I used to treat sausage as one of the simplest things on the grill: pick up a package from the butcher or grocery store, fire up the charcoal, cook the links to temperature, and serve.
Then I spent time cooking and eating barbecue in Texas. I came home happy with my ribs and brisket, but with homework on several other things those barbecue joints do exceptionally well. Smoked sausage was near the top of that list.
The biggest lesson? A juicy filling and a snappy casing need more attention than a single trip across a hot grill. The missing piece in my process was an ice bath followed by a refrigerated drying period, with a second smoke before serving. Nothing particularly complicated. Just simple things done well.
Key Takeaways
- Separate smoking, chilling, drying, and finishing to improve casing texture without sacrificing a juicy filling.
- Pat sausages dry after the ice bath, then refrigerate them on a rack before finishing.
- Space links apart so smoke reaches the casings evenly and avoids pale contact patches.
- Match cooking and reheating temperatures to your sausage rather than treating 155°F as universally safe.
Table of Contents
- Why Cooking Sausage Straight Through Can Miss the Mark
- The Texas BBQ Approach: Smoke, Chill, Dry, and Finish
- Step 1: Set Up for Even Smoke and Gentle Heat
- Step 2: Give the Sausages an Ice Bath
- Step 3: Dry the Casings and Refrigerate
- Step 4: Finish With a Hotter Smoke
- The Result: Better Snap Without Sacrificing the Juicy Center
Why Cooking Sausage Straight Through Can Miss the Mark
Internal temperature matters, but it does not tell the whole story about texture. You can reach the appropriate temperature inside a sausage and still end up with a disappointing casing.
My old approach tended to produce one of two results:
- Shriveled links with a soft exterior: The sausage stayed on the cooker too long, losing the texture I wanted.
- Split casings and escaping juices: Aggressive heat sent the delicious contents onto the grill instead of keeping them inside the sausage.
That second result is especially frustrating. The sizzling and flare-ups might look exciting, but those juices belong in your lunch.
The goal is the best of both worlds: a properly cooked, smoky, juicy interior and a casing with that fantastic snap when you bite through it. To get there, I started treating smoking, chilling, drying, and finishing as separate jobs.
The Texas BBQ Approach: Smoke, Chill, Dry, and Finish
I had assumed Texas barbecue restaurants smoked their sausages in batches mainly for logistics. There is a texture benefit hiding in that workflow, too.
At Interstellar, a Michelin-starred barbecue restaurant I visited, they were preparing a week's worth of sausages on a huge offset smoker, then bringing portions back up to serving temperature as needed. That helped change how I thought about the process at home.
For a backyard cook, the workflow looks like this:
- Smoke gently to build flavor without blasting the links with high heat.
- Chill in an ice bath between cooking stages.
- Dry thoroughly and refrigerate so the casing is dry before it returns to the smoker.
- Finish with a hotter smoke before slicing and serving.
The bad news is that this is not a last-minute sausage dinner. The good news is that the extra work is simple, and you can separate the preparation from the final cook.
A Necessary Temperature and Food Safety Clarification
I described the first stage as “cold smoking,” using the barbecue shorthand I picked up in Texas. Technically, it was not cold smoking. True cold smoking, such as smoking cheese, happens below about 90°F. My first smoking stage ran at 160°F to 180°F.
In this cook, I pulled the sausages from the first stage at about 155°F internal and used the same target during the final smoke. Those numbers describe my cook, but 155°F is not a universal safe endpoint for grocery-store sausage. Product type and any validated time-at-temperature process matter.
For fresh raw sausage at home, follow the package instructions and USDA sausage safety guidance: ground beef and pork sausage should reach 160°F, and poultry sausage should reach 165°F. USDA also recommends maintaining a smoker temperature of 225°F to 300°F when smoking raw meat and poultry. Do not copy the lower-temperature stage for an unknown raw product without an appropriate validated process.
The useful lesson is the staged approach to casing texture, not treating one temperature as suitable for every sausage.
Step 1: Set Up for Even Smoke and Gentle Heat
I used the Masterbuilt Gravity XT for this batch, but the basic workflow is not exclusive to a gravity-fed smoker. What matters is controlled heat, smoke, and enough separation from the heat source to avoid scorching the links.
My Gravity XT Fire Setup
I started with a small amount of leftover charcoal, less than roughly six inches deep in the hopper. A fire starter underneath, lit with a torch, got that small coal bed going. Once it was hot, I added small wood splits, including two pieces of white oak.
That approach required adding wood once or twice during roughly the first 30 to 40 minutes. For less hands-on tending, the alternative I described was layering wood splits with charcoal so the controller could manage the fire.
Those are details of my low-temperature setup, rather than a requirement for the technique. Use a fire and cooking temperature appropriate for the sausage you are preparing.
Rack Position and Spacing Matter
On the Gravity XT, I chose the third rack level. That put the sausages farther from the incoming heat and gave them an even convection environment for the initial smoke.
Leave space between every link. Where sausages touch, smoke cannot reach the casing evenly. You can end up with pale contact patches, or what I call smoke bald spots.
Close the lid and let the cooker work. In my batch, the first stage took about an hour and a half. I began checking around the one-hour mark rather than assuming the clock would tell me when they were ready.
I used an instant-read thermometer and checked sample links in different areas of the grill. Whenever possible, I returned the probe to the same entry point instead of making fresh holes all over the batch. With jalapeño cheddar sausage, that also helps avoid creating extra escape routes for melted cheese.
Step 2: Give the Sausages an Ice Bath
This was the big missing step in my old sausage routine.
After the initial smoke, I transferred the links to a bowl of ice water for about 15 minutes. Instead of going straight from the smoker to the cutting board, they got a deliberate cooling stage before drying and finishing.
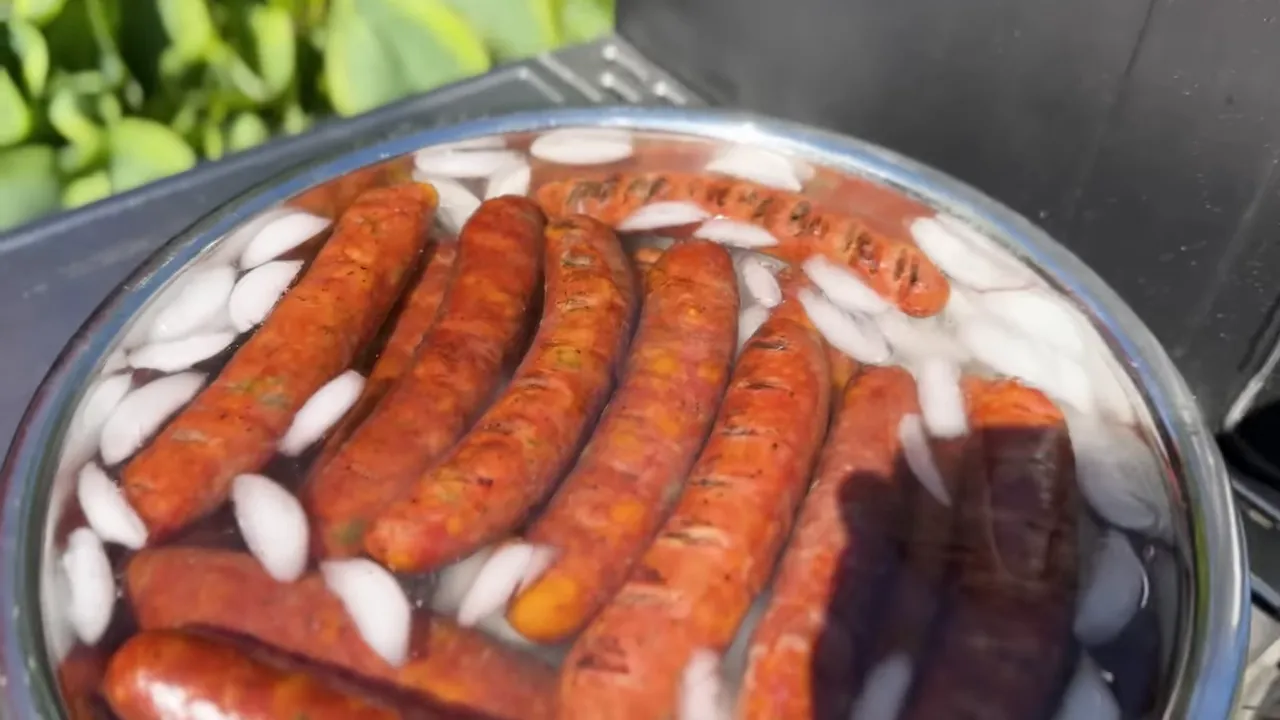
Have the ice bath ready before you need it. It is a simple step, but it is part of the method, not an optional pause while you organize everything else.
Step 3: Dry the Casings and Refrigerate
Once the sausages came out of the ice bath, I patted them dry and arranged them on a wire rack over a tray. Then they went into the refrigerator for 30 minutes.
Do not put wet sausages straight back into the smoker. Take the time to remove surface water with paper towels. The rack then allows refrigerator air to circulate around the links and helps dry the casing further.
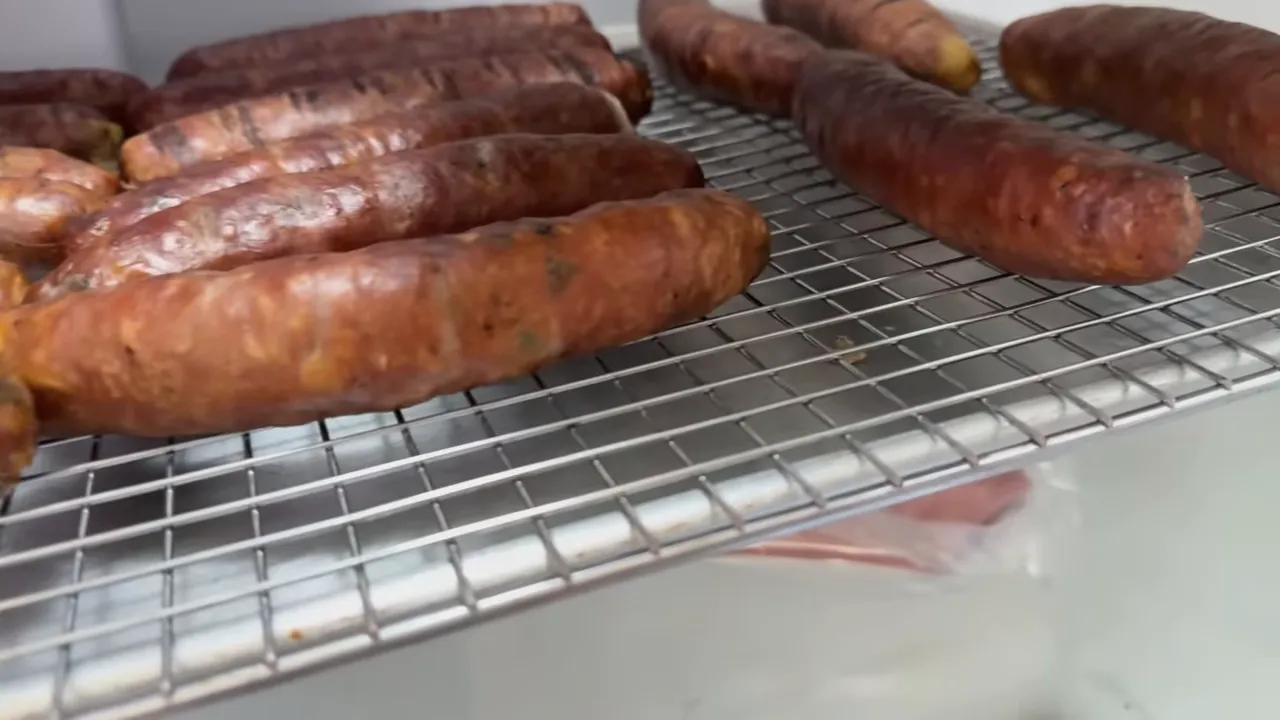
After half an hour, mine were cool to the touch with dry casings. Even that short refrigerated rest gave me excellent results.
This is also where same-day and make-ahead cooking split. For a same-day meal, I moved on after that 30-minute drying period. For an overnight preparation, the refrigerated rest gives the casings more drying time before the final smoke.
Make-ahead cooking still requires proper cooling, cold storage, and reheating. The restaurant's batch schedule is not a home storage rule. USDA guidance calls for reheating cooked leftovers to 165°F, so do not use my 155°F serving target as a general leftover-reheating instruction.
Step 4: Finish With a Hotter Smoke
For the final stage, I increased the Gravity XT to 225°F. The finishing range I described was 225°F to 250°F.
The dried links went back onto the smoker, and this stage took another hour and a half in my cook. Again, temperature checks determined the endpoint, not the timer alone. Apply the safe cooking or reheating target appropriate to your product.
This is a controlled finishing smoke, not an invitation to crank the grill up and burst the casings. You have already put effort into keeping the filling juicy and preparing the outside for a better bite.
How Much Time Should You Allow?
My same-day batch fit into an approximately four-hour window:
- Initial smoke: About 90 minutes in this cook.
- Ice bath: About 15 minutes.
- Refrigerated drying: About 30 minutes.
- Final smoke: About 90 minutes in this cook.
- Handling and buffer: Allow a little extra time for transfers and temperature checks.
That is a planning example, not a guaranteed schedule. A different sausage, starting temperature, or safe cooking process will change the timing.
The Result: Better Snap Without Sacrificing the Juicy Center
My test batch was grocery-store jalapeño cheddar sausage. The first snap test sent hot cheese flying, which was a pretty convincing reminder not to break a freshly cooked cheese-filled sausage near anything you want to keep clean.
I suspected the cheese was not a high-temperature variety. That is worth asking your butcher about if you want cheese-filled links that hold their filling better during cooking.
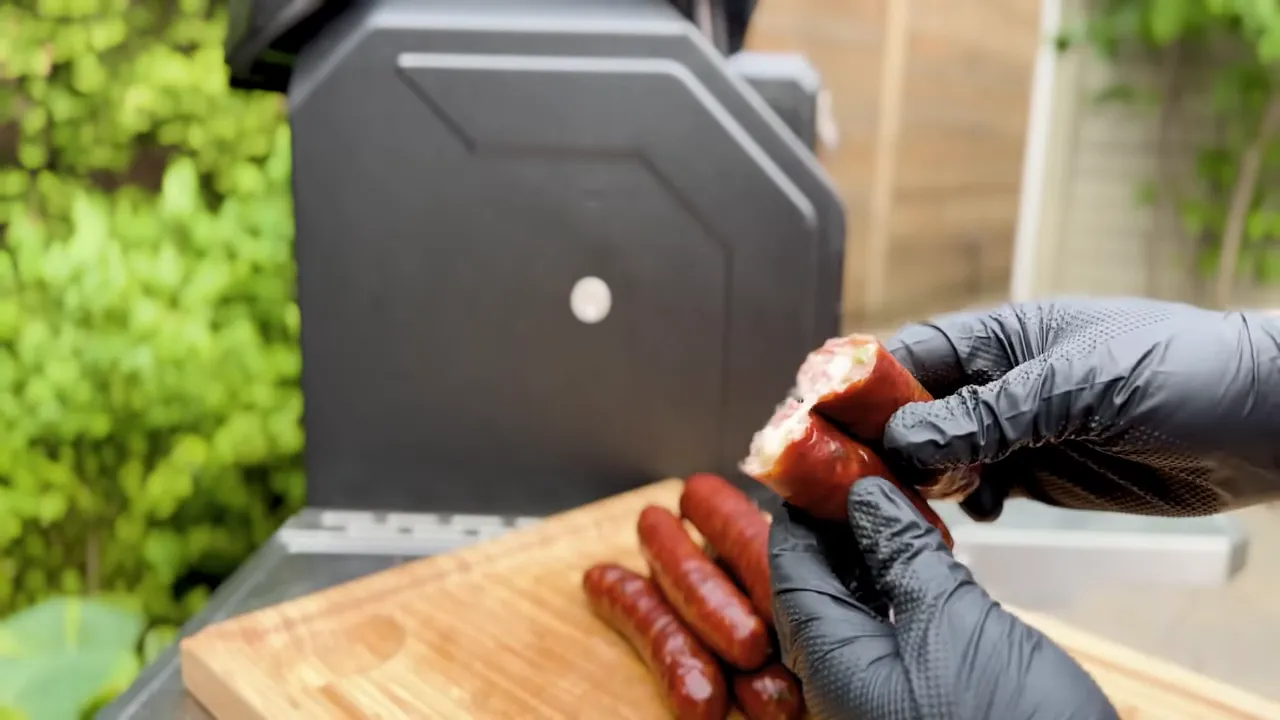
Despite the cheese lava, the casing sliced beautifully, the bite had the texture I had been missing, and the inside stayed incredibly juicy. That combination is the whole point.
Texas barbecue keeps teaching me the same lesson: simple things done well can make a world of difference. Give the casing its own attention, rather than thinking only about the filling. Smoke, chill, dry, and finish, with safe handling throughout, and an ordinary sausage cook can become something genuinely special.
And whether you are cooking for Oktoberfest, Grilltoberfest, or just friends and family, do not be afraid to fire it up.
|


