The best thing about a Masterbuilt Gravity Series smoker has always been the food. Team Charcoal gets something close to pellet grill convenience without giving up that charcoal flavor. The question with my older Gravity Series 1050 was not whether it could make fantastic barbecue. It was whether it would still be doing it after a few more birthdays.
Mine had just crossed its fourth birthday, and the answer was looking pretty grim. The switches, controller, fan, and hopper were all on their last legs. A grease fire had finished off the last working components. This was no longer a case of replacing one part and calling it good.
So I tackled the restoration in two halves: rebuild the physical parts with LSS Mods, then give the grill a new brain using a ChefsTemp S1 digital gauge, Breezo fan, and ProTemp 2 Plus wireless thermometer system.
The result was excellent for smoking, with connected temperature control and battery-powered operation. High-temperature searing came with one important asterisk.
Table of Contents
- Key Takeaways
- First, Fix the Grill Before Replacing the Controller
- Why I Chose ChefsTemp Instead of a FireBoard Controller
- The Three Components Behind the Conversion
- How I Adapted the Breezo Fan to the Gravity Series 1050
- Replacing the Analog Thermometer With the S1
- The Cooking Test: Excellent Smoking Control
- The Asterisk: It Did Not Restore 600°F to 700°F Searing
- What the ChefsTemp Conversion Actually Cost
- Is Restoring an Older Gravity Series Worth It?
Key Takeaways
- Repair deteriorated firebox and hopper components before spending money on replacement electronics.
- The ChefsTemp retrofit combines an S1 gauge, Breezo fan, and ProTemp 2 Plus thermometer system.
- This custom 1050 conversion delivered stable smoking performance but did not restore maximum searing temperatures.
- Promotional pricing put the electronics around $200 US, excluding the physical rebuild and fabrication costs.
First, Fix the Grill Before Replacing the Controller
A new controller cannot repair a burned-through firebox. That became painfully obvious once I started pulling my 1050 apart.
Several years earlier, Luke at LSS Mods had offered to send over upgrades to protect the parts that were beginning to fail. I figured I was good for the moment. Well, apparently “good for the moment” eventually turns into a piece of firebox metal that is mostly missing.
What should have been a solid barrier had deteriorated enough to leave insulation exposed directly to the fire. I could not identify that material or verify its suitability for direct flame exposure, but I certainly did not want to keep cooking with it in that condition.
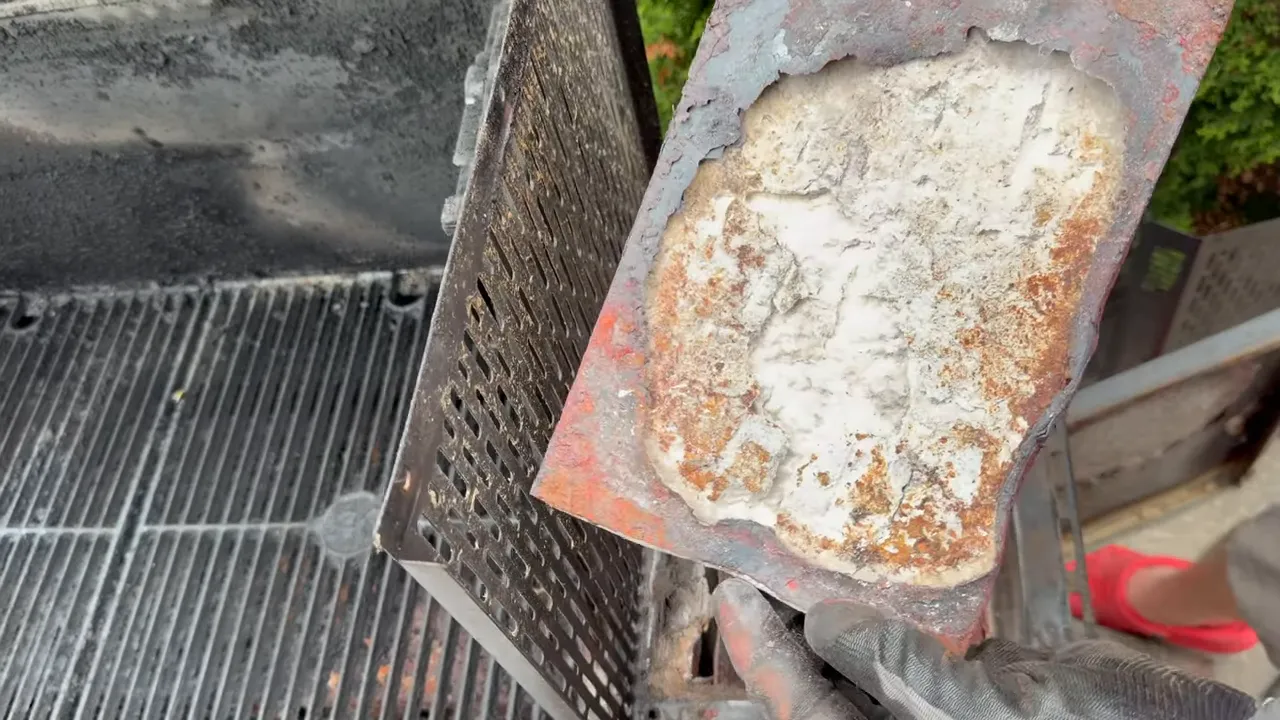
The LSS Mods rebuild components I installed included:
- A Super Sear manifold.
- A sliding top cover for the manifold in smoking mode.
- A stainless steel grate.
- Hopper protection.
- Replacement protection for the deteriorated firebox area.
These parts brought the cooking hardware back into shape and addressed the exposed-insulation problem that concerned me most.
The installation was also a reminder that the condition of your starting point matters. I had seen installations taking around 30 minutes. Mine took about three hours. Waiting until everything was badly deteriorated made this a much bigger project.
By the end, the 1050 looked like a grill again. Unfortunately, it still did not work. Time for the electronics.
Why I Chose ChefsTemp Instead of a FireBoard Controller
The established aftermarket route is something like a FireBoard Drive, including a replacement unit that mounts in place of the original controller. That is a straightforward answer when the controller is your main problem.
My problem was the whole laundry list. I also needed a fan, wanted wireless food probes, and wanted the grill to keep running without an outlet supplying power.
I had a couple of personal reasons to try something different, too. In previous testing, I had run into problems with a FireBoard wireless probe, and my Spark had broken in half. That does not mean every FireBoard owner will have the same experience. It does explain why I was willing to take the more interesting path.
The FireBoard DC bundle I was comparing started at $329 US. My goal was to spend less while getting more of the components this particular grill needed.
What I wanted the replacement system to do
- Replace the failing fan, not just the controller.
- Control cooking temperature through a modern connected system.
- Track food temperature wirelessly.
- Operate from battery power so an electrical outage would not immediately stop the blower.
- Show cooking information on the grill, thermometer stand, and phone.
I had already used this general approach to modernize a Weber Smokey Mountain and turn traditional kamados into connected cookers. The new part was adapting it to my Masterbuilt Gravity Series 1050.
This was a custom retrofit, not an officially supported, bolt-in ChefsTemp kit for the 1050. That distinction matters if you are deciding between an established replacement controller and a project that involves making an adapter.
The Three Components Behind the Conversion
The system works by splitting the jobs among three devices rather than putting everything in the original controller location.
S1 digital gauge: the new control center
The S1 replaces the factory analog lid thermometer, or what I affectionately call the temperature suggestometer. It measures the cooking temperature, provides a large display, and communicates wirelessly with the Breezo fan for temperature control.
I selected the 3.5-inch stem after measuring the available space inside my grill. That measurement proved important because I wanted to retain all three rack levels without the probe hitting anything when the lid closed.
Breezo fan: replacement airflow
The Breezo takes over the blower's job, supplying air to the fire under the S1's control. It pairs wirelessly with the gauge, but it still needs a physical power connection.
ChefsTemp supplies adapter options for certain grills and kamados. None was a ready-made fit for this installation, so I made a mounting plate for the original fan opening.
ProTemp 2 Plus: food monitoring and fan power
The ProTemp 2 Plus wireless thermometer adds food-temperature monitoring to the system. Just as importantly for this project, its stand can provide external power to the Breezo.
That gave me a way to run the fan without keeping the grill plugged into household power. My goal was an overnight smoking setup that would not lose its blower simply because the electricity went out. Actual runtime still needs to suit the cook you are planning; this rebuild was not a documented full-night battery endurance test.
How I Adapted the Breezo Fan to the Gravity Series 1050
The stock fan opening measured approximately 5 by 5 inches. I traced the opening and original mounting-hole locations so I could reuse the existing mounting points.
The essential change was to cover that larger opening with a metal plate containing the smaller round port needed by the Breezo.
- Measure the existing fan opening. I used my grill's dimensions rather than assuming a universal fit.
- Transfer the mounting pattern to sheet metal. The original hole locations gave me a starting point for securing the adapter.
- Cut the Breezo port. I used a hole saw to make a 1.25-inch opening, the standard round-hole option listed by ChefsTemp for this approach.
- Cut out and fasten the plate. This closed off the unused area around the new fan inlet.
- Seal the plate perimeter. I used HVAC foil tape around the adapter.
- Install the fan. The Breezo's retaining fingers compressed into the opening and held it snugly.
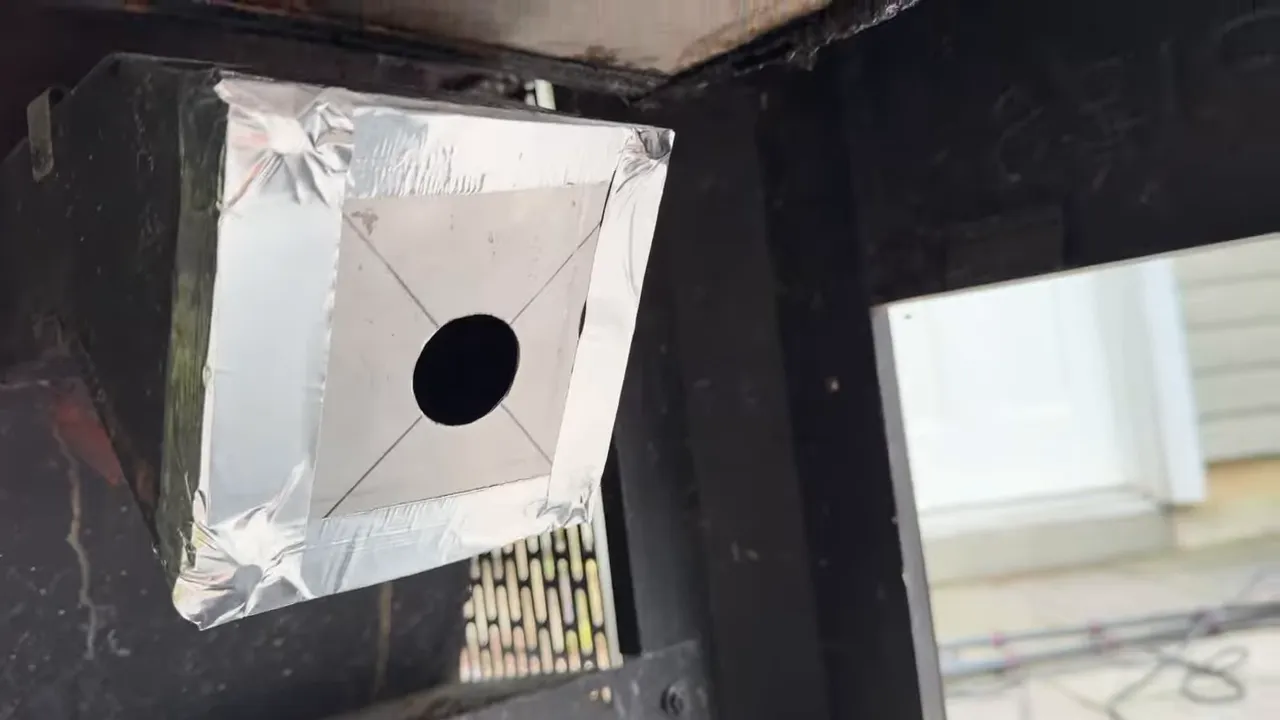
I had purchased RTV silicone as another sealing option but used the tape for this initial installation. That is something I would inspect over time rather than treat as a proven permanent seal.
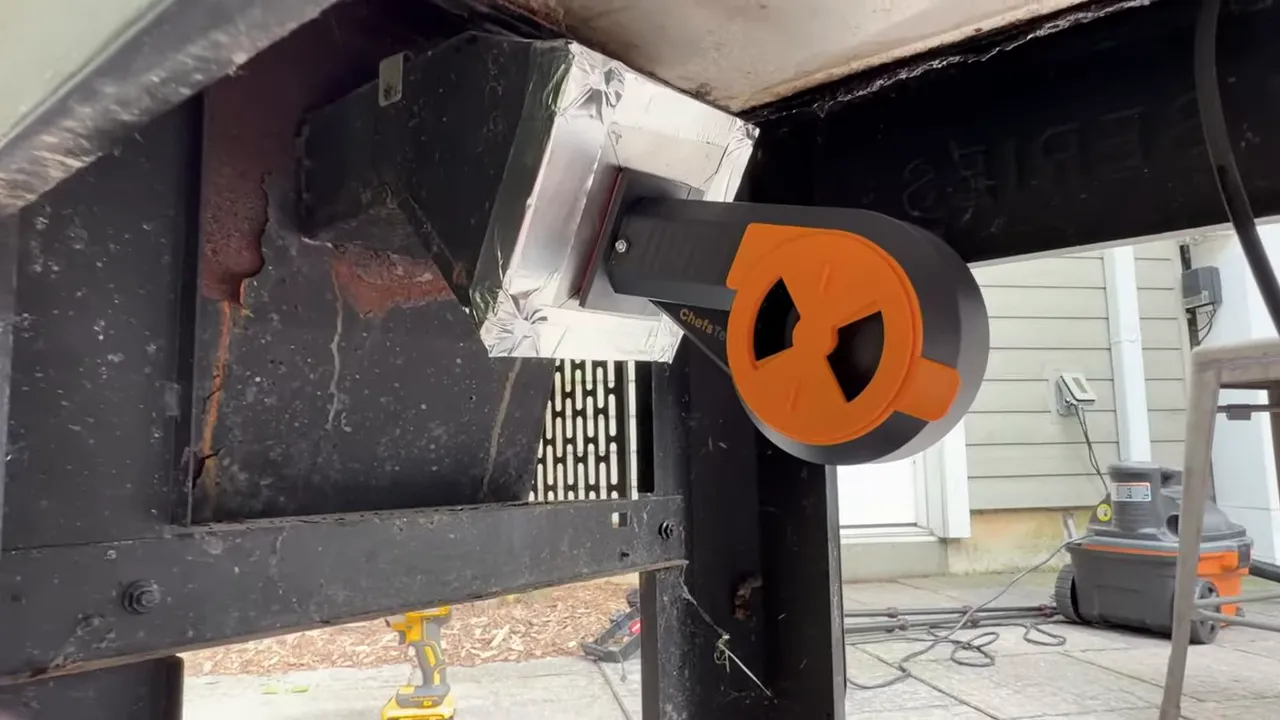
This is the fabrication portion of the conversion, not a plug-and-play controller swap. Before modifying your own cooker, consult the Masterbuilt support resources for your model's operating and safety information. My successful test does not establish factory approval or verify that the retrofit reproduces the original switch and safety-control behavior.
Replacing the Analog Thermometer With the S1
With the blower installed, I removed the original lid thermometer. Its mounting arrangement left an additional lower opening that needed covering.
I folded a small piece of metal left over from cutting the fan adapter and used it with foil tape to cover that unused opening. Then I fitted the S1 through the main thermometer opening and secured it with its washer and mounting hardware.
Before lighting anything, I checked three things:
- The S1 was displaying a temperature reading.
- The Breezo could turn on and off while powered by the ProTemp 2 Plus stand.
- The lid closed without the 3.5-inch stem touching any of the three installed rack levels.
Everything passed. Naturally, I had a ribeye ready for just such an occasion.
The Cooking Test: Excellent Smoking Control
After adding charcoal and lighting a starter, I brought the grill up to temperature and put the system to work.
It worked. And not in the “well, technically it runs” sense. The rebuilt grill gave me stable smoking performance, the Breezo responded to the S1, and the ProTemp 2 Plus stand supplied the fan's power.
The connected setup also let me monitor the cook from different places. I could get information on my phone, at the thermometer stand, or from the large lid-mounted gauge. With Wi-Fi connectivity, I could monitor the meat and adjust cooking parameters through the system.
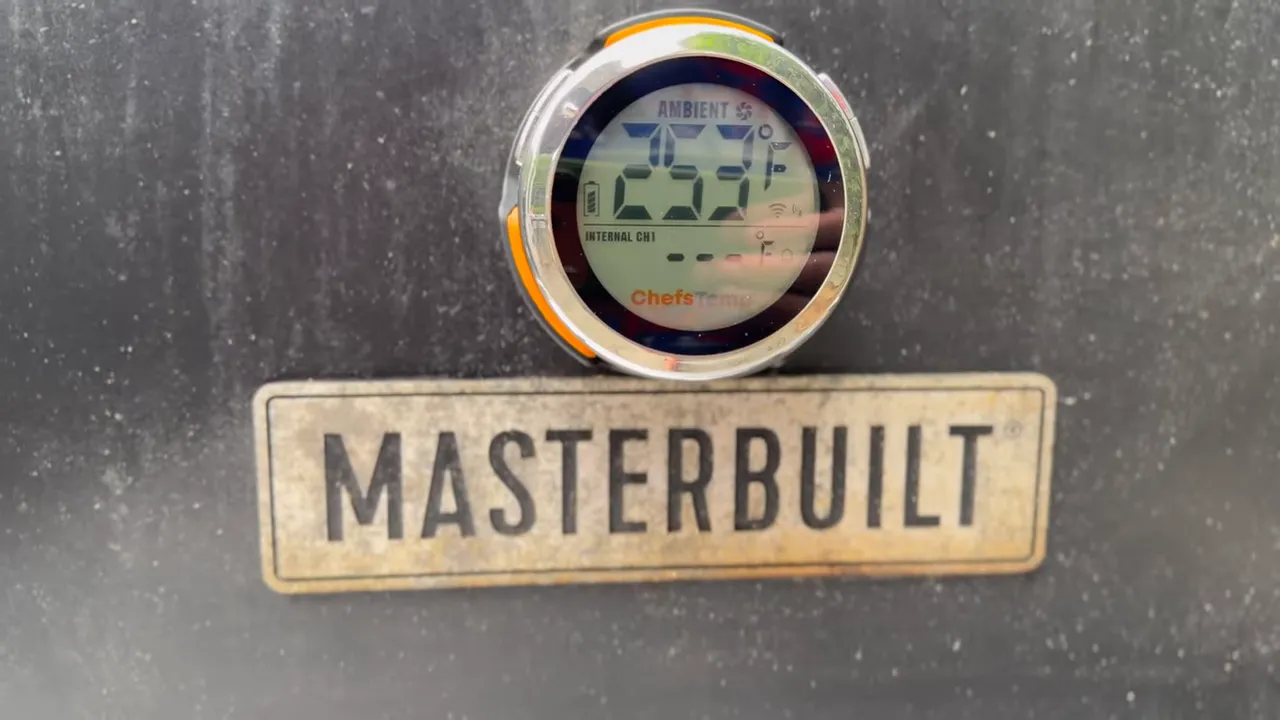
For low-and-slow barbecue, this was the result I had hoped for: the charcoal cooker I already liked, brought back to life with a more useful set of electronics.
The Asterisk: It Did Not Restore 600°F to 700°F Searing
Smoking performance was excellent. Maximum temperature was less conclusive.
Before the final failure, this particular 1050 was already topping out around 470°F to 475°F, rather than reaching the 600°F to 700°F range. After rebuilding the firebox and installing the ChefsTemp system, I still could not get it into that higher range.
There are two possibilities I have not resolved:
- The Breezo may not move enough air for this grill at its highest heat demand.
- Remaining rust holes or other leaks in my aging cooker may still be limiting performance.
I cannot pin that limitation on the Breezo alone, because the original fan had already been unable to get this grill much hotter before the conversion.
Fortunately, the LSS Super Sear manifold helped make up for it. Removing its top cover let me sear over the concentrated heat coming into the cooking chamber near the hopper. I still got the kind of steak crust I would normally expect from my Gravity Series.
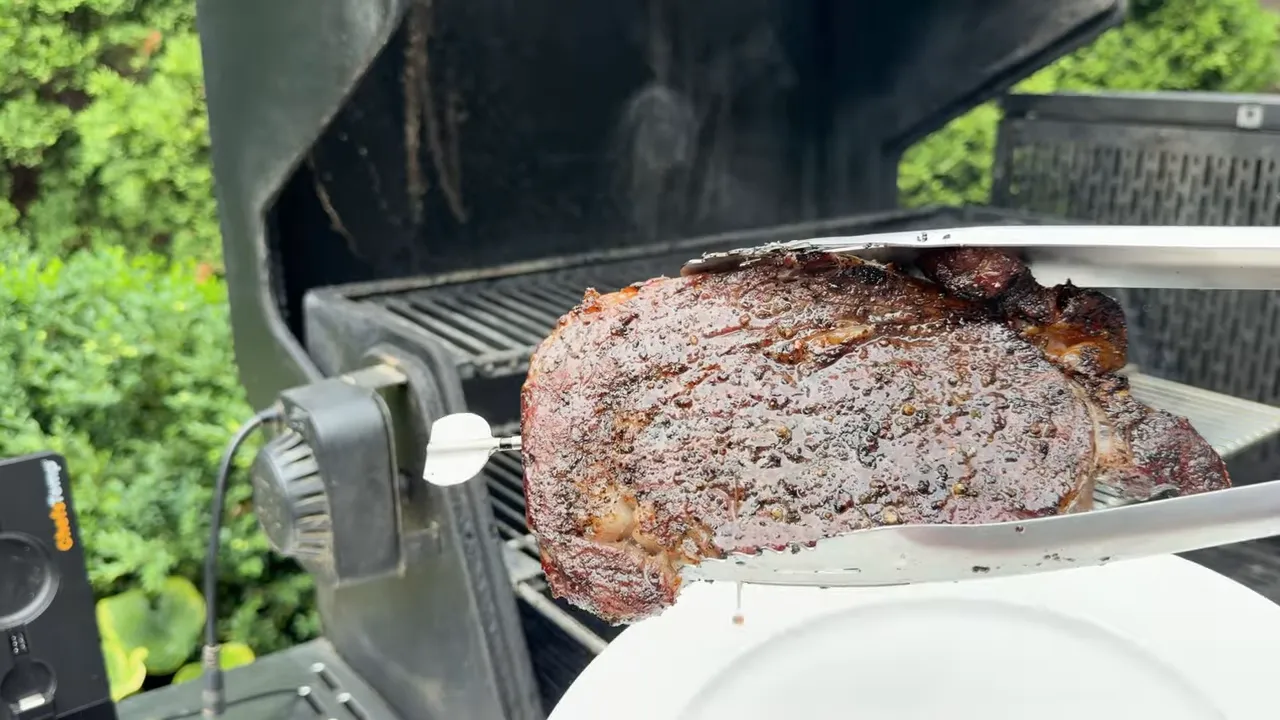
I have also experimented separately with a grate over an open hopper for live-fire searing. That is a different modification, not part of the controller conversion or necessary to get the result described here.
My verdict on heat is simple: proven useful for smoking in this test, but not proven as a way to restore factory-level maximum searing temperatures.
What the ChefsTemp Conversion Actually Cost
At the time of this build, a 20% discount combined with an additional promotion brought the ChefsTemp electronics package to approximately $200 US. That covered the fan, wireless food-temperature system, S1 controller, and digital gauge.
The FireBoard route I compared started at $329 US and did not include the replacement fan, wireless food probe, or separate lid-mounted digital gauge I wanted for this project.
On those quoted totals, that is about $129 less for the ChefsTemp electronics while addressing more of my replacement needs. The approximately $200 figure should not be treated as a complete restoration budget including the LSS hardware, fabrication supplies, and labor.
I discussed potential savings of up to 70% while planning the build, depending on promotions and the comparison being made. The more useful takeaway is the actual package comparison above. Discounts change, so check current prices and exactly what each bundle includes.
Luke at LSS Mods supplied the rebuild components, and Masterbuilt provided free product or sponsorship for this project. Product links may be affiliate links.
|
Is Restoring an Older Gravity Series Worth It?
For my 1050, this was a two-thumbs-up result. The LSS parts addressed the physical deterioration, and the ChefsTemp setup replaced the control and blower functions while adding wireless meat monitoring and operation without an outlet.
But the decision starts with the cooker, not the controller. If yours needs only a controller and you want an established mounting solution, the conventional replacement route may make more sense. If it also needs a fan and you want connected food monitoring, this custom approach is worth considering.
Be honest about the amount of repair required, your willingness to fabricate an adapter, and your expectations for high-temperature cooking. My installation was on a 1050, so it is not confirmation of identical fit or performance on a Gravity Series 560, 800, or 900.
I did not turn my old grill into a brand-new one. I did bring it back into useful smoking service with a feature set I am genuinely excited about, without buying another whole cooker. That is a pretty good reason to fire it up.


