A Kamado Joe Classic II that costs more than $2,500 new, sitting on Facebook Marketplace for $200. That sounds like a smoking deal. There was just one small catch: some of the expensive bits had been destroyed.
I bought it anyway. Then I made the gamble considerably more interesting by telling my wife I could repair it and cook our family’s dinner on it that same night.
The plan looked simple enough. Buy the damaged grill for $200, fit a replacement dome I had found for $175, and save more than $2,000. If it worked, we would have a premium ceramic grill for a fraction of the new price. If it didn’t, I would have a pile of expensive broken ceramic and the much less enjoyable job of admitting I was wrong.
What followed was a useful lesson in buying a used kamado: the obvious damage is only the beginning of the inspection.
Key Takeaways
- A used kamado is only a bargain after accounting for repairs, missing parts, and lost warranty protection.
- Inspect the ceramic body, firebox, bands, hinge, and accessories before agreeing on a price.
- Verify replacement-dome compatibility instead of relying on the seller’s listing description.
- Secure spring-loaded hinges correctly and dry damp ceramic gradually before bringing the grill to cooking temperature.
Table of Contents
- The Deal Only Works If the Repair Budget Works
- Six Problems Hiding Behind One Broken Dome
- Inspecting and Reinstalling the Multi-Piece Firebox
- Straightening the Handle and Shelf Brackets
- The Air Lift Hinge: A Cheap Missing Part With Serious Consequences
- Could a Series I Dome Work on a Classic II?
- The Maintenance Problem That Could Have Broken It Anyway
- Drying the Ceramic Before Bringing It Up to Cooking Temperature
- The Result: Ready for Chicken Thighs With 10 Minutes to Spare
- What to Check Before Buying a Used Kamado
- Was Buying the Broken Kamado Joe a Mistake?
The Deal Only Works If the Repair Budget Works
I live just outside Toronto, where the size of the local market means there are plenty of used Kamado Joe, Big Green Egg, and other ceramic grills available. Some are genuine bargains. Others are priced so close to new that the savings barely justify buying secondhand.
That distinction matters because a used grill does not come with the same lifetime warranty protection as a grill bought new by its original purchaser. A low asking price needs to leave room for replacement parts, missing accessories, and problems you haven’t discovered yet.
This Classic II was listed for $350, and I negotiated it down to $200. The dome was clearly beyond repair, but I had found several replacement Classic domes available locally, starting at $175.
- Damaged grill: $200.
- Replacement dome, initially: $175.
- Planned purchase total: $375.
- New-grill comparison: more than $2,500 before tax.
Those are Canadian-dollar figures from my local purchase, not a promise of what the same parts will cost elsewhere.
On paper, there was plenty of room for this to make sense. Unfortunately, I had rushed the inspection while collecting the grill. Once I got it home and started taking it apart, the repair list grew.
Six Problems Hiding Behind One Broken Dome
The grill had suffered a fall, and the damage wasn’t confined to the lid. Before I could think about charcoal or chicken thighs, I needed to deal with six separate issues:
- Damaged firebox sections. Removing the multi-piece firebox exposed damage to at least one ceramic panel.
- A bent handle. I needed to transfer that handle to the replacement dome.
- Bent side-shelf brackets. More metalwork needed straightening before the shelves could function properly.
- A missing Air Lift hinge disengagement tool. This small part was essential to working safely on the spring-loaded hinge.
- Ice and moisture inside the grill. Heating wet ceramic too aggressively could create even more damage.
- The wrong replacement dome. The supposedly Series II dome was actually a Series I part.
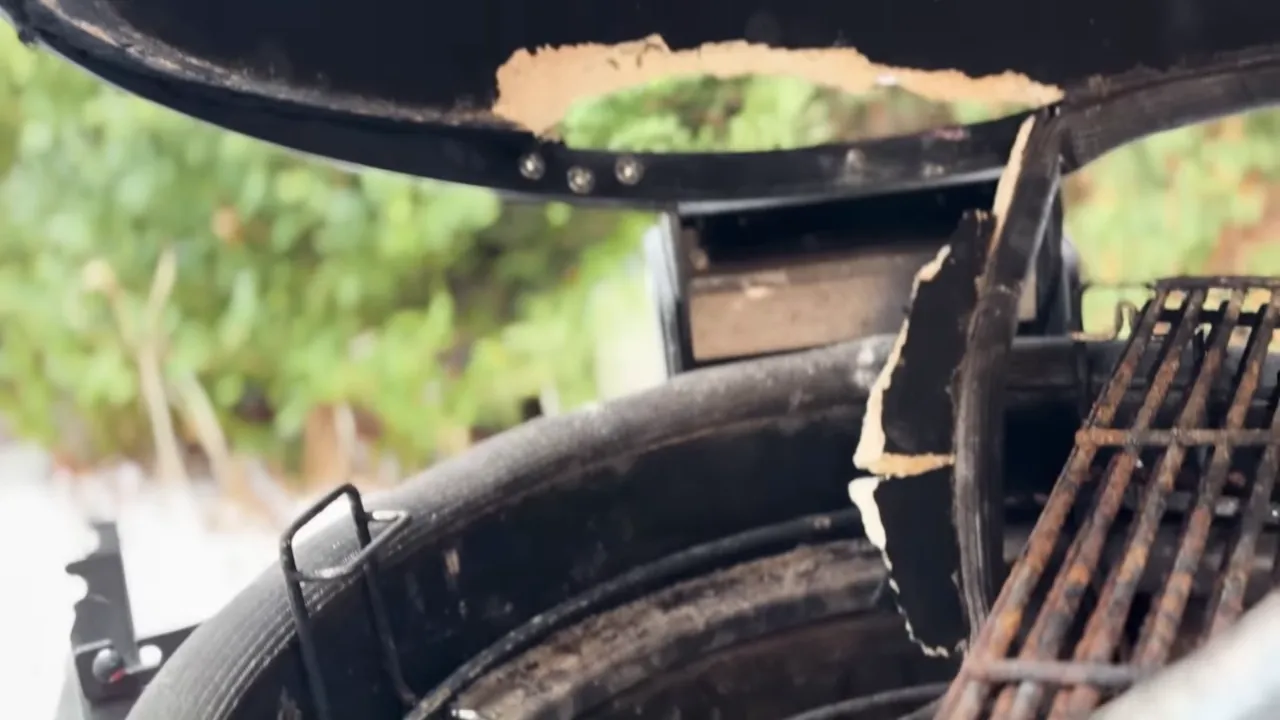
The last discovery was the one that could stop the entire project. The Series I dome was not designed for the Series II Air Lift hinge. Unless I could make that combination work, I didn’t have the one component the repair absolutely depended on.
Inspecting and Reinstalling the Multi-Piece Firebox
The firebox looked rough, but after a closer inspection, I judged the damaged sections structurally sound enough to reuse for this repair. That was a judgment about these particular parts, not a blanket rule that damaged ceramic is always fine.
One advantage of the newer Kamado Joe multi-piece firebox is that you can replace individual wall sections rather than buying an entire firebox. I was allowing roughly $25 per section in my discussion of potential repairs, although current prices and local currency need checking before you build a budget around them.
If a section deteriorated after being exposed to heat, I could replace that section later. That is a much more manageable possibility than discovering that the entire internal assembly needs replacing.
A useful trick when assembling the firebox alone
Getting all the curved panels to stay in position while fitting the retaining ring can be a bit of a juggling act. Small balls of toilet paper or paper towel placed behind the panels temporarily hold them away from the outer grill wall, making it easier to fit the metal ring over the top.
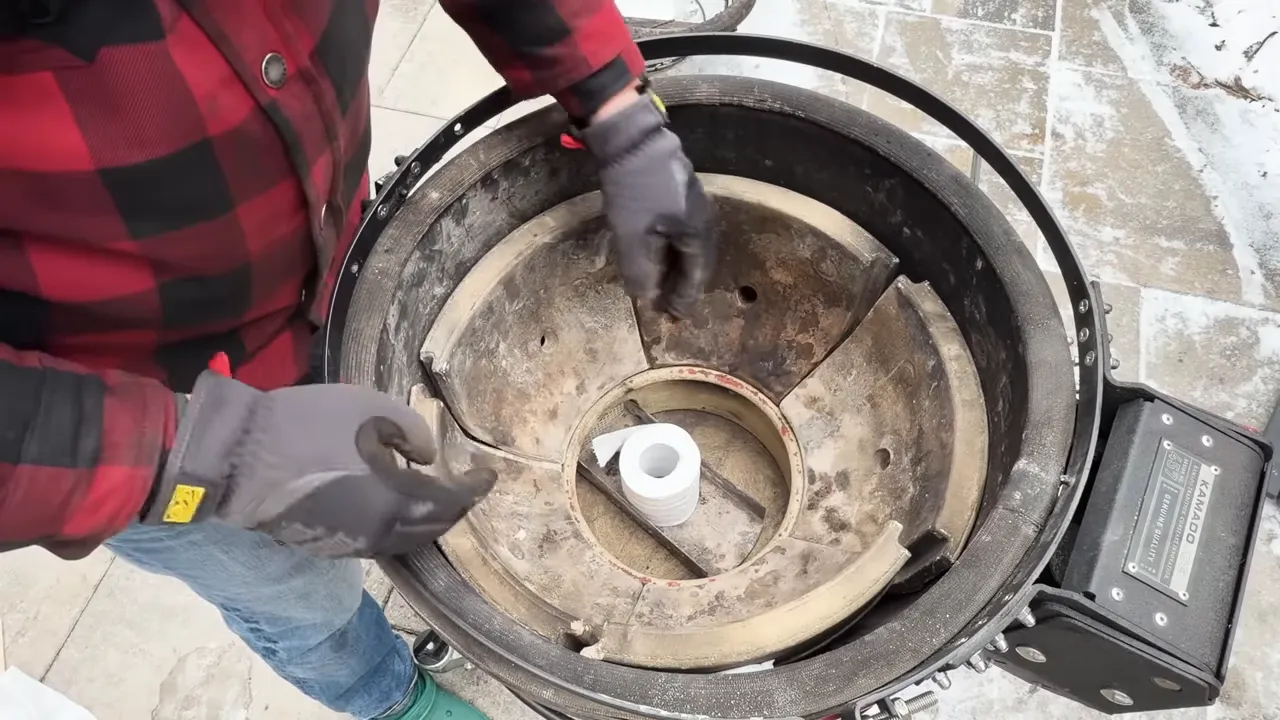
I inspected the ring as well. It wasn’t perfectly pristine, but I had seen more distorted examples, and this one appeared capable of seating properly and holding the panels in position.
There is an important second half to the paper-spacer trick: retrieve as much of that paper as possible once the ring is seated. Leaving wads behind the firebox can restrict airflow. I used a piece of plastic hanger to fish them out of the narrow gaps.
Straightening the Handle and Shelf Brackets
The bent handle and side-shelf brackets were not precision parts, so I approached those repairs the old-fashioned way: a vise, a mallet, and some careful persuasion.
The goal wasn’t showroom perfection. It was getting the parts back into a usable shape without snapping them. Every broken bracket would mean another replacement order and another bite out of the savings.
That distinction stayed important throughout the restoration. I was trying to build a functional cooking tool at a bargain price, not erase every sign of its previous life. The repaired handle and shelves worked, even if the fit and finish would never pass for brand new.
The Air Lift Hinge: A Cheap Missing Part With Serious Consequences
The seller couldn’t find the included dome disengagement tool. A replacement was available for as little as $12.99, so cost wasn’t the problem. A delivery estimate of one to two weeks was.
That would have ended the same-day repair before dinner even became a possibility.
The disengagement tool may look simple, but it performs a critical job. The Air Lift hinge contains a spring under substantial tension. Removing or disturbing the hinge and band assembly without properly securing it can be dangerous.
I went to Home Depot and bought hardware to make a temporary substitute based on a disengagement tool I had used previously. During this repair, I reduced the spring tension at the rear, used the broken dome and clamps to help bring the damaged hinge back toward its level position, and secured the assembly with my makeshift tool and nut.
That describes what I did on this damaged grill, not a universal hinge-service procedure. For your own repair, use the correct manufacturer tool and the instructions for your exact model. A dinner deadline is not a good reason to guess how a loaded hinge should be restrained.
Could a Series I Dome Work on a Classic II?
With the other repairs moving forward, the replacement dome became the make-or-break moment.
Although it had been advertised as a Series II replacement, opening the box revealed a Series I dome. Comparing the two, their overall geometry appeared almost identical to me. The crucial difference for this repair was the locating holes used by the Series II Air Lift hinge and band assembly.
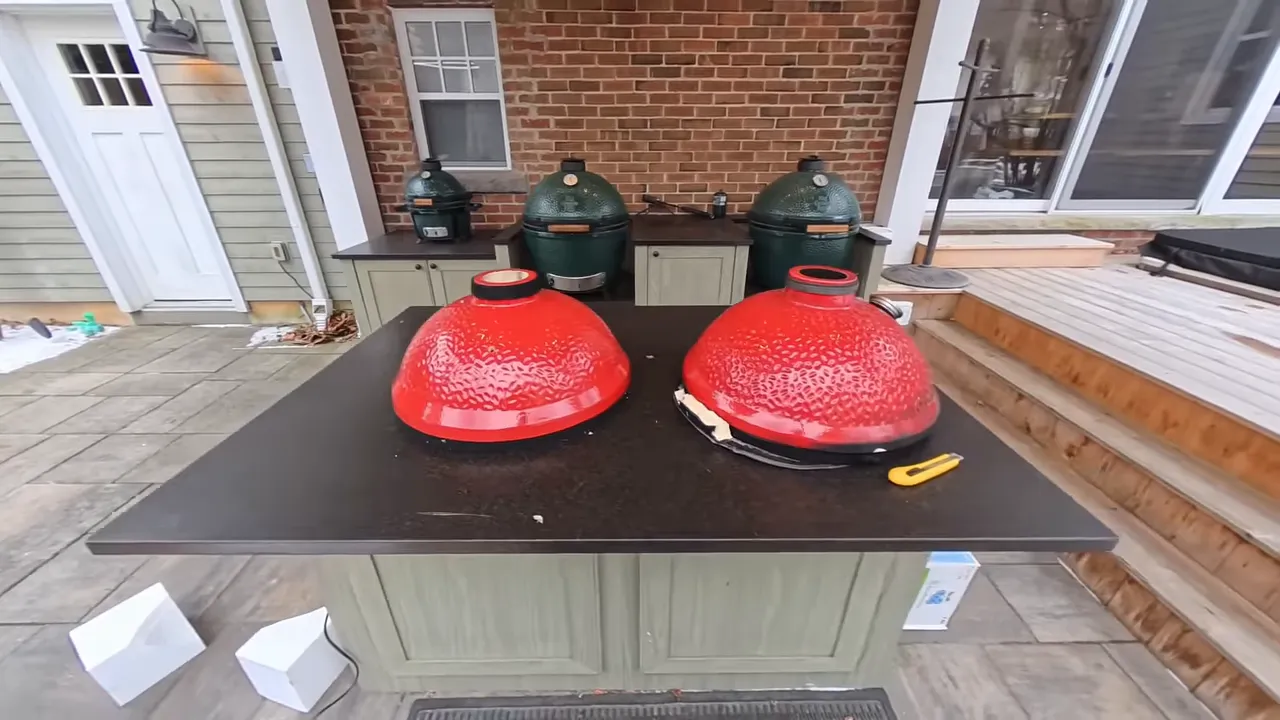
A surviving piece from the rear of the original dome showed the holes that accepted the locating tabs. The replacement lacked those holes. My proposed solution was to add two small holes in the correct positions.
Simple to describe? Absolutely. Low risk? Not even slightly.
Misplacing a hole or damaging the ceramic could ruin the brand-new dome and leave me back where I started, only $175 poorer.
I used the original ceramic fragment as a reference and a piece of string to help establish the dome’s centerline before marking the locations. The point was to align the new dome with the existing assembly rather than assume that two similar-looking lids were automatically interchangeable.
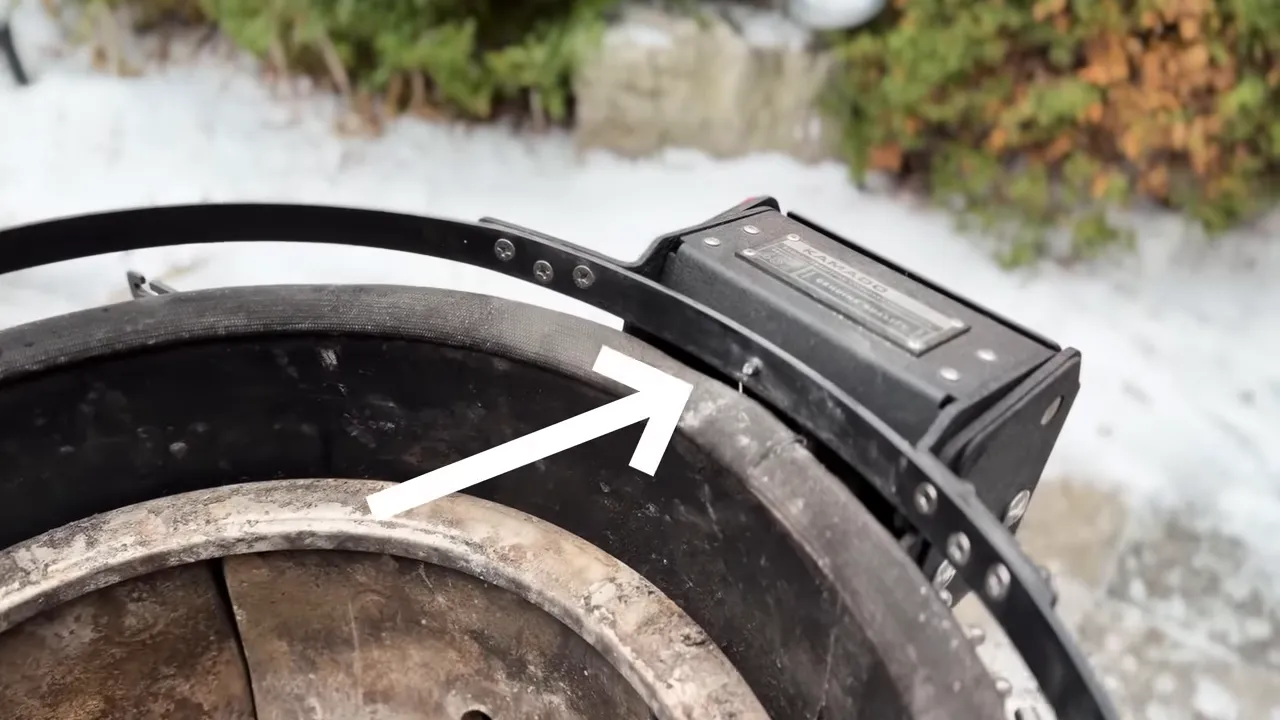
The modification worked in this particular build, allowing me to retain the Series II Air Lift hinge. That does not make a Series I dome a guaranteed drop-in replacement for every later grill. Confirm the actual part and its compatibility before handing over your money. The listing title alone is not enough.
The Maintenance Problem That Could Have Broken It Anyway
As I reassembled the grill, I found another uncomfortable surprise: the bottom band and Air Lift hinge nuts were barely finger-tight.
Even without the fall, I suspect this dome was heading toward trouble. If the band cannot securely retain the ceramic, the dome can slip out and hit the ground.
Kamado Joe grills arrive packaged in a way that can make them feel ready to use without much thought. That does not mean the hardware never needs checking.
On a secondhand grill, the inspection needs to include the bands and hinge, not just the ceramic. During reassembly, I checked and secured the relevant hardware rather than assuming the previous owner had maintained it.
For model-specific assembly and service information, start with Kamado Joe’s official resources. Follow the appropriate instructions rather than treating “as tight as possible” as a maintenance specification.
Drying the Ceramic Before Bringing It Up to Cooking Temperature
After 20 years of owning and cooking on different ceramic kamados, two things remain consistent: trapped moisture and rapid temperature changes are a bad combination.
This grill had ice and moisture inside it. Charging straight toward grilling temperature risked cracking components I had just worked to save, or damaging something that had survived the fall.
The answer was a small, controlled fire and a gradual warm-up to dry the grill before asking it to cook dinner.
There wasn’t a magic temperature or timed drying schedule established in this repair. The important lesson is not to confuse getting a fire lit with having a damp ceramic grill ready for high heat.
That drying stage belonged in the repair plan just as much as the replacement dome did.
The Result: Ready for Chicken Thighs With 10 Minutes to Spare
After the dome modification, metal repairs, reassembly, hardware checks, and gradual drying, the grill was ready to cook exactly 10 minutes before my deadline.
Chicken thighs went onto the grate, and the bargain kamado finally had an opportunity to do the job I bought it for.
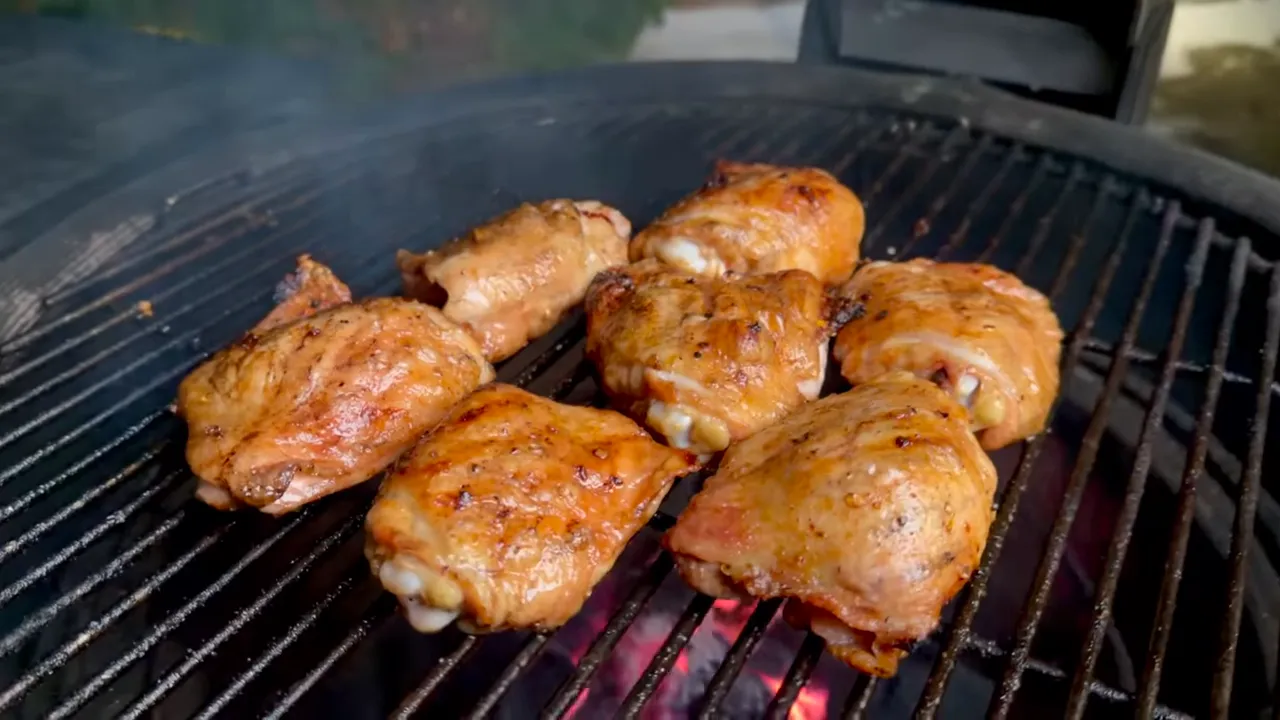
Was it a pristine restoration? No. From a distance, it looked pretty good. Up close, there was no hiding that this grill had experienced a few things.
But the cosmetic history was not what mattered to the cook. Getting a functional premium kamado back into service was the goal, and on that basis, this repair earned a massive two thumbs up.
The final purchase price got even better
When the replacement-dome seller learned that the part was a Series I dome rather than the advertised Series II, they voluntarily offered an additional discount. That brought the dome price down to $100.
- Used grill and its existing components: $200 CAD.
- Replacement dome after the discount: $100 CAD.
- Combined grill-and-dome purchase cost: $300 CAD.
- New comparison: more than $2,500 CAD, plus tax.
That is roughly 88% below a $2,500 sticker price, which puts it in the neighborhood of the 90%-off bargain I set out to find.
There is a caveat worth keeping attached to that number: the $300 figure is the grill-and-dome purchase cost, not a complete accounting of labor, repair supplies, and every accessory still needed. I also discovered that the included heat deflectors were missing. That was entirely on me for rushing the inspection, and replacing them remained another expense.
What to Check Before Buying a Used Kamado
The successful repair does not mean every broken kamado is a bargain. It means this one was bought cheaply enough, with locally available parts, to give the project a chance.
If you are assessing a used Kamado Joe, Big Green Egg, or Primo, these are the checks I would prioritize.
1. Inspect the expensive ceramic first
On a Kamado Joe, the dome and lower ceramic body are major budget risks. On a Big Green Egg, look closely at the dome, base, firebox, and fire ring. A damaged one-piece firebox, such as those discussed for Big Green Egg or Primo, can be more expensive to address than a single panel in a multi-piece design.
Used replacement parts or a donor grill may bring those costs down, but confirm availability before assuming a cheap listing will become a cheap repair.
2. Look for damage beyond the impact point
A broken lid should prompt a wider inspection. Check the handle, shelf brackets, hinge, and bands. In my case, the fall affected several parts that I needed to reuse.
3. Inventory what is actually included
Check the cooking components, heat deflectors, shelves, and model-specific service tools. Missing accessories are easy to overlook when your attention is fixed on a dramatic ceramic break.
I missed the heat deflectors. Don’t repeat my mistake.
4. Verify replacement-part compatibility
Check the model, series, and actual replacement part. My dome was new in its box and still wasn’t the part it had been advertised as.
Even an inexpensive part is poor value if you cannot use it without an uncertain modification.
5. Check for moisture and neglected hardware
Ice or damp ceramic changes your first-fire plan. Loose band and hinge fasteners change your safety assessment. Neither issue should disappear from consideration just because the outside looks tidy.
6. Price the deal without assuming warranty coverage
The lifetime warranty point is a major part of negotiation. The ceramic warranty protection discussed for Kamado Joe, Big Green Egg, and Primo applies to the original purchaser, with the required proof and registration conditions. It is not something to assume transfers with a Marketplace sale.
Check the manufacturer’s current terms, including Kamado Joe’s warranty details, before assigning any value to a seller’s warranty claim.
A seller may genuinely not realize that distinction. Explaining it gives you a fair reason to question near-new pricing: you are taking on repair risk without the original purchaser’s protection.
Set your maximum offer after allowing for known repairs, missing parts, and the uncertainty that remains. If that total approaches the cost of buying new, the apparent bargain has stopped being much of a bargain.
Was Buying the Broken Kamado Joe a Mistake?
For this grill, at this price, with these replacement parts available locally, no. I got a functional premium kamado back into service, cooked our family dinner on time, and avoided the least enjoyable part of the wager with my wife.
But the real lesson is not simply to buy the cheapest broken grill you can find. It is to buy low enough that the repair still makes sense after the surprises arrive.
Inspect it properly. Verify the parts. Respect the hinge tension. Dry damp ceramic gradually. And remember that a functional grill does not have to look brand new to make excellent barbecue.
Don’t be afraid to fire it up. Just do the checks before you make dinner depend on it.
|


