Charcoal-grilled chicken is one of my all-time favorite things to cook. Tender meat, juicy breast slices, beautifully browned skin, and that live-fire flavor make it worth firing up the barbecue.
But when you’re juggling work, young kids, and dinner, a kamado can feel like one more job. There’s ash to clear, charcoal to light, temperature to manage, and the very real possibility of serving dry chicken to your toughest critics: your kids.
That was exactly where Jenny was when we tackled this Backyard Barbecue Rescue. She wanted chicken she could confidently make during the week, not another complicated weekend project. Our solution was spatchcock chicken with Alabama white sauce, a simple savory rub, and grilled carrots. The bigger goal was to make the whole process easier to repeat.
What You'll Learn
- Spatchcocking helps chicken cook faster and more evenly, while additional deboning simplifies carving.
- Alabama white sauce adds tang and sweetness, with heat you can adjust for your family.
- A half-deflector setup protects the chicken while carrots cook over direct heat.
- Cook around 350°F, verify doneness with a thermometer, and rest the chicken before slicing.
Table of Contents
- Make the Alabama White Sauce First
- Mix a Savory Wing Dust Rub
- Spatchcock the Chicken for Faster, More Even Cooking
- Keep the Carrots Simple
- Set Up the Kamado for Two Cooking Zones
- Cook at 350°F and Let the Thermometer Do the Work
- Brush with White Sauce Near the Finish
- Rest, Slice, and Serve
- A Weeknight Cook Worth Repeating
Make the Alabama White Sauce First
Alabama white sauce brings sweetness, tang, and a little heat to grilled chicken. Mayonnaise provides the creamy base, while apple cider vinegar and lemon juice give it that bright finish. Horseradish and cayenne let you adjust the kick.
That flexibility matters when you’re feeding a family. Jenny finds even medium salsa a little hot, so we kept things restrained. At my house, I’d be more generous with the horseradish.
Alabama white sauce ingredients
- 1 cup mayonnaise
- 1 tablespoon brown mustard
- 2 tablespoons brown sugar
- 1/4 cup apple cider vinegar
- 1 tablespoon lemon juice
- 1 teaspoon prepared horseradish
- 1/4 teaspoon cayenne pepper
- 1/2 teaspoon black pepper
- 1/2 teaspoon kosher salt
Add everything to a jar, close the lid securely, and shake until combined. That’s it. A lineup of ingredients might look like a lot of work for a Tuesday, but the actual mixing takes about a minute.
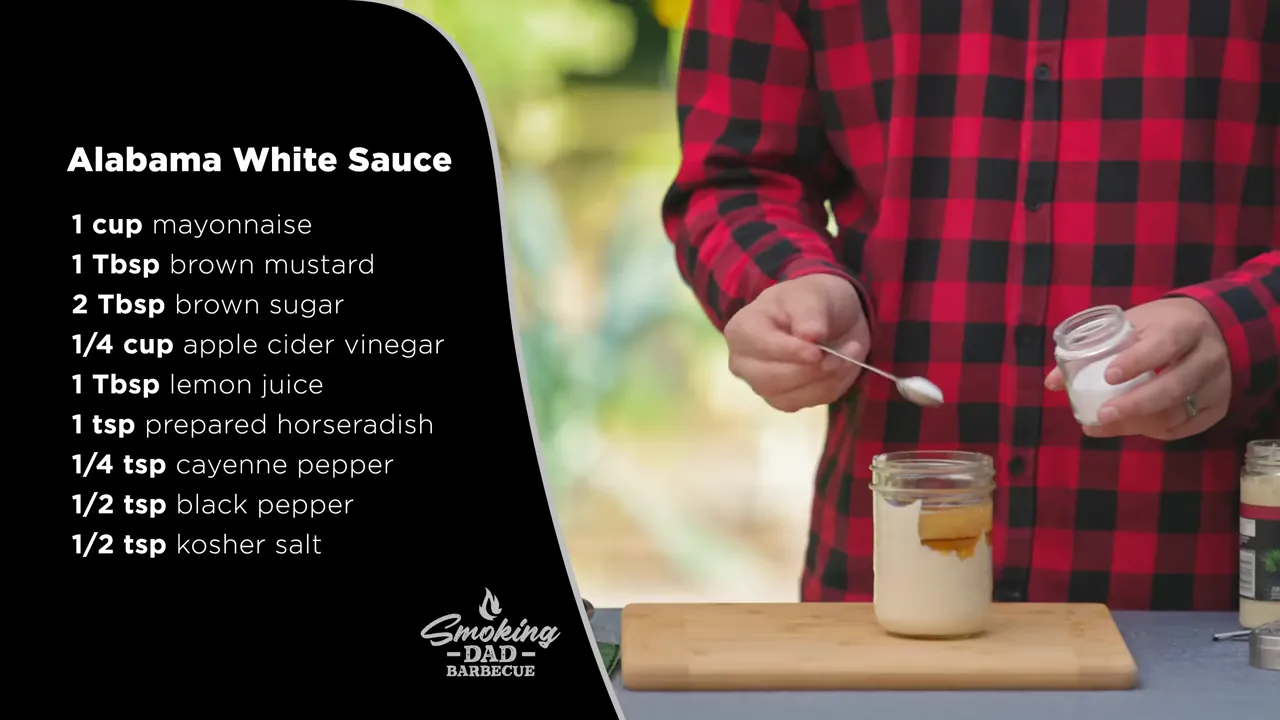
Start gently with the heat. You can increase the horseradish or cayenne to suit your household without changing the basic character of the sauce.
You won’t need the whole batch for one chicken, which makes this a useful make-ahead component. Keep unused sauce refrigerated in a clean, covered container, and keep the portion used for brushing separate from any sauce you plan to serve at the table.
Mix a Savory Wing Dust Rub
The chicken seasoning is deliberately straightforward. Salt and pepper form the base, garlic and onion round it out, and paprika adds another layer of flavor. It works beautifully with the tangy sauce without turning the meal into something overly spicy.
Wing dust ingredients
- 2 tablespoons black pepper
- 2 tablespoons salt
- 2 tablespoons garlic powder
- 1 tablespoon onion powder
- 1 tablespoon paprika
Combine the ingredients in a jar and shake well. This makes a batch of rub, not an instruction to put all of it on one bird.
I like a 50/50 salt-to-pepper starting point. Pepper texture is another small adjustment you can make: a coarser grind gives a bolder peppery bite, while a finer grind distributes it more subtly.
We used a Pepper Cannon with an adjustable grind and a removable base that holds 2 tablespoons. That made measuring the pepper convenient and saved another measuring spoon from the cleanup pile. The important part, though, is the seasoning ratio, not owning a particular grinder.
Spatchcock the Chicken for Faster, More Even Cooking
Spatchcocking opens the chicken so it lies flat. That helps it cook more quickly and evenly than leaving it in its whole, rounded shape.
For this cook, I took the preparation a step further. Along with removing the backbone, I removed the keel bone and rib cage. That gives us two useful benefits: access to season the underside of the breast meat, and much easier slicing once dinner is ready.
How I prepare the bird
- Remove the backbone. Open the chicken from the back so you can work inside the cavity.
- Trace along the keel bone. Work carefully through the tissue around the center breastbone, keeping the skin on the opposite side intact.
- Flex the breast to release the bone. Opening each side helps loosen the keel bone so it can be pulled out.
- Remove the rib cage. Use controlled cuts underneath the membrane, following the bones closely and letting the knife do the work.
- Open the chicken flat. You now have exposed breast meat underneath and an intact presentation side on top.
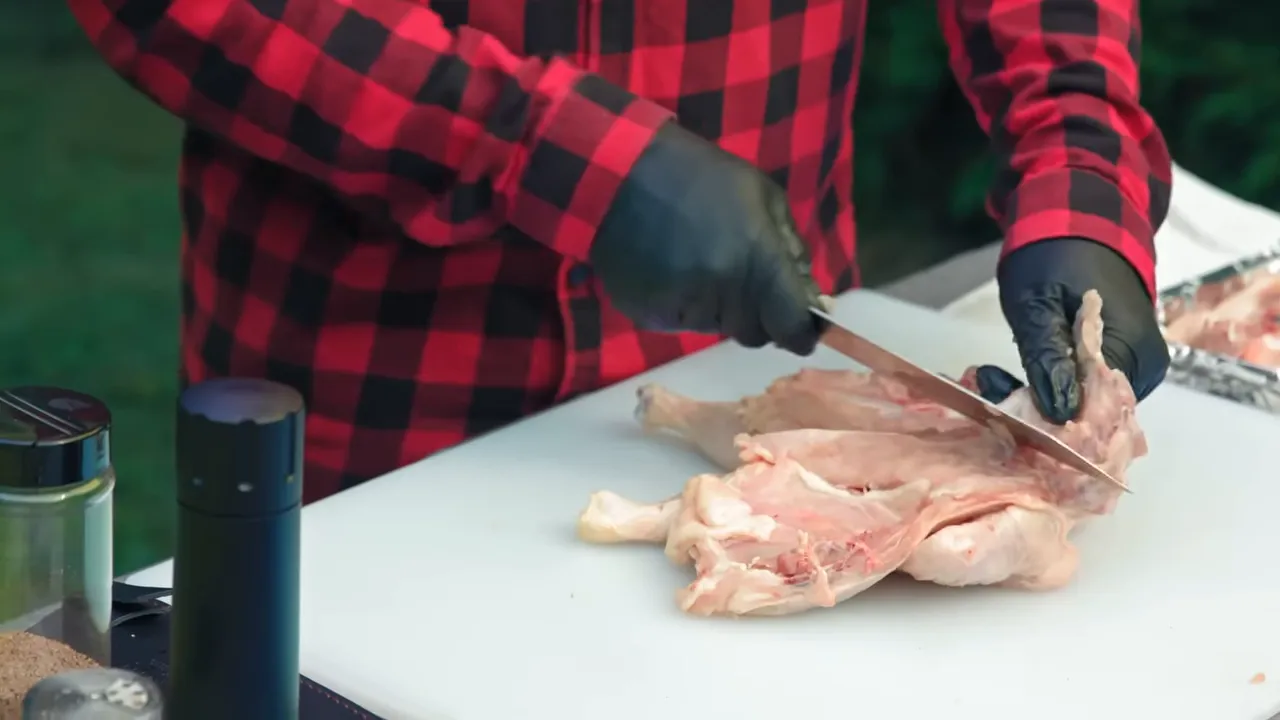
Removing the additional bones is my preferred refinement, rather than the defining requirement of spatchcocking. The backbone removal and flattened shape are what make it a spatchcock chicken.
Season the inside first
Apply the wing dust to the exposed underside, then flip the chicken and season the skin side last. That keeps the presentation side looking tidy when it goes on the grill.
Don’t build a thick crust of dry seasoning. Too much rub can become cakey and chalky, then crack and fall off during cooking. Aim for an even coating rather than a heavy blanket.
Prep ahead if it helps, but don’t make it a requirement
If the quietest part of your day is after the kids are in bed, prepare and season the chicken the night before, then refrigerate it. You move some work out of the dinner rush and gain the benefit of an overnight dry brine.
But that’s an improvement, not a permission slip to barbecue. I consider the difference modest. If you haven’t planned ahead, prepare the chicken the same day and get on with dinner. A good weeknight method needs to fit real life.
Keep the Carrots Simple
The vegetable side doesn’t need its own complicated recipe. We peeled the carrots, then dressed them with a little olive oil, salt, and pepper.
Kamado Joe supplied a stainless steel cooking surface that let us prepare the carrots on it and transfer the whole piece straight to the grill. That cut down on handling and kept the carrots together.
The key detail comes when positioning them: point the thick ends toward the hotter part of the fire. Those thicker sections can handle more heat than the narrow tips.
Set Up the Kamado for Two Cooking Zones
Jenny’s frustration wasn’t just the food. Cleaning out the grill and getting the fire ready made charcoal cooking feel like a chore before dinner had even started.
We added an ash can and charcoal basket to simplify that routine. Once the grill and ashes are completely cold, the basket can be lifted and shaken so loose ash falls into the can. Empty the collected ash, reset the basket, and the next cook starts with less fuss.
For the cooking setup, we used one heat deflector rather than shielding the entire grill:
- Back half: a cooking grate above the heat deflector for the chicken.
- Front half: the stainless steel cooking surface over direct heat for the carrots.
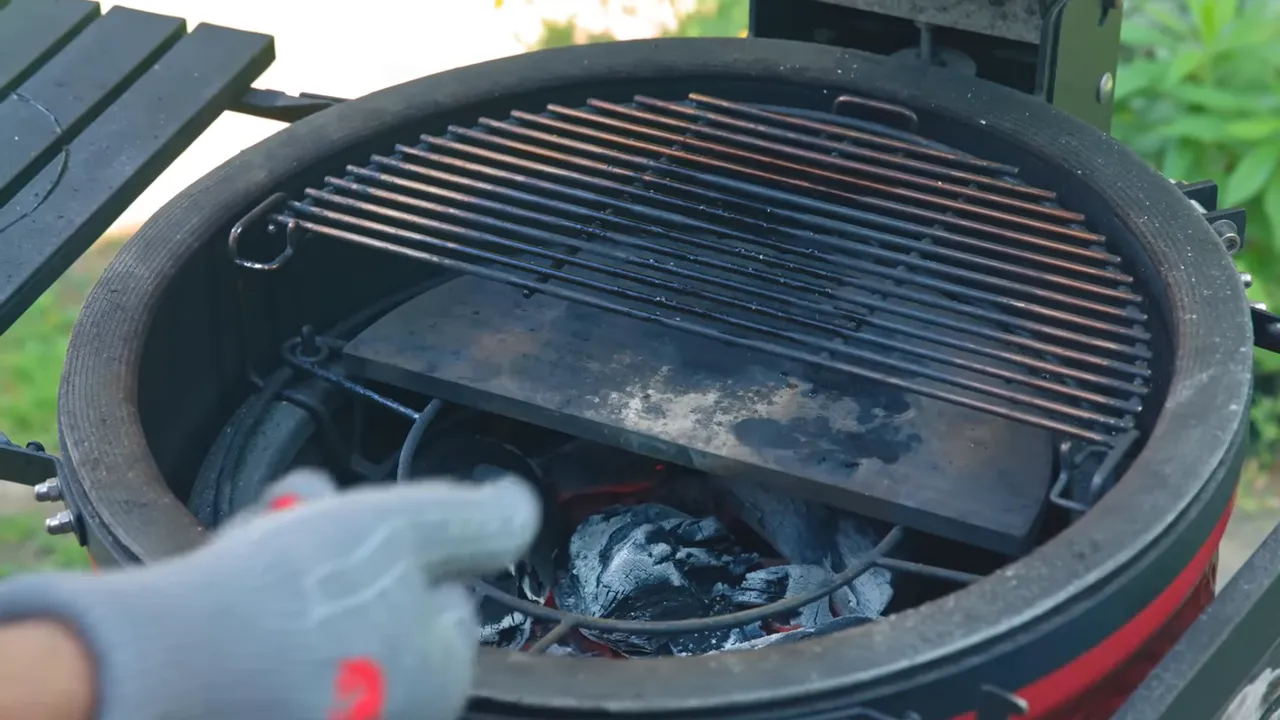
With the charcoal lit and showing a coating of white ash, install the cooking setup, close the dome, and begin bringing the grill to 350°F. You want heat building in the dome as well as an established fire below.
What if the grill gets too hot?
This was a big concern for Jenny. She’d struggled to bring the temperature back down before, and the resulting dry chicken had been firmly rejected by her three-year-old.
My approach to an overshoot is to reduce airflow decisively instead of making tiny changes that don’t slow the fire enough. Close the dome and bring the vents down to a very small opening.
In the recovery approach we discussed, fresh charcoal and deflectors that haven’t yet heated through also help absorb heat while the restricted airflow reins in the fire. Handle any hot components with appropriate heat protection, and don’t treat cold deflectors as something to add contrary to your grill manufacturer’s instructions.
The main lesson is simple: an overshoot doesn’t have to ruin dinner. Get the fire under control before putting the chicken into an excessively hot grill.
Cook at 350°F and Let the Thermometer Do the Work
A wireless meat thermometer is particularly useful when you’re balancing the barbecue with everything happening inside the house. We used a MEATER probe so Jenny could check progress on her phone rather than repeatedly walking outside.
Insert the probe into the breast according to its instructions, including pushing it past the required minimum insertion mark. Position the chicken skin side up on the protected rear grate, with the carrots over the direct-heat section.
At 350°F, our chicken took about an hour. Use that as a planning estimate, not a guarantee. The thermometer decides when the chicken is ready, not the clock.
As the cook approached its target, I checked the opposite breast with an instant-read thermometer. That second check matters because a probe only tells you what’s happening where it is positioned.
A note on the 155°F target used in this cook
For this cook, I used a 155°F breast target followed by a rest for carryover cooking. A reading of 155°F alone, however, is not the same as meeting the standard instant-temperature recommendation for poultry. Lower-temperature poultry cooking depends on maintaining the required temperature for sufficient time.
For a straightforward home food-safety benchmark, follow the USDA safe minimum internal temperature guidance: chicken should reach 165°F. Check the thickest breast and innermost thigh areas, avoiding bone, and don’t assume the rest will automatically produce a particular temperature increase.
Brush with White Sauce Near the Finish
When the chicken is nearly finished, spoon or pour a little Alabama white sauce over the skin and spread it with a brush. This is a finishing application, not a sauce we keep adding throughout the entire cook.
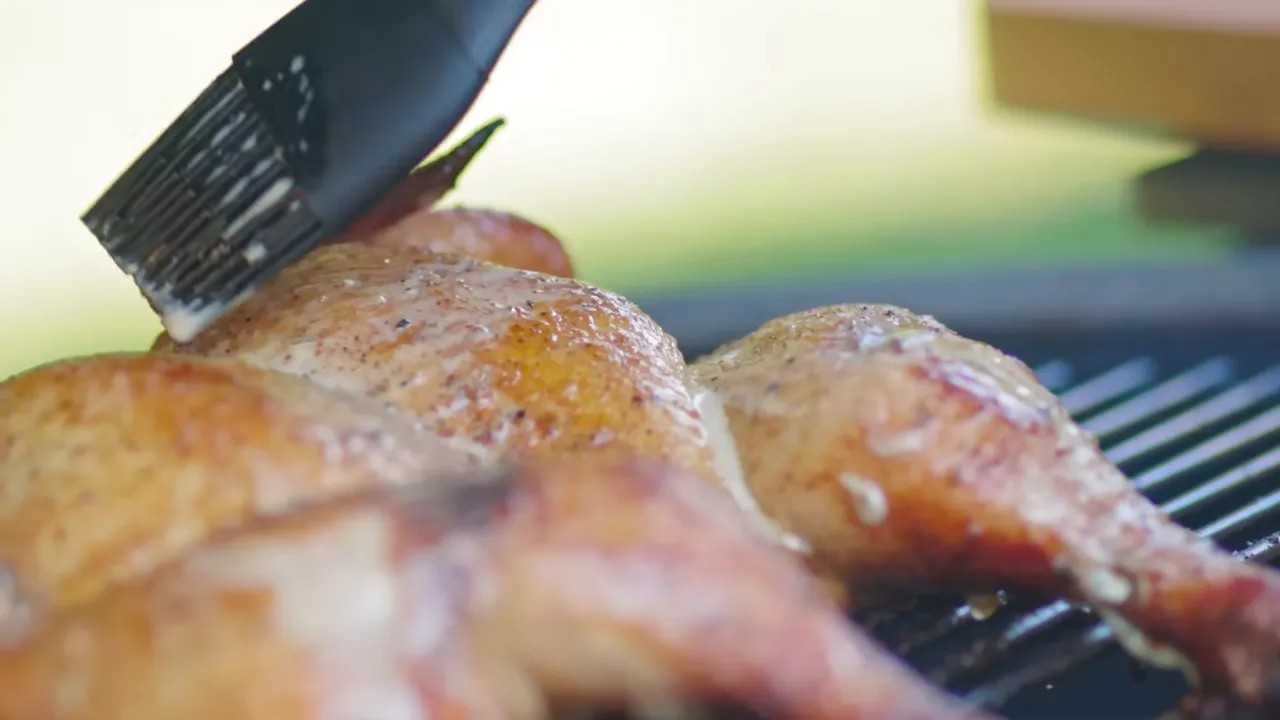
Check the carrots at the same time. Ours were soft enough to bend when lifted with tongs, with plenty of color from the direct heat. Remove them when tender.
We closed the dome for roughly another minute after saucing, then moved the chicken to the cutting board once the cooking target was reached.
Rest, Slice, and Serve
Give the chicken about 10 minutes to rest before carving. That allows the last of the carryover cooking to happen and helps keep the juices in the meat rather than all over the cutting board.
This is where the extra deboning work pays us back. With the keel bone and rib cage removed, you can slice through the breast without repeatedly running into bones. The legs and wings still need to be portioned around their remaining bones.
Serve the chicken with the grilled carrots and extra clean white sauce on the side. That gives everyone some control: a lightly seasoned piece for someone who prefers a milder meal, or another spoonful of tangy sauce for someone who wants more zip.
Jenny and Mike liked that balance. The seasoning wasn’t overpowering, the sauce brought a pleasant tang, and their little one was happy to join in. Most importantly, Jenny felt comfortable making it again rather than continuing her search for a gas barbecue.
A Weeknight Cook Worth Repeating
The success here wasn’t one secret accessory or a complicated recipe. It was a collection of manageable decisions: make the sauce in a jar, mix a batch of rub, flatten the chicken, simplify ash cleanup, give the chicken and vegetables different heat zones, and use temperature information instead of constant guesswork.
Do the prep the night before if that makes your evening easier. Do it the same day if that’s what life allows. Amazing barbecue doesn’t need to be reserved for the weekend.
Don’t be afraid to fire it up.


