A great backyard offset smoker needs more than thick steel and a big cooking chamber. It needs usable cooking space, sensible fire management, room to work, and ideally, a way to get it through the shed door without dismantling half the yard.
The second-generation Smoke North Echo brings some very thoughtful answers to those problems. I purchased the original Echo, and it has been my go-to backyard offset for the past couple of seasons. Living about an hour from the shop where these pits are built occasionally has its advantages: this time, I had the opportunity to test a G2 prototype before its public release.
For the first cook, I went with smoked chicken halves inspired by what Cooper showed me at Bar-A-BBQ. That gave me a chance to explore the new hardware, examine the heat pattern with an infrared camera, and find out whether all that engineering translated into juicy chicken with properly rendered skin.
Disclosure: Smoke North provided the prototype for testing, and Dalstrong sponsored this first-look cook. These are early impressions, not a long-term durability verdict.
Table of Contents
- Key Takeaways
- More Cooking Space, Not Just a Bigger Number
- Heavy Steel With Practical Backyard Details
- Why I Like Reverse Flow for a Backyard Offset
- The Optional Cerakote Finish: Promising, but Still Under Test
- Preparing Chicken Halves: Match the Butchery to the Cooker
- A Simple Pepper and Seasoned Salt Dry Brine
- The First Burn: Heat-Soak Before Evaluating the Pit
- Smoking the Chicken and Finishing the Skin
- The Payoff: Easy Carving, Juicy Meat, and Clean Smoke
- My Early Verdict on the Echo G2
Key Takeaways
- The Echo G2 adds over 40% more interior grid space than the original generation.
- A folding stack, raised firebox, and stainless prep insert improve everyday backyard usability.
- Keep breast-area bones for direct heat protection; remove them for easier carving after indirect cooking.
- The first heat inspection and chicken cook were promising, but long-term performance remains unproven.
More Cooking Space, Not Just a Bigger Number
The Echo G2 is just over 100 gallons, but the more useful improvement is its layout. It offers over 40% more interior cooking grid space than my first-generation Echo.
That original pit is hardly short on capacity. I have cooked 12 pork shoulders in it. More room in the G2 opens up possibilities for church gatherings, charity cooks, or a friendly backyard barbecue competition with the neighbors.
With the optional upper rib rack installed, total cooking space is just over 1,400 square inches. More importantly, the upper rack has a slimmer profile than before. The old arrangement extended far enough toward the front that accessing food at the back could be awkward. This version gives me more room to reach in, and I can move the rack forward or backward to suit the food and heat pattern.
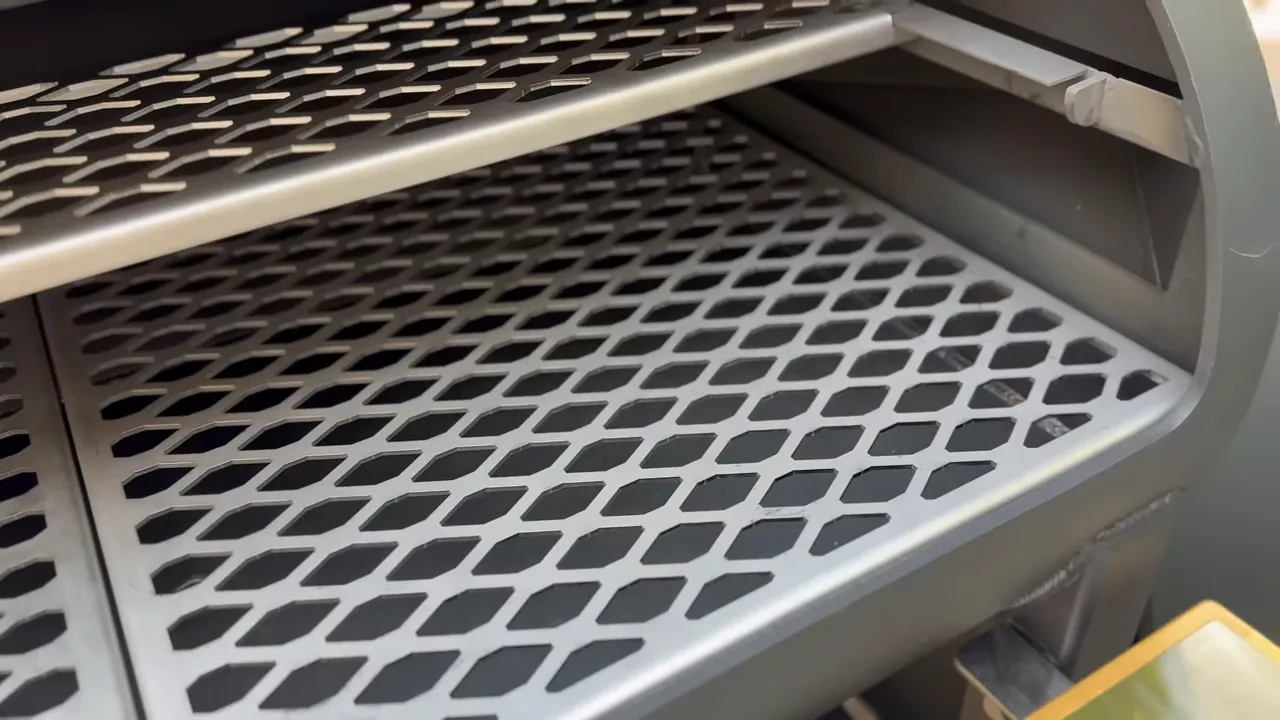
Capacity only helps if you can actually service the food. That change makes the extra space feel useful rather than merely impressive on a specification sheet.
Heavy Steel With Practical Backyard Details
Smoke North now has two distinct options in this part of its lineup: the Trillium for direct flow and the Echo for reverse flow. I tested the Trillium for about four months earlier in the year, and several of its newer construction details have carried over to the Echo G2.
A Folding Stack That Solves a Real Storage Problem
Folding stacks are familiar on large trailer-mounted pits, where transport clearance matters. On a backyard smoker, my concern is much less dramatic: can I get it into the garage or storage shed?
The G2 stack folds down over the cooking chamber. That means I can move a full-size pit out of the way when I need the patio space, without the chimney becoming the thing that stops it at the doorway.
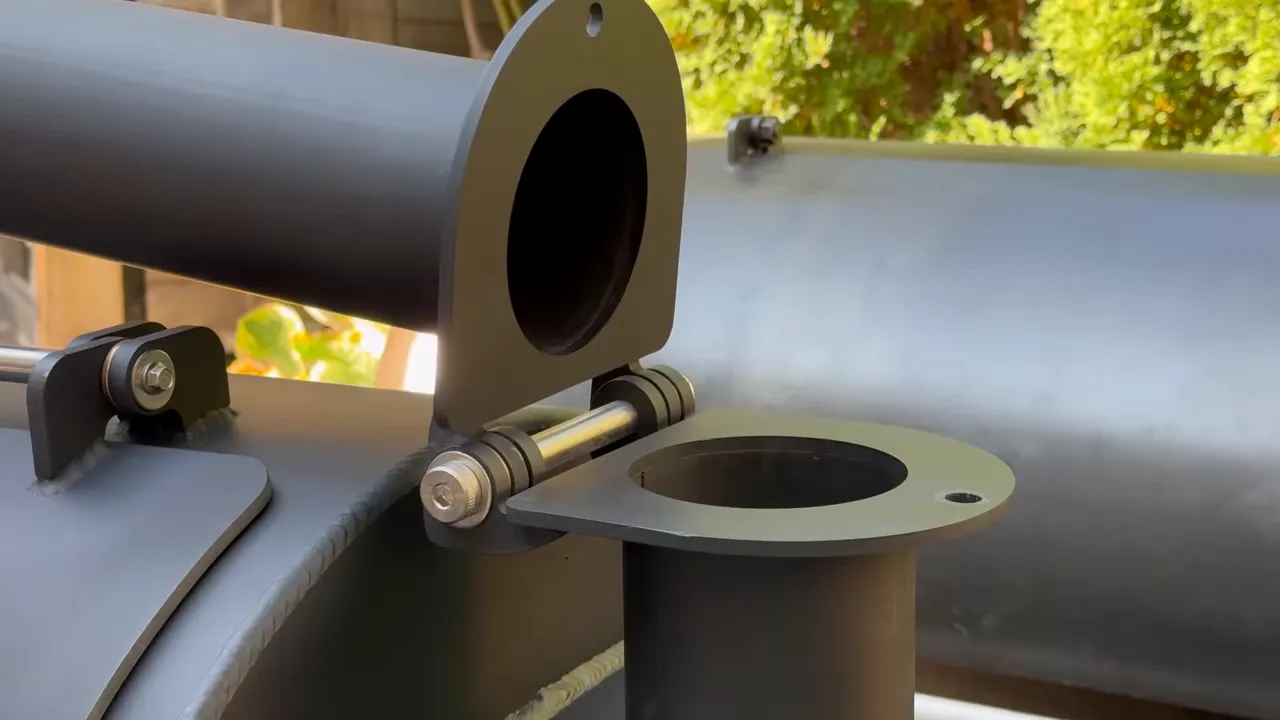
Of course, this is still roughly 1,000 pounds of steel. The premium 8-inch wheels make a meaningful difference. On my paved patio, I was able to reposition it by myself. That is not a promise about moving it over every surface, but it makes the weight much more manageable in my backyard.
Thicker Cooking Chamber, Double-Wall Firebox
The major construction details include:
- Cooking chamber: 3/8-inch fresh North American steel.
- Cooking chamber door: Fresh-rolled 1/4-inch steel to keep the door weight more manageable.
- Cylindrical firebox: Inner and outer walls made from 1/4-inch steel, separated by an insulating air gap.
- Updated firebox hardware: Heavy 3/8-inch steel components, industrial-grade bushings, and stainless steel elements.
The double-wall firebox is intended to improve efficiency and insulation, something I am particularly interested in as colder weather approaches. The updated latch and hinge arrangement also feels like hardware designed for years of use rather than an afterthought attached to a steel box.
A Higher Firebox and an Ember-Catching Lip
The firebox sits higher than on my original Echo, so I do not have to bend nearly as far down to work inside it. That is welcome when adding splits, but it matters even more if you use the optional cooking grate.
I use a firebox grate constantly. It lets me sear steaks, cook corn over leftover coals, and even make pizza. It is almost a little Santa Maria-style cooking opportunity tucked into the side of the smoker. Raising that working area makes it a more comfortable place to cook.
The opening also has a lip to help retain ash and embers. My original Echo can drop coals when the door opens, so this is a practical improvement. The similar design worked very well during my Trillium testing. It is an ember-retention feature, though, not a substitute for a suitable cooking surface and normal fire precautions.
Storage, Drainage, and a Better Prep Shelf
Underneath, the substantial tube chassis includes a storage grate for firewood, accessories, or a drip pan. A ball valve provides a way to drain grease and cooking residue from the pit.
Up front, the prep shelf combines a wood surround with a stainless steel insert. I love the look of wood, but there is no denying how convenient stainless steel is when it is time to wipe everything down and reset.
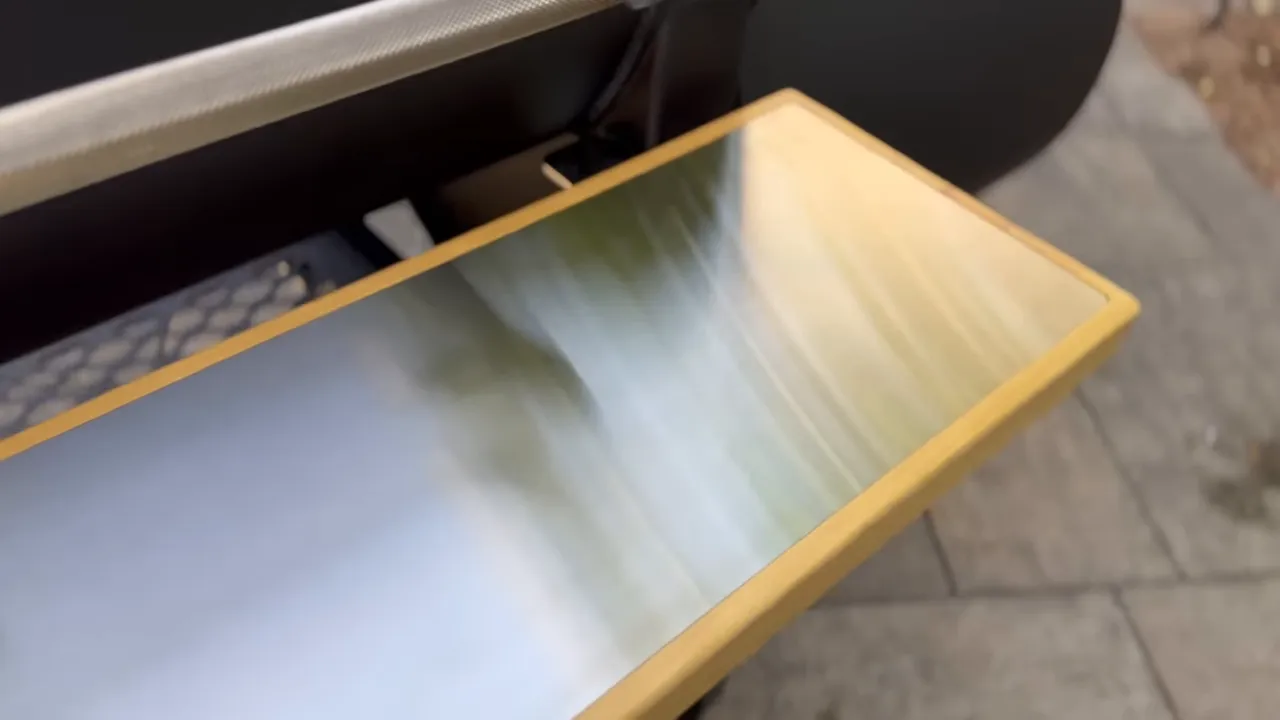
The G2 also gets updated handle details and a Tel-Tru temperature gauge. None of these features cooks the food on its own, but together they make the pit easier to live with.
Why I Like Reverse Flow for a Backyard Offset
Inside the Echo, heat travels beneath the baffle toward the far end of the cooking chamber. It then turns upward around the shaped end cap, moves back across the cooking area, and exits through the collector and chimney near the firebox end.
That slightly domed end cap is part of the design, not just a cosmetic choice. It helps shape the turn as the heat comes up from beneath the baffle and returns across the food.
My preference for reverse flow did not come from one chicken cook. In earlier comparisons, I looked at evaporative cooling, radiant energy, cook times, and taste across direct-flow and reverse-flow pits. Those tests won me over to reverse flow, particularly at backyard scale.
That does not mean every reverse-flow smoker is better than every direct-flow smoker. Design and execution matter. What I like about a well-engineered backyard reverse-flow pit is how much useful cooking space it can deliver within its footprint.
The Smoke North offset lineup includes both approaches. For my own backyard cooking, the Echo layout remains especially appealing.
The Optional Cerakote Finish: Promising, but Still Under Test
One of the most obvious changes on this prototype is the optional premium Cerakote finish. Somehow, I nearly got through the entire hardware discussion without giving it the attention it deserved.
The preparation described for this finish involves blasting the steel, baking the pit overnight to remove oils, applying a high-temperature coating rated up to 1,800°F, and allowing it to cure for five days.
The attraction is straightforward: a good-looking finish with less exterior maintenance, especially through winter.
I enjoy the raw, seasoned appearance of my original Echo, and I have put a lot of effort into maintaining it. Even so, cooler areas such as the lower chassis can be difficult to keep protected. Certain weld areas around the older firebox design have also needed attention.
Cerakote is intended to address those frustrations. But the promise of durability and proof of durability are different things. This first burn cannot establish how the finish will handle years of heat cycles and winter weather. That is exactly why I wanted to test it.
Preparing Chicken Halves: Match the Butchery to the Cooker
There are two useful ways to prepare chicken halves. The right choice depends on whether the underside will face direct heat or cook indirectly in a smoker.
For Direct Heat, Keep the Rib Cage and Keel Bone
- Remove the backbone with poultry shears or a suitable sharp knife.
- Open the bird and press it flat.
- Split it down the center into two halves.
- Leave the rib cage, keel bone, and associated cartilage in place.
Those bones provide some protection from heat coming up beneath the chicken. That is useful when cooking directly over a fire, where the underside can get ahead of the top.
They also help hold the half together as the meat becomes tender, reducing the chance of the thigh separating from the breast during handling.
The trade-off comes at carving time. With the rib cage and keel bone still present, you cannot simply cut uninterrupted breast slices all the way toward the wing.
For Indirect Heat, Remove the Rib Cage and Keel Bone
For an indirect offset cook, I like taking a little extra time to remove those bones. The payoff is better access for seasoning and much easier carving.
- Remove the backbone. Open the bird so you can work from the cavity side.
- Trace around the keel bone. Use shallow, controlled cuts, keeping the blade close to the bone.
- Lift as you separate. Gentle upward tension helps expose the connective tissue without forcing the knife through the breast.
- Flex the bird. Pressing and opening it helps release the keel bone from the surrounding rib structure.
- Remove the keel bone and cartilage. Continue tracing until you can pull them free.
- Work beneath the rib cage. Follow the bones with the knife and lift them away, then separate the bird into halves.
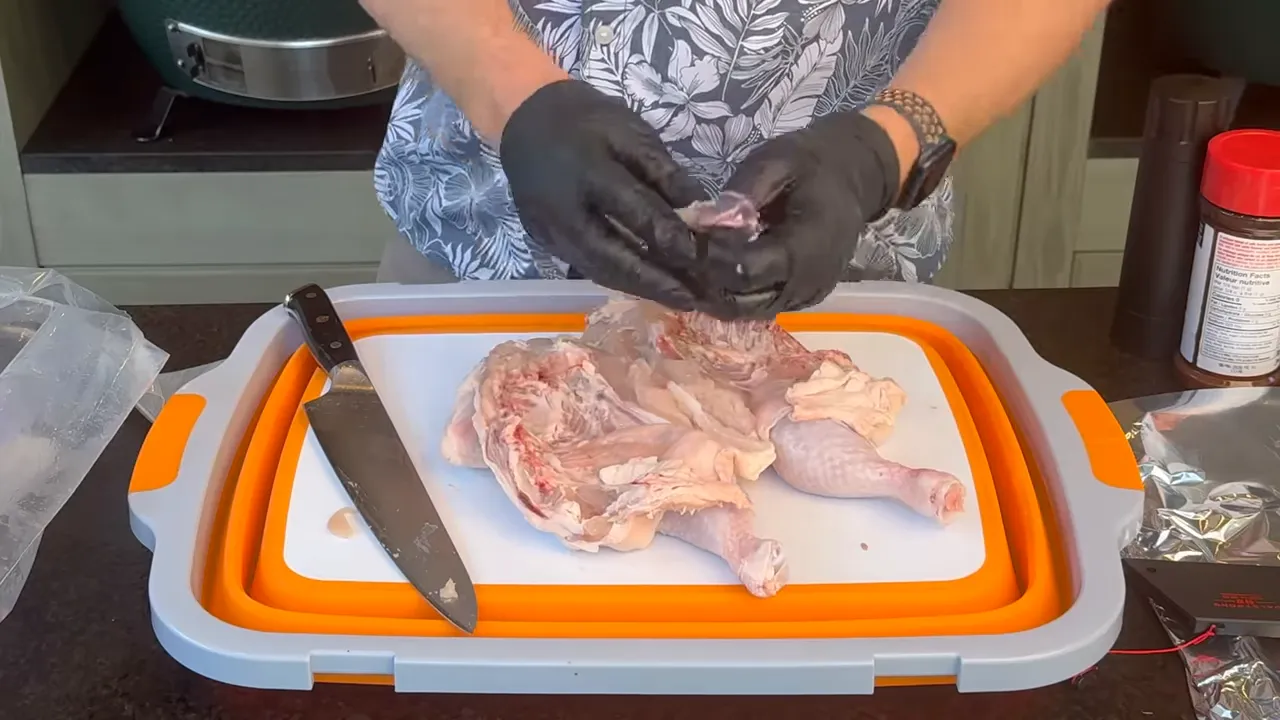
The main thing to avoid is pushing the knife so far through the meat that you pierce the skin on the other side. Take your time and follow the bones rather than digging deeply into the breast.
This is not a fully boneless chicken half. The leg and wing bones remain. It is targeted prep that removes the obstacles beneath the breast, where they would otherwise interrupt those nice serving slices.
A Simple Pepper and Seasoned Salt Dry Brine
For this cook, I prepared three chickens, giving me six halves. The seasoning was deliberately simple:
- Freshly cracked black pepper.
- Seasoned salt, such as Lawry’s.
- Optional barbecue sauce or rib glaze for serving.
I started on the exposed meat side with pepper, followed by a sprinkle of seasoned salt. Then I flipped the halves and repeated the process on the skin side. I ground roughly two tablespoons of pepper to start, rather than measuring out a fixed rub formula.
The chicken went into the refrigerator in the morning and stayed there until dinner time. That gave the salt several hours to work as a dry brine and season the meat. If your schedule allows, preparing it the night before gives you a longer brining window.
There is no need to complicate this with a long ingredient list. Clean smoke, simple seasoning, and well-rendered skin can do an awful lot of the heavy lifting.
The First Burn: Heat-Soak Before Evaluating the Pit
I started the fire and allowed about an hour for the pit to heat-soak. With this much steel, getting the temperature gauge up is not the same as getting the entire cooker thoroughly warmed.
Once that initial fire had burned down, I added a couple of fresh splits to establish the cooking fire. That was when I examined the cooking chamber with the infrared camera.
Why I Prefer Infrared to a Biscuit Test
Biscuit tests are fun, particularly if you are hungry for biscuits, but the results depend heavily on how you run the fire.
On a direct-flow offset, a fresh fire can expose food near the firebox to a very different heat load than a mature fire that has settled into coals. Damper position can change the result too. You can end up with a very different-looking tray simply by choosing a different moment in the fire cycle.
After conversations with builders including Franklin, Workhorse Pits, Primitive Pits, TMG, and Sonny Moberg, I have become a big believer in using infrared imagery to examine heat patterns.
It gives me a useful look at heated surfaces throughout the chamber, especially after adding fresh wood. It is not a substitute for food probes or a complete measurement of air temperature, but it helps me understand where energy is concentrated.
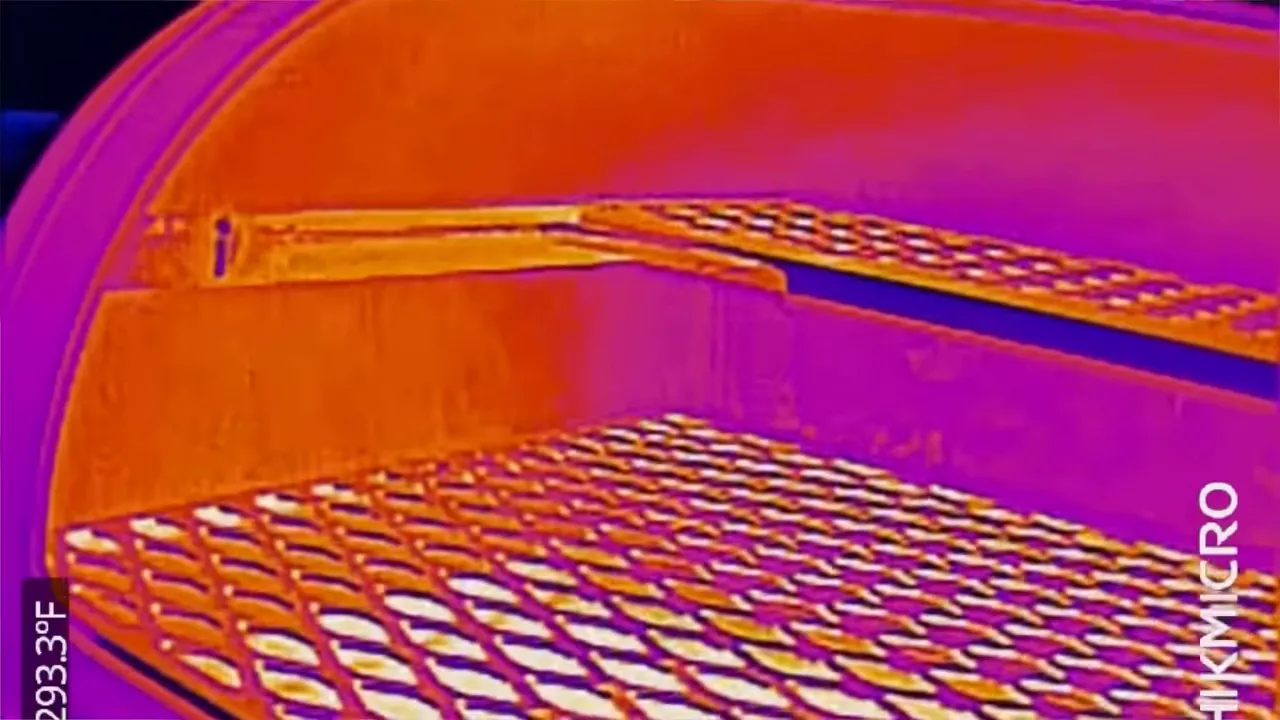
The G2 looked extremely promising. Across the chamber, the pattern appeared impressively even for an offset smoker. The heated surfaces around the rounded far end also matched the intended reverse-flow path.
That gave me confidence in using the lower grate for the chicken, while keeping the upper rack available as a finishing zone.
Smoking the Chicken and Finishing the Skin
I spaced the six chicken halves across the lower grate and installed a MEATER probe to keep track of progress.
I deliberately set an early alert below the eventual finishing point. That alert was a reminder to check the chicken and manage the final stage, not a declaration that it was ready to serve.
As the cook approached the finish, I moved the halves to the upper rib rack. Based on the heat pattern, that position offered more radiant exposure and useful convection near the top of the chamber. The goal was to help finish rendering and crisping the skin.
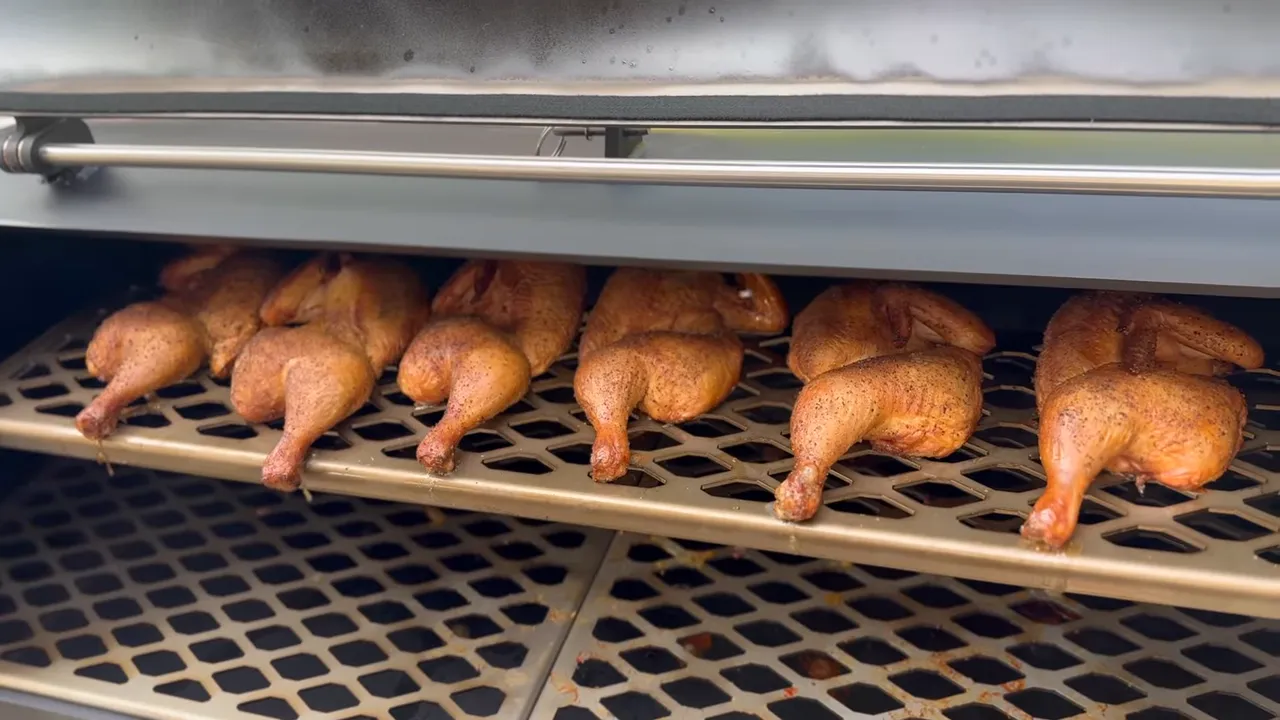
You can add sauce toward the end if that is how you like your chicken. I kept most of this batch simple, with some Bar-A-BBQ rib glaze available for tasting and serving.
Use a thermometer to confirm doneness rather than relying on color or skin texture. For a straightforward home food-safety reference, the safe minimum internal temperature guidance lists 165°F for poultry. This first cook was not documented as a fixed-time, fixed-temperature recipe, so I would not attach an invented schedule to it.
The Payoff: Easy Carving, Juicy Meat, and Clean Smoke
Once the chicken was off the pit and resting, the skin was beautifully rendered. This was also where the extra prep paid for itself.
After separating the leg portion, I could slice through the breast without running into the rib cage underneath. Each slice could carry a little skin and seasoning, rather than turning carving into a search for the next bone.
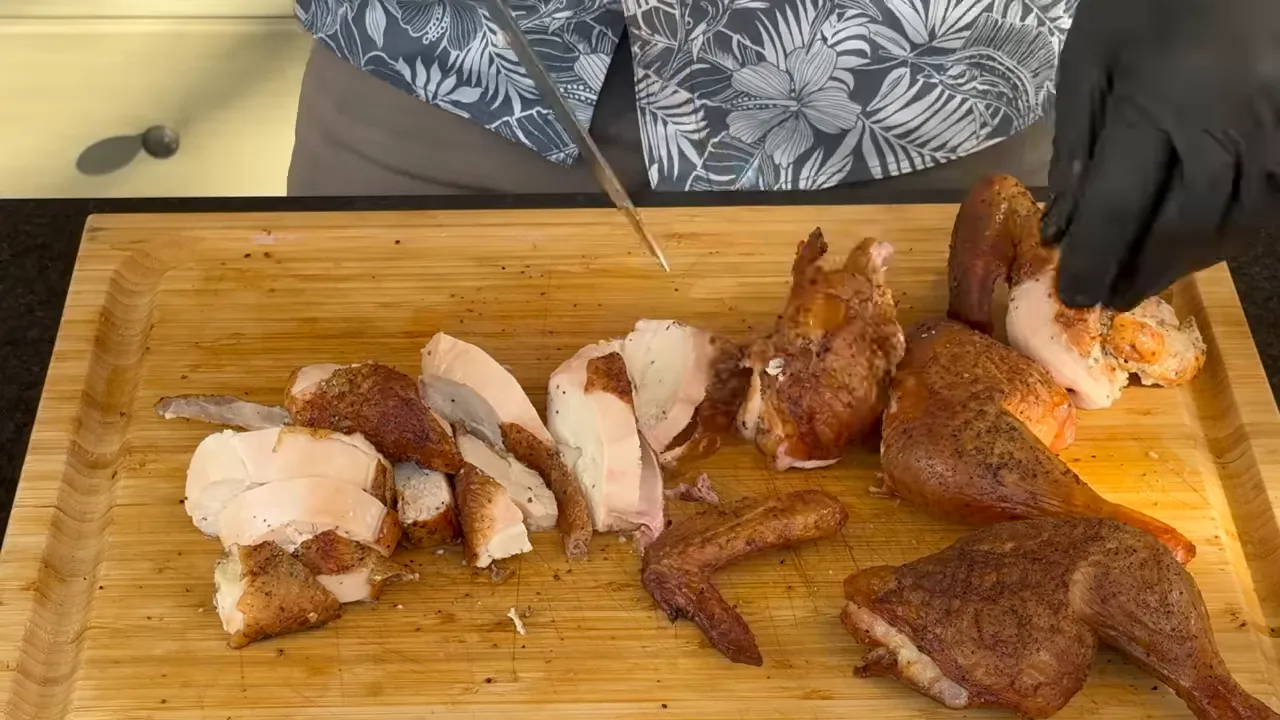
And the flavor? Boy oh boy. Juicy chicken, crisp skin, and that distinctive clean offset-smoke character. A little barbecue sauce did not hurt either.
People sometimes assume an offset will make chicken or turkey overwhelmingly smoky. My experience is that a clean-burning fire can produce a much more balanced result than that expectation suggests. It is not simply a question of adding more smoke. The quality of the fire matters.
My Early Verdict on the Echo G2
Six chicken halves were not much of a capacity test for a pit this size. They were, however, a very encouraging first cook.
The Echo G2 combines more usable grate space with improvements that address real backyard frustrations: storage clearance, firebox access, ember retention, shelf cleanup, and access to food at the back of the chamber. The first infrared inspection was promising, and the chicken delivered exactly the kind of result I wanted.
What remains is longer testing. A heavily loaded cook, an extended smoking session, and more time with the Cerakote finish will tell me much more than one successful dinner.
For now, this prototype has made a strong first impression. My biggest problem may be explaining why I would like this to be the one that stays when the truck comes back.
Do not be afraid to fire it up.
Thanks to Dalstrong for sponsoring this cook. Their knives are a regular part of my prep because I enjoy the combination of sharpness, reliability, and design.
|


