A whole pig turning over live coals looks like a serious barbecue project. It was on my wish list for years, right alongside all those do-it-yourself rotisserie pig kits I kept finding reasons not to try.
After roasting a 20-pound suckling pig on my Lone Star Grillz Santa Maria, my biggest takeaway is simple: I wish I had done it sooner. An overnight brine, a homemade Tex-Mex rub, and some careful work securing the spit delivered juicy pulled pork with properly crispy skin.
The preparation deserves your attention, but this cook is much less intimidating once you break it into manageable jobs.
Key Takeaways
- An overnight wet brine suited this backyard cook better than a competition-style injection.
- Secure rotisserie forks, tight hardware, and trussed legs keep the pig stable during rotation.
- An established coal bed provides the starting heat and flavor for the live-fire roast.
- The Santa Maria delivered excellent pork, with higher fuel consumption as the main trade-off.
Table of Contents
- Should You Inject or Brine a Suckling Pig?
- The Overnight Citrus and Herb Brine
- Build the Coal Bed Before Mounting the Pig
- My Homemade Tex-Mex Dry Rub
- How to Secure a Whole Pig on the Rotisserie
- Roasting Over Live Coals
- Bar-A-BBQ-Inspired Rib Glaze for Pulled Pork
- The Results: Crispy Skin and Two Pans of Pork
- What I Learned About the LSG Santa Maria
- Sponsor Note: Portable Power for Camping, Cooking, and Home Backup
Should You Inject or Brine a Suckling Pig?
My answer depends on where you are cooking: a competition site or your backyard.
At Memphis in May, the schedule does not leave much room for an overnight wet brine. You arrive with the hog on ice, start injecting, apply seasoning, and get cooking that same day for the following day’s judging. In that situation, an injection makes sense.
But competition barbecue and a family meal have different goals. Competition flavors are built to make a big impression in a small sample. Having tasted award-winning barbecue myself, I would not necessarily want that same level of richness and intensity across an entire plate. Harry Soo has made the same distinction between competition food and barbecue you want to eat as a meal.
There is a cost difference, too. For a pig this size, I estimated that a competition-style injection program could run about $75 in products. A homemade brine starts with inexpensive household ingredients and lets me choose the flavor profile.
For this backyard pig roast, I had the time, so I chose an overnight wet brine. That gave me room to build flavor with citrus, herbs, garlic, and ginger before adding the dry rub the next morning.
The Overnight Citrus and Herb Brine
I made a concentrated brine on the stove, then cooled and diluted it with bagged ice in a large cooler. The quantities below describe that concentrate, not a finished brine ready to use without dilution.
Brine Ingredients
- About 13 cups water
- 5½ cups Diamond Crystal kosher salt
- 2 cups granulated sugar
- Fresh rosemary, about three grocery-store packages
- Fresh thyme, about one grocery-store package
- Fresh sage, about one grocery-store package
- 1 orange, sliced
- 4 lemons, sliced
- 17 cloves garlic, diced, or 3 tablespoons prepared minced garlic
- A 5-inch piece of ginger, peeled and sliced
- 2 tablespoons whole black peppercorns
- 1 tablespoon red chili flakes
- 5 bay leaves
- Bagged food-safe ice for cooling, dilution, and overnight cold storage
I used Diamond Crystal kosher salt in both the brine and rub. Keep that brand in mind when measuring by volume rather than treating every salt as interchangeable.
Make the Concentrate
- Bring the water toward a boil in a large pot.
- Stir in the salt until it dissolves and there is no substantial layer sitting on the bottom.
- Add the sugar and stir to dissolve.
- Add the herbs, citrus, garlic, ginger, peppercorns, chili flakes, and bay leaves.
- Turn off the heat and let the mixture steep for at least 20 minutes.
- Cool it completely before it comes into contact with the raw pork.
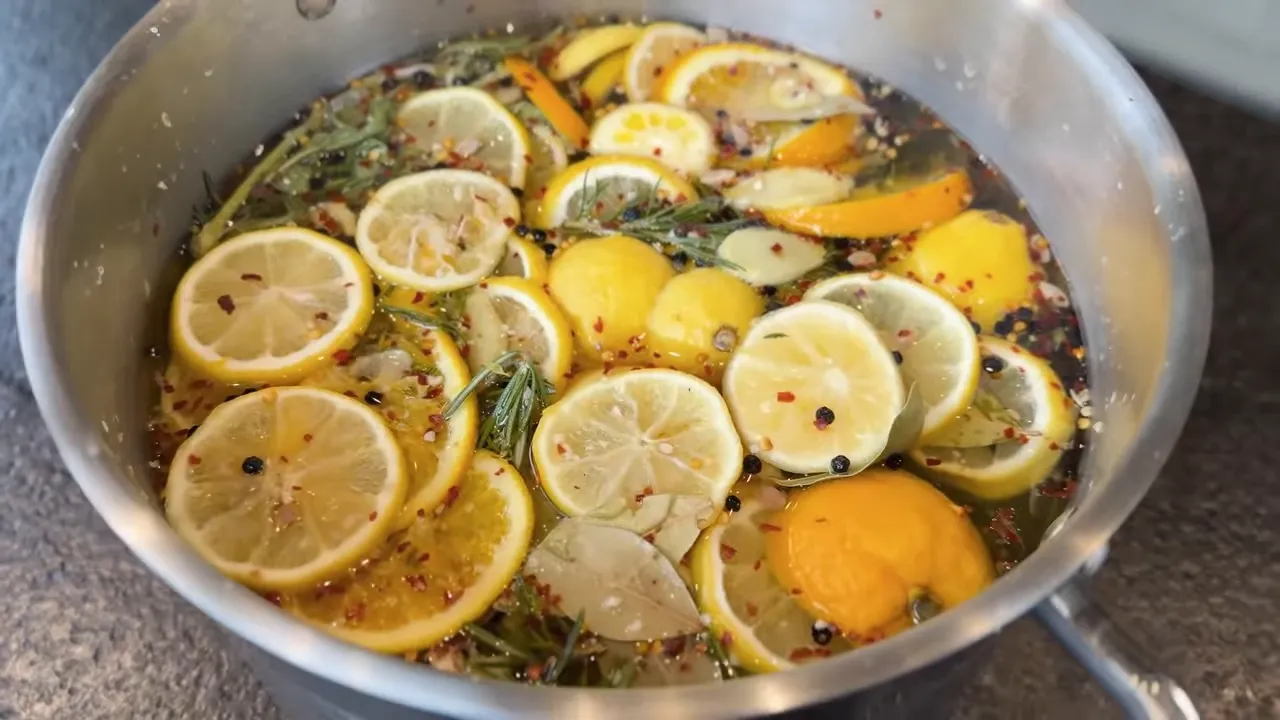
A spoon makes quick work of peeling the ginger. And for a wet brine, prepared minced garlic is an easy shortcut that saves effort without giving up the flavor I am after.
Keep the Pig Cold All Night
I precooled my cooler with two bags of ice and planned on roughly eight grocery-store bags across the cooling and brining setup. The next morning, there was still plenty of ice left, and I had not needed to add more overnight.
The number of bags is not a precise dilution measurement. Bag weights and cooler sizes vary, so do not treat that count as a universal salt-to-water ratio. This is a description of my setup, rather than a standardized final brine concentration.
The nonnegotiable part is temperature. Do not pour warm brine onto refrigerated raw pork. Cool the brine first, then keep the pig cold throughout the overnight soak, replenishing ice as necessary.
Visible ice was my ongoing check, but a thermometer gives you a more useful food-safety measurement. Follow USDA cold-storage guidance and keep the pork at 40°F or below. Keep preparation time outside cold storage brief as well.
I sourced this pig through my local butcher, with responsible farming, animal welfare, and butchering practices in mind. That matters to me when taking on a whole-animal cook.
Build the Coal Bed Before Mounting the Pig
The next morning, I removed the pig from the brine for seasoning and mounting while getting the Santa Maria ready.
I wanted an established coal bed before starting the rotisserie, not a pile of newly lit charcoal underneath the pork. That head start also warmed the firebrick lining so it could contribute radiant heat.
My startup process was straightforward:
- Place Fogo charcoal in the corners of the firebox.
- Light it with a GrillBlazer GrillGun.
- Let the coals develop a white ash coating.
- Rake and redistribute the established coals before loading the spit.
The point is not simply to get heat quickly. I want the flavor of a settled, burning coal bed from the beginning of the cook.
My Homemade Tex-Mex Dry Rub
For seasoning, I used a homemade blend inspired by the general flavor direction of Meat Church Holy Voodoo. It is not a copy of that product. My version leaves out ingredients such as MSG, turbinado sugar, and dehydrated jalapeño powder, using readily available pantry ingredients instead.
It gives me a savory, smoky seasoning with some sweetness and heat. This makes a large shaker batch, so halve it if you want a smaller amount. You do not need to use the entire batch on the pig.
Tex-Mex Rub Ingredients
- 1 cup Diamond Crystal kosher salt
- 10 tablespoons smoked paprika
- 6 tablespoons granulated garlic
- 6 tablespoons brown sugar
- 3 tablespoons freshly cracked black pepper
- 2 tablespoons dried oregano
- 1 tablespoon granulated onion
- 2 teaspoons chili powder
- 2 teaspoons cayenne pepper
- 2 teaspoons cumin
- 2 teaspoons celery seed
Add everything to a container with enough room to shake it thoroughly. The ingredients look great in layers, but the finished seasoning needs to be evenly mixed so every shake delivers the same balance.
I prefer granulated garlic and onion here rather than the very fine powders. Once mixed, season the pig inside and out, then save a little rub for touching up areas disturbed during mounting.
How to Secure a Whole Pig on the Rotisserie
This is the part worth slowing down for. You want the pig and spit turning together, with nothing working loose halfway through the cook.
On a larger pig, the rotisserie forks have more room to fit into the rib cage. This little pig took some adjustment, but I was able to secure everything while keeping the tightening screws accessible.
- Position the pig on the spit. Leave access to the fork screws so you can tighten them properly.
- Seat the front fork into the rib cage. Push the rear fork into the hams.
- Tighten the hardware with pliers. I wanted it secure enough that it would not loosen during rotation.
- Truss the legs with butcher’s twine. Keep everything pulled in tightly.
- Close the belly. I used a skewer and twine to secure the opening.
- Install a wireless meat probe in a ham. This let me follow the internal temperature during the cook.
- Touch up the seasoning. Cover any spots that lost rub during handling.
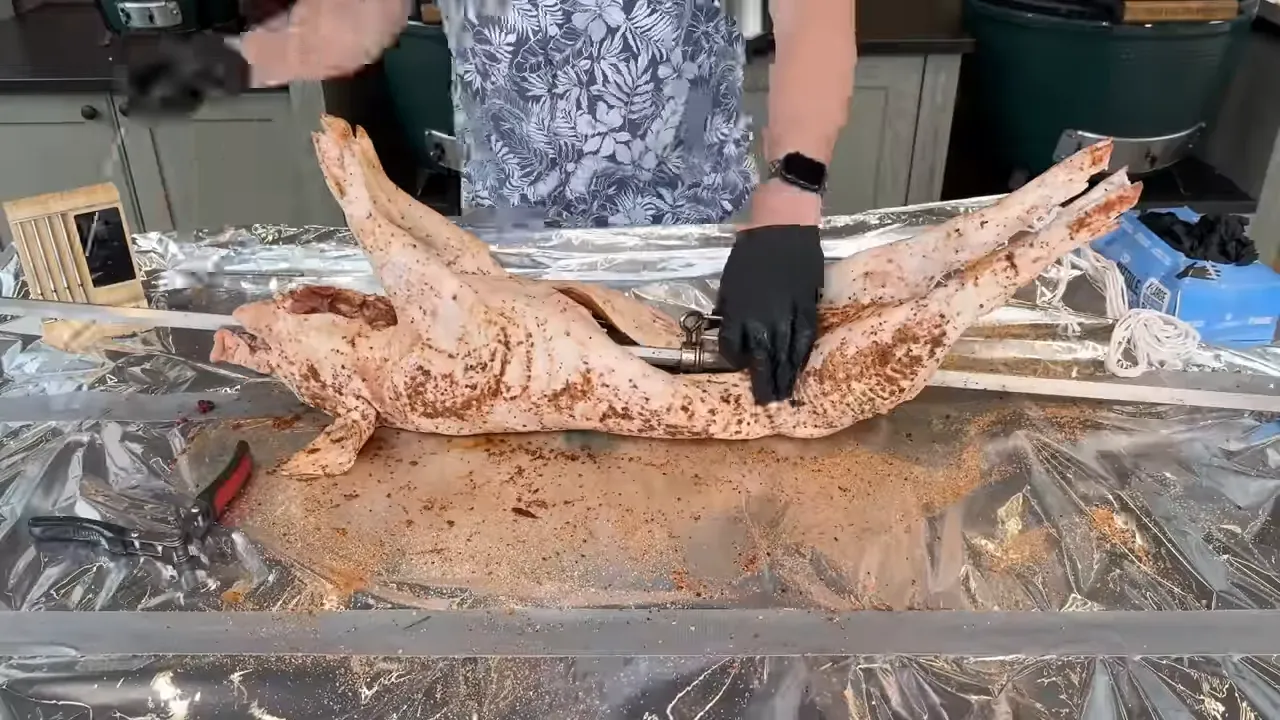
Does Suckling Pig Skin Need Scoring?
For a larger pig with thicker skin, I would score it to help achieve that crispy finish. Smaller pigs have thinner skin, which is generally less of a struggle.
I left this one unscored. It was a decision I knew could come back to haunt me, but the finished skin turned out wonderfully crisp.
Roasting Over Live Coals
With the coal bed established and the pig secured, I loaded the spit onto the Santa Maria and started it turning.
The cook involved managing the live fire, redistributing coals, and replenishing the fire as needed. This is direct cooking over coals, with the pig rotating above the heat rather than sitting in an enclosed smoker.
I tracked the ham with the wireless probe and checked the finished pork with an instant-read thermometer. The final temperature check shown was around 200°F, or 93°C, followed by a check of that beautifully crisp skin.
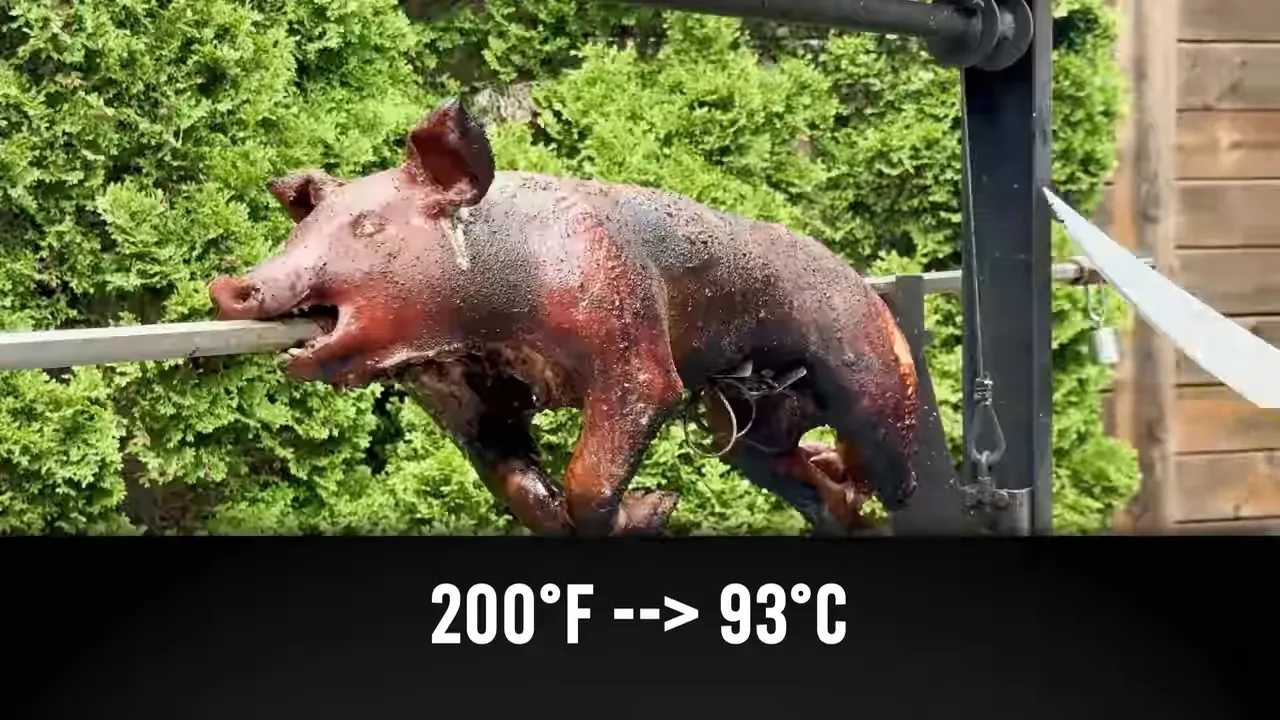
I do not have a fixed cooking time, fire temperature, or spit-height schedule to attach to this cook. Those details were not measured out as a repeatable timetable, so I would not plan a serving deadline around an invented hours-per-pound rule.
Once finished, I removed the pig from the rotisserie and let it rest before breaking it down.
Bar-A-BBQ-Inspired Rib Glaze for Pulled Pork
I served the pulled pork with a little leftover rib glaze based on an earlier recipe Cooper from Bar-A-BBQ had shared publicly. I have used this style of sauce on ribs, beef back ribs, and pulled pork, and it works beautifully.
There is an important distinction: Cooper updated his recipe and now sells a rib glaze. This is a scaled-down adaptation of the earlier shared version, not a disclosure of his current commercial recipe.
The batch makes approximately a liter, or a little more.
Glaze Ingredients
- 1¼ cups ketchup
- ⅓ cup brown sugar
- ⅓ cup white sugar
- ⅔ cup honey or maple syrup
- ⅓ cup apple cider vinegar
- ⅓ cup white vinegar
- ⅓ cup water
- ⅓ cup Worcestershire sauce
- 2 teaspoons black pepper
- 2 teaspoons cumin
- 2 teaspoons granulated onion
- 2 teaspoons granulated garlic
Combine the ingredients and blend until thoroughly mixed. The result should be a pourable glaze rather than a thick, heavy sauce. Adjust the consistency as needed.
Maple syrup is a particularly good option. I suggested that variation to Cooper, and he later used it with pork belly burnt ends. It tastes fantastic and mixes a little more easily than honey.
The Results: Crispy Skin and Two Pans of Pork
I started by removing a ham, then worked through the loin and shoulders. The meat was juicy, and the skin had the crisp texture I was hoping for.
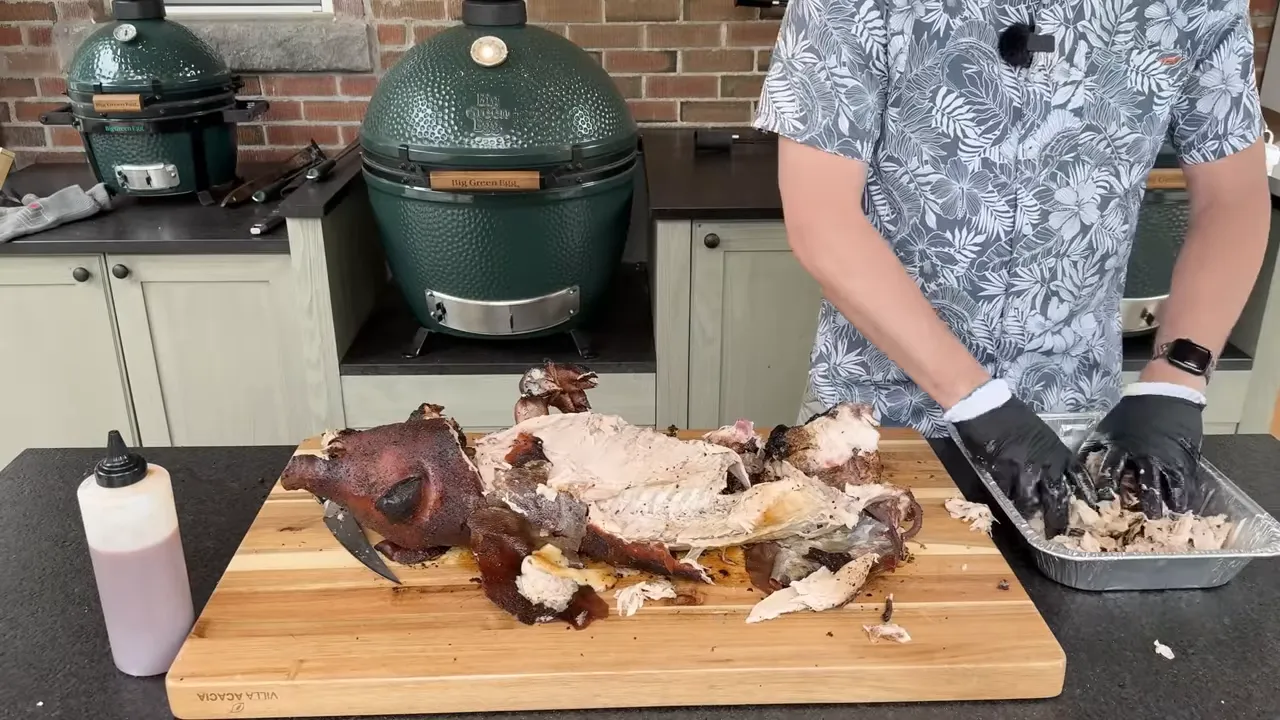
From the 20-pound pig, I ended up with about two foil pans of pork. That is a description of this cook’s yield, not a precise serving count, but it was plenty for our family.
A little glaze over a sample of the pulled meat was all it needed. The first bite took me straight back to Texas Hill Country barbecue. Cooking directly over live coals has a character that really does hit differently.
I went back for a second bite, just to be sure. Still fantastic.
What I Learned About the LSG Santa Maria
Large cooks like this were one of the reasons I wanted to explore a Santa Maria-style grill in the first place. My Lone Star Grillz rotisserie setup is rated to turn up to 80 pounds, so this 20-pound pig was well within its stated capacity.
You do not need my exact 48-inch grill to appreciate this approach. The appeal is the live-fire flavor of pork cooking directly over a coal bed.
After about a year of learning this grill, I have loved the flavor of everything coming off it. The trade-off is fuel consumption.
In my experience, the open Santa Maria uses noticeably more fuel than a ceramic kamado or an offset. That was true even on this warm day, with temperatures in the mid-70s to low-80s Fahrenheit. In a colder northern climate, that becomes an even bigger consideration.
That balance between flavor and fuel use has shaped my plans for another cooker, particularly something I can use more comfortably year-round. But for this suckling pig roast, the Santa Maria delivered exactly the experience I had hoped for.
If a whole pig has been sitting on your barbecue wish list, do not let its appearance convince you it is beyond reach. Give the cold storage, mounting, and fire preparation the attention they deserve. The reward is a pretty special meal.
Sponsor Note: Portable Power for Camping, Cooking, and Home Backup
EcoFlow sponsored this cook, and I used the Delta 3 Plus to power the equipment used to produce the sponsor segment. Portable power has several practical uses in my household:
- Camping and RV trips: Power where campsite electrical access is limited, including some air-conditioning use.
- Tailgating: Running equipment such as a television, speakers, mini fridge, or powered cooking accessories.
- Home backup: Supporting essentials such as a sump pump, refrigerator, or freezer during an outage.
- Travel production: Charging cameras, drones, laptops, microphones, and lighting.
- Production at home: Powering the equipment for the sponsor segment itself.
The features that stood out to me were its backup-power capability, quiet indoor operation, straightforward plug-and-play design, fast recharging, and charging options that include AC and solar. EcoFlow advertises a roughly 10-millisecond backup switchover, quiet operation under specified conditions, and a full AC recharge in under an hour. Appliance compatibility, runtime, noise, and charging speed depend on the equipment and operating conditions.
For me, protecting a fridge and freezer full of future barbecue is a particularly useful application. The original promotion included limited-time Prime Day discounts, so check the store for current pricing and terms rather than relying on those past offers.
|


