Brisket is too expensive to buy a whole packer and casually send a third of it to the garbage. Yet that can happen when we copy a restaurant-style brisket trim without asking why that restaurant trims that way.
My goal for this cook was different: keep as much of the brisket as possible, turn the trimmed fat into beef tallow, and get burnt ends, slices, and chopped brisket sandwiches from the same packer.
Did everything go perfectly? Absolutely not. The burnt ends were fantastic. The flat taught me a painful lesson about overcooking and bottom heat on a kamado. But the minimal-trim approach did exactly what I wanted: it kept more of what I paid for working toward dinner.
Key Takeaways
- Restaurant brisket trims prioritize consistency and cooker performance, not necessarily maximum backyard yield.
- This minimal trim retained about 95% of the packer, with removed fat rendered into tallow.
- Separating the point and flat partway through allows each muscle to finish independently.
- Minimal trimming does not eliminate the need to protect the flat from overcooking and bottom heat.
Table of Contents
- Why Restaurant Brisket Trimming Advice Does Not Always Fit the Backyard
- The Plan: One Packer, Three Brisket Dishes, Plus Tallow
- Start Saving Money Before You Pick Up a Knife
- How I Micro-Trimmed This Brisket
- Seasoning: Keep Salt Under Your Control
- The Simple Big Green Egg Setup I Used
- Separate the Point and Flat After the Bark Develops
- Turn the Point Into Burnt Ends While the Flat Rests
- What Went Wrong With the Flat
- Better Brisket Value Does Not Require Perfect Slices
Why Restaurant Brisket Trimming Advice Does Not Always Fit the Backyard
This is not a criticism of Aaron Franklin. He has been incredibly generous with his knowledge, both publicly and when I had the chance to spend a day talking barbecue with him. His approach makes perfect sense for Franklin Barbecue. That does not mean every part of it makes sense for a family cook.
A restaurant-style trim can remove roughly 30% to 35% of a packer’s starting weight. There are three important reasons for that.
- Every slice needs to meet a very high standard. If a Texas Monthly editor might walk through the door, appearance and consistency matter on every plate. Aggressive trimming helps eliminate sections that are unlikely to produce those ideal slices.
- The cooker influences the shape. An offset moves a lot of hot air across the brisket. Raised sections, including the mound often called the mohawk, can burn before the rest cooks properly. Removing them can be a sensible choice on that cooker.
- The trimmings have another job. Restaurants can use fat and meat trim in sausage, sides, and other products. What leaves the brisket does not necessarily leave the business as waste.
At home, the equation changes. If you aggressively trim a brisket and throw those pieces away, you have paid for food you never use. If you already turn every trimming into something delicious, you are solving that problem another way.
The point is not to stop trimming altogether. It is to trim for your cooker, your menu, and your priorities. I was cooking for friends and family, not a judging panel.
The Plan: One Packer, Three Brisket Dishes, Plus Tallow
Instead of asking every inch of this brisket to become a perfect slice, I gave the different parts different jobs:
- The point: burnt ends to serve as an appetizer.
- The flat: sliced brisket, provided I hit the texture correctly.
- The less attractive pieces: chopped brisket sandwiches.
- The trimmed hard fat: rendered beef tallow to use later in the cook.
I started cooking the brisket whole, then separated the point and flat partway through. That gave me the option to finish the two muscles separately rather than forcing them to reach the same endpoint together.
That flexibility matters even more with a minimal trim. Leaving the brisket closer to its natural shape means keeping a bigger thickness difference between the flat and point. You save meat at the cutting board, but you still have to manage those differences at the grill.
Start Saving Money Before You Pick Up a Knife
The first step happens at the meat counter. Look for a packer with a reasonably thick, even flat.
Some flats taper down to an extremely thin edge, almost like a flank steak. That section is difficult to cook alongside the much thicker portions, and it is often one of the first things removed during trimming.
The brisket I chose still tapered, but its thinnest section was roughly 1 to 1½ inches thick. Starting with a better shape meant I did not need to sacrifice a large section just to make the rest more uniform.
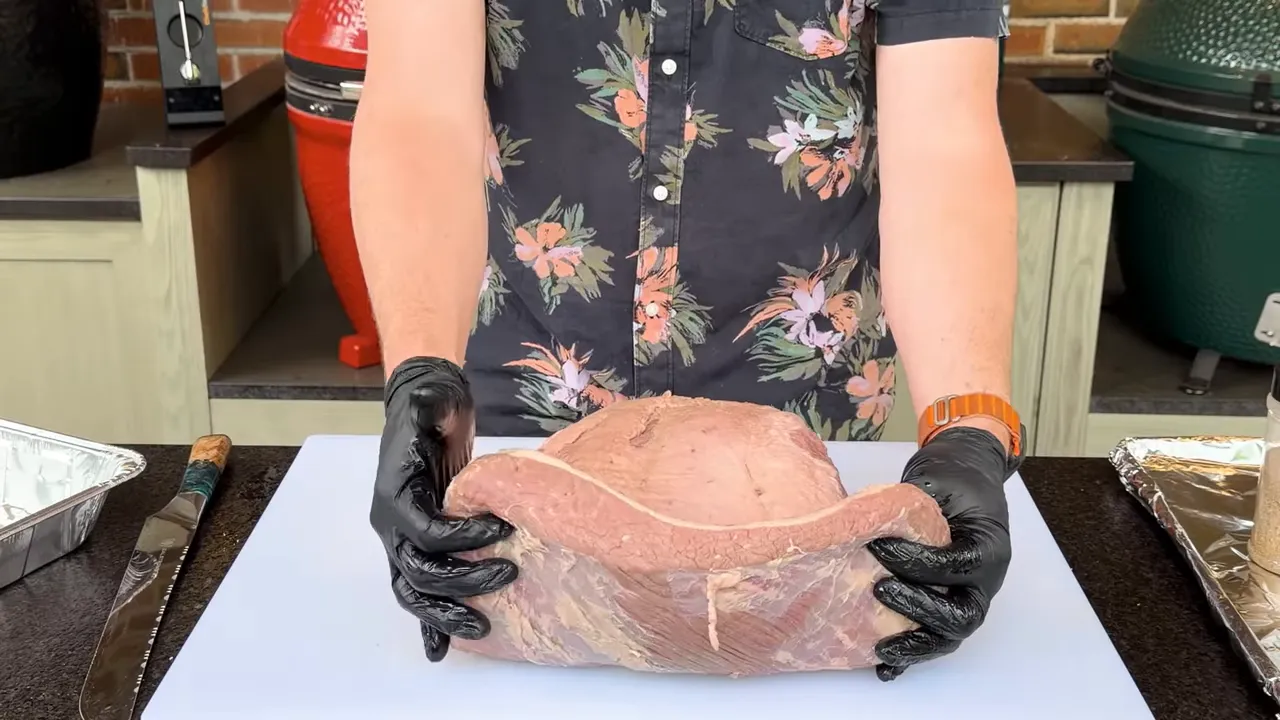
You cannot control everything hidden inside the packaging. The amount of hard fat and the shape of the point vary. But choosing a flat without a paper-thin end is a useful place to start.
How I Micro-Trimmed This Brisket
Remove hard fat with a purpose
I focused first on the firm fat around the area commonly called the deckle. Rather than cutting away meat to create a beautifully sculpted packer, I removed the hard fat I wanted to render into tallow.
At that stage, I had taken off essentially no meat. That was the goal: keep the edible brisket intact and give the removed fat another job.
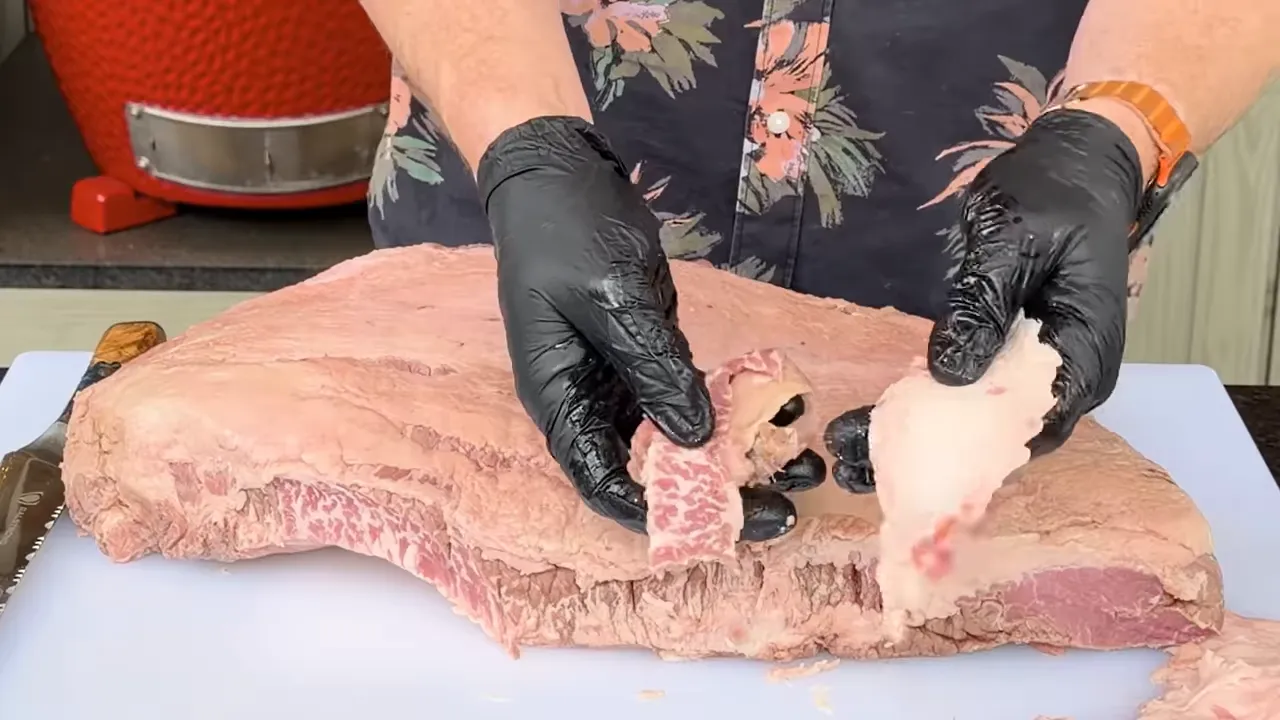
Trim the point for the dish you are making
I was more aggressive with the thick surface fat over the point. Some of it was well over ½ inch thick, and that muscle was destined for burnt ends.
Removing more of that outer fat gave the seasoning better access to the meat. The point has much more internal fat than the flat, so it was not the part I was most worried about drying out.
You could leave more of that fat in place if that is how you like to eat it. Minimal trimming is not a rule that says you must keep every fat deposit. It is a decision to stop cutting away useful food just to copy someone else’s finished shape.
Weigh what you actually remove
Here is where this cook landed:
- Fat removed: 336 grams, approximately 0.74 pounds.
- Brisket retained: 6,233 grams, approximately 13.74 pounds.
- Trim percentage: about 5% of the combined weight.
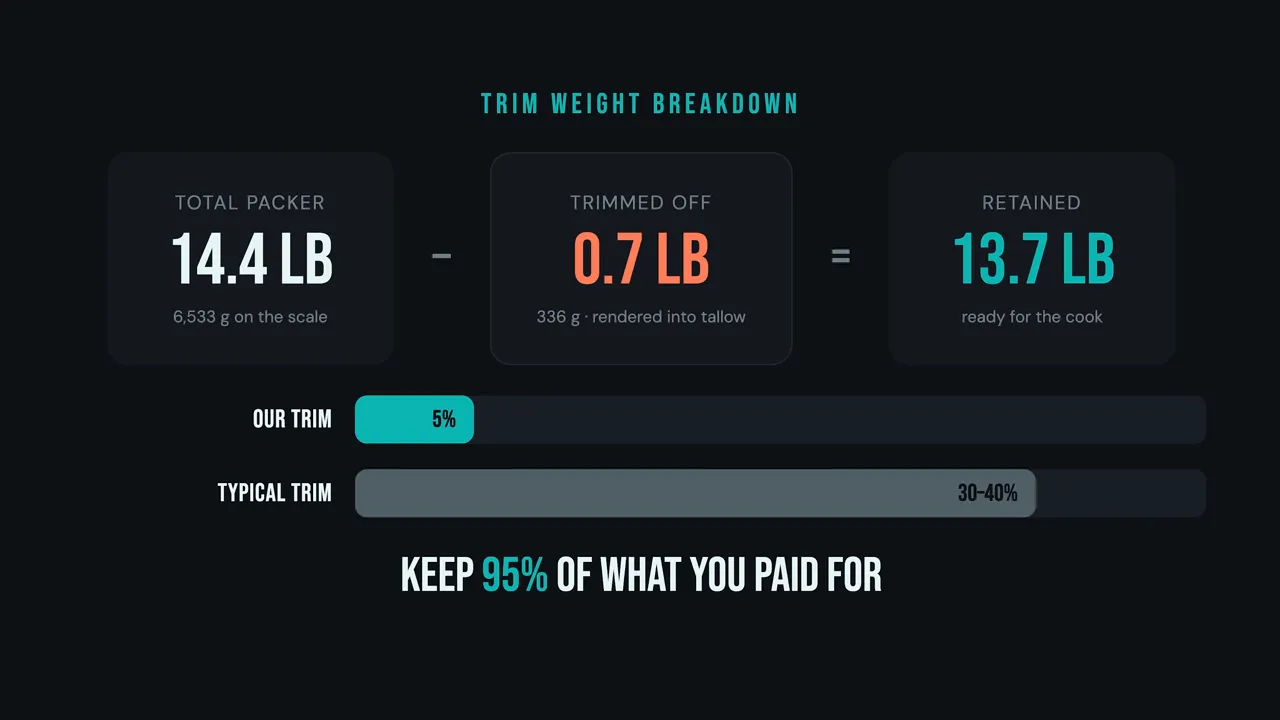
Compared with removing 30% to 35%, that is roughly 25 to 30 percentage points more of the original packer staying on the grill.
That is the basis of the nearly-one-third value argument. It is not a discount at the checkout, and it is not a claim that raw weight becomes an equal weight of finished barbecue. It is about retaining more of the brisket you bought instead of discarding it before cooking.
Seasoning: Keep Salt Under Your Control
For this cook, I used a low-salt rub blend I had been developing, then added salt separately. The idea is simple: control the salt independently from the rest of the flavor.
Many commercial rubs contain a substantial amount of salt. If you want a heavier coating of pepper, savory ingredients, or spice, adding more rub also adds more salt. Separating those jobs gives you more flexibility.
There are two straightforward approaches:
- Dry brine first: apply salt and refrigerate the brisket overnight before adding your other seasonings.
- Season together: apply salt and a low-salt rub, then give the brisket time to brine before cooking.
My flavor direction was deep and savory, with some sweet heat mixed in. But you do not need a special rub to make this method work. Salt and pepper are absolutely fine.
The Simple Big Green Egg Setup I Used
I cooked this brisket on my extra-large Big Green Egg. Normally, when I am putting everything into a long kamado cook, I use a double-indirect setup. For this experiment, I deliberately kept the setup simpler.
That choice made the fire preparation easy. It also came back to bite me later, so consider this the setup I tested, not a claim that simpler is always better.
- Clean out the ash. Start with a clean cooker before loading the fire.
- Add wood chips and chunks to the ash can. I placed them in the Kick Ash Can beneath the charcoal basket.
- Install the basket and add more wood. A couple of chunks went into the basket before I covered them with charcoal.
- Light a hot spot in the center. I used a torch to establish the fire.
- Add another wood chunk on top. That supplied smoke early in the cook.
The intention was to stagger the smoke. The top chunk supplied smoke at the beginning, the buried chunks contributed as the charcoal burned down, and falling hot embers could ignite the wood below.
It is a simple way to keep supplemental smoke available without repeatedly moving grates and deflectors. A double-indirect approach takes more setup and uses more fuel, but that extra fuel consumption is part of why I use it for flavor as well as heat management.
Once the cooker was ready, the seasoned packer went on whole. I also put the saved fat in a pan to render, then strained the liquid tallow and reserved it for the next stage.
Separate the Point and Flat After the Bark Develops
I placed my leave-in temperature probe in the flat. That is the muscle most sensitive to overcooking, so it deserves the attention.
I also checked multiple areas with an instant-read thermometer. There was a substantial difference between the point and flat, both in temperature and how they felt when probed. With less trimming and a less uniform shape, that was not a surprise.
I did not separate the muscles at the 160°F to 165°F mark often suggested for wrapping. On this kamado cook, I let the brisket reach roughly the 180s°F so the bark could develop further.
That was a decision based on this cooker and this brisket, not a universal separation temperature.
To divide the muscles, I gently lifted the point and followed the seam of fat between it and the flat. A little upward tension helped expose the seam, allowing the knife to follow it instead of cutting through the meat.
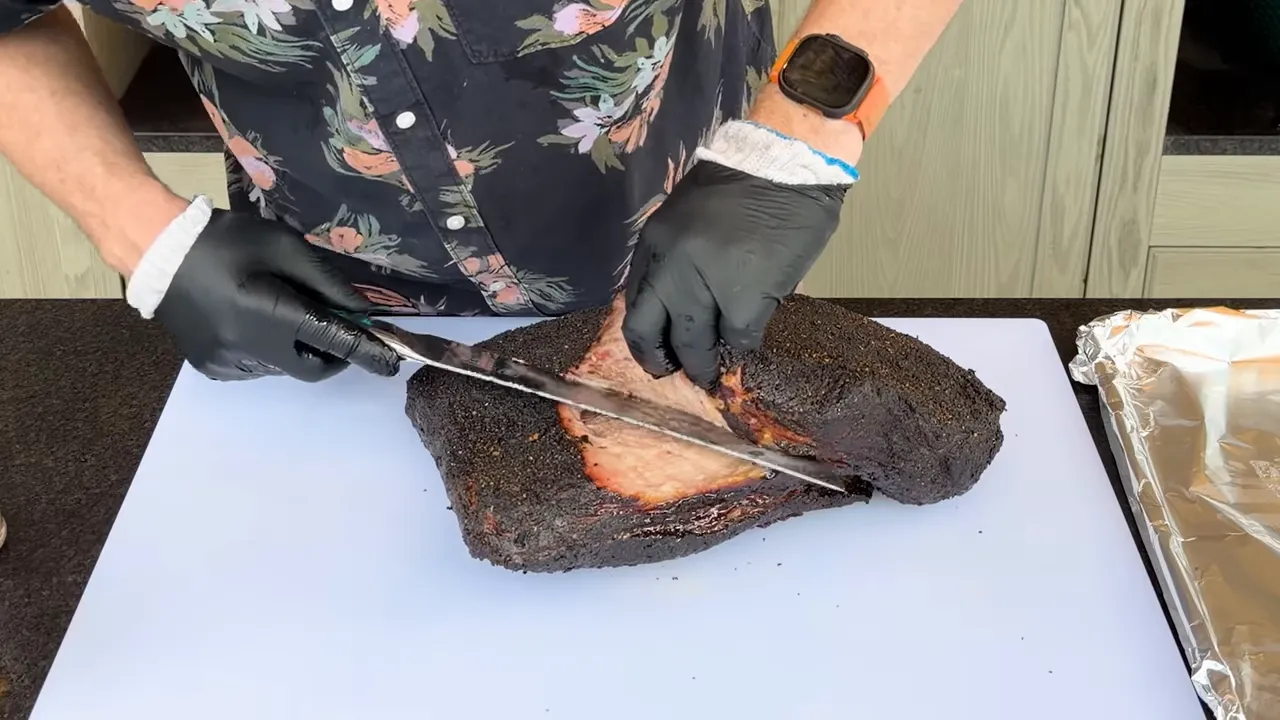
After separating them, I added more rub to the newly exposed surfaces. Each muscle went into its own foil boat with a little of the reserved tallow underneath, then returned to the grill.
The separate boats let me manage the flat and point independently while keeping their rendered fat contained.
Turn the Point Into Burnt Ends While the Flat Rests
When the flat was ready to come off, I wrapped it tightly in foil for its rest. Then I turned my attention to the appetizer.
The point’s foil boat already held rendered beef fat. I saved that rather than starting with a clean container and throwing away all that flavor.
- Move the cooked point to a cutting board.
- Cut it into cubes.
- Return the cubes to the saved foil boat with its rendered fat.
- Add your favorite barbecue sauce.
- Mix everything together and return it to the grill until the sauce tacks up.
I used a sauce adapted from a recipe shared by Bar-A-BBQ, but the important part here is the process: keep the beef fat, coat the cubes, and give the sauce time to set.
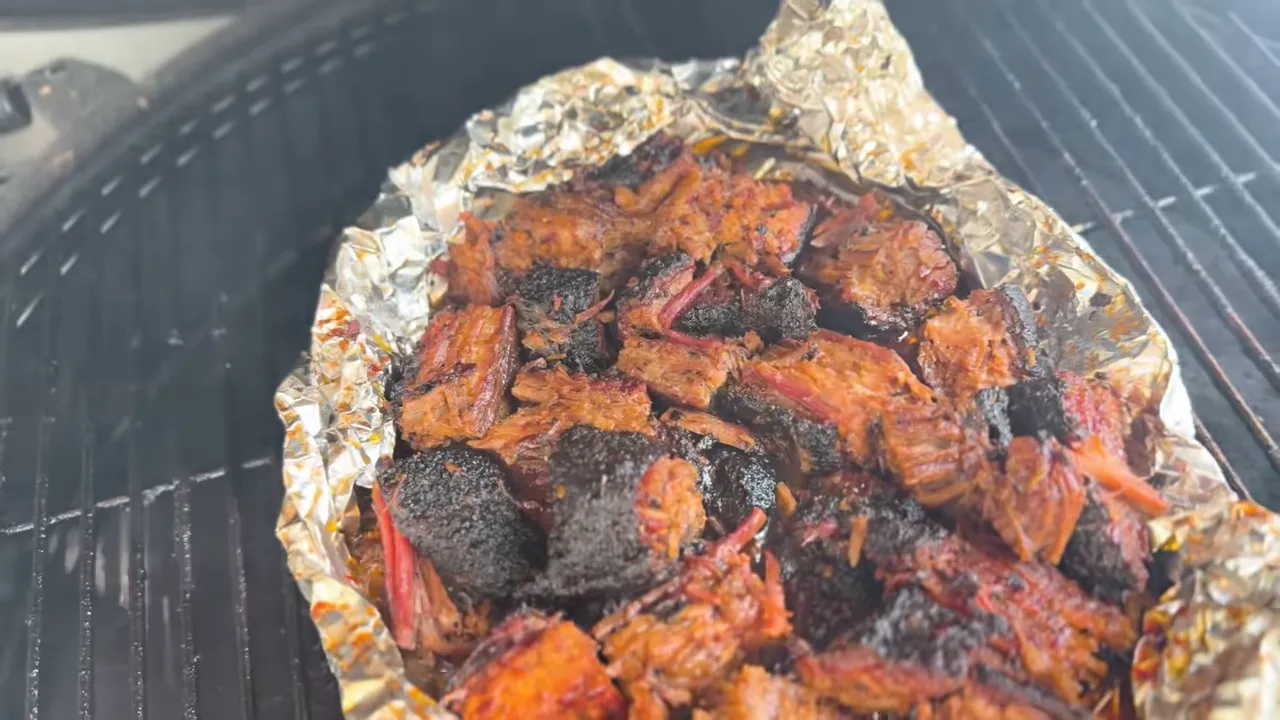
The burnt ends were the clear winner of this cook. Tender, flavorful, and exactly what I wanted.
What Went Wrong With the Flat
Now for the honest part. The flat did not give me the slices I wanted.
When I pushed too hard with the knife, the meat started to mush and fall apart. That is useful texture for shredded brisket sandwiches, but it is not the slice that folds over a finger and separates with a gentle pull.
I overcooked it. That was a James problem, not proof that keeping more meat on a brisket cannot work. I got distracted by the burnt ends and did not give the flat the attention it needed.
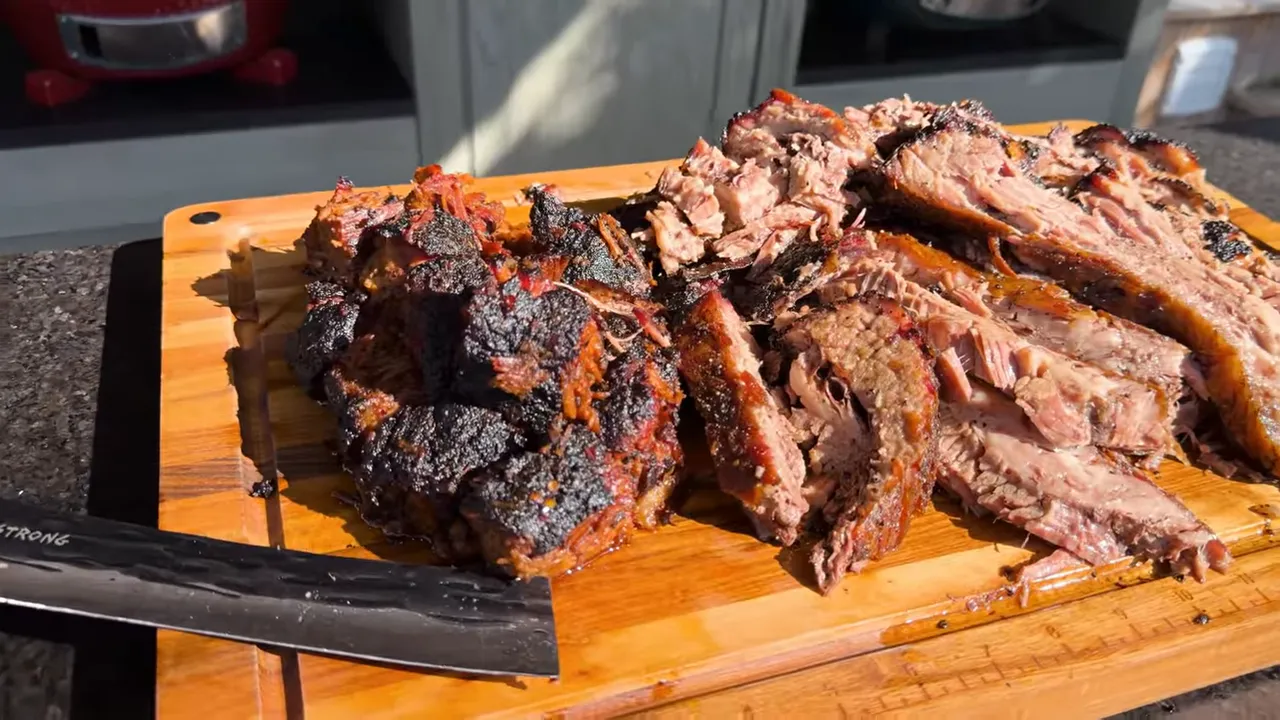
There was another issue: the underside had become leathery. In hindsight, skipping my usual double-indirect setup was a mistake.
A kamado has its heat source underneath the food, and the brisket sits relatively close to that fire. My normal double-indirect arrangement helps limit the bottom heat reaching the meat. The foil boats added protection later, but they did not undo what had already happened underneath.
I wanted to make this cook accessible to someone without a second deflector and the spacers needed for that setup. Fair enough. But this was a painful reminder that simplifying equipment can introduce a tradeoff.
My takeaway is to keep the minimal trim, restore the bottom-heat protection I normally use, and pay closer attention to the flat as it finishes. Saving meat at the cutting board does not replace careful cooking.
|
Better Brisket Value Does Not Require Perfect Slices
The original plan was burnt ends, slices, and chopped brisket. The actual result leaned much more heavily toward burnt ends and sandwiches. I am not going to pretend otherwise.
But the flavor was still excellent, and the flexible menu meant the flat still had a useful place at the table. The roughly 5% trimmed off became tallow, and the rest stayed available for serving rather than being carved away for appearance.
For a restaurant or a competition, I would have different priorities. For a backyard meal, I would rather decide what each section can become than insist the entire packer meet one slicing standard.
Buy a better starting shape. Trim with a purpose. Save the fat. Finish the muscles separately when that helps. And do not confuse a beautiful restaurant trim with the only way to make worthwhile barbecue.
You paid for the whole brisket. Give as much of it as possible a job. Then do not be afraid to fire it up.


