A grill that can handle direct heat, vertical smoking, and a real wood-fired offset cook sounds like a pretty tempting way to reclaim some patio space. But versatility only matters if the food delivers.
So I gave the 48-inch Lone Star Grillz Adjustable Charcoal Grill a proper test: a charity-auction barbecue feast for about 20 people, with a full packer brisket, three racks of St. Louis ribs, eight sausages, chicken wings, and all the fixings. Dinner was scheduled for 6 p.m. Saturday. No pressure, right?
The important questions were not quite the same: Can the LSG Adjustable Grill work as an offset smoker? And should you use it that way? After managing its wood fire through a loaded cook and getting feedback from the guests, my answer is yes, with a few trade-offs worth understanding.
Disclosure: This test involved free product/sponsorship from Lone Star Grillz, and Dalstrong sponsored the production.
Key Takeaways
- The LSG Adjustable Grill successfully handled a real wood-fired offset-style cook for a substantial mixed-meat meal.
- Larger splits averaged about 40 minutes between additions while maintaining visible flames.
- Offset mode limits indirect capacity because one side must remain dedicated to the fire.
- Wind sensitivity and a bolder smoke profile are the main fire-management trade-offs.
Table of Contents
- Why This Was More Than a Quick Brisket Test
- Offset Size: Why Bigger Often Means Easier
- Wood Split Size Is the Key to Fire Management
- How I Set Up the LSG as an Offset Smoker
- Getting a Full Barbecue Meal Ready at the Same Time
- What Worked: Three Advantages
- The Three Trade-Offs You Need to Know
- The Verdict: Can It Be Your Only Smoker?
Why This Was More Than a Quick Brisket Test
If I count the LSG in the offset category, it becomes the eighth offset-style cooker I have owned or tested extensively. My previous testing has included small backyard pits, roughly 100-gallon smokers, and trailer rigs, with extended use to understand fire management, fuel consumption, and flavor.
This was the LSG’s first big, all-day offset-style test for me, not the conclusion of six months of testing this particular grill. I had already cooked chicken halves on it with a real wood fire, and that early result was promising enough to raise the stakes.
Normally, I would use a dedicated offset for this charity meal. Instead, I committed the main smoking work to the adjustable grill. The wings would be cooked at the event, while the brisket and ribs would be prepared ahead and held hot.
Because the food was leaving the house for service, this was not a controlled, side-by-side tasting. The final flavor assessment came from my experience cooking it and the reactions of the people eating it.
Offset Size: Why Bigger Often Means Easier
A small offset is not necessarily the easiest introduction to wood-fired barbecue. In my experience, a larger firebox and cooking chamber usually create a more stable environment. They can accommodate a larger burning split, which means longer intervals between additions and less fiddling.
That is why I hate seeing someone write off offsets after fighting a small, inexpensive backyard pit. Moving up in size can actually make fire management easier.
Compare usable space, not just advertised space
My Oklahoma Joe’s Highland has just over 600 square inches of cooking area. But on the direct-flow offsets I have tested, I generally allow for less consistent cooking zones at both ends: roughly 15 percent near the firebox entrance and another 15 percent near the stack collector.
That is my practical allowance, not a universal specification. The point is that the middle of the grate is where I usually find the most consistent temperatures.
Using the on-screen comparison from this test, the Highland’s 619 square inches becomes about 433 square inches after that allowance. One independent side of the LSG measures approximately 20 by 22 inches, or 440 square inches.
Suddenly, the comparison looks much closer. With one side devoted to the fire and the other to food, the LSG has a usable footprint comparable to the central cooking zone of a small dedicated offset.
It does not replace the capacity of a large pit. But for a family doing occasional briskets and ribs, the idea is much more credible than the grill’s shape might suggest.
Wood Split Size Is the Key to Fire Management
One of the biggest stumbling blocks in offset cooking is choosing wood that is too large for the cooker and target temperature.
I want a visible flame, not a smoldering log. The size and amount of burning wood determine how much heat I am putting into the pit. If a split burns cleanly but sends the temperature well above my barbecue range, the answer is usually a smaller split, not simply choking the fire until it struggles.
Here is how that has played out across my cookers:
- Open-air Santa Maria: Larger splits make sense because there is abundant airflow and no enclosed cooking chamber retaining the heat.
- Roughly 100-gallon offset: A split about 12 inches long has typically given me 40 to 50 minutes between additions.
- Small backyard offset: Cutting that split to about 6 inches and splitting it thinner has typically meant additions every 15 to 20 minutes.
Those are observations from my setups, not guaranteed burn times. But they explain why I was so interested in the LSG’s early performance.
On the chicken-half cook, it maintained visible flames with a larger split and gave me roughly 40 to 50 minutes of useful burn time, approaching an hour in that session. That was much closer to my larger offset than to the small backyard pits.
For the charity cook, I planned to start with smaller splits to learn how they behaved, then move to the approximately 12-inch splits that had already worked well. My target cooking range was 250°F to 270°F.
How I Set Up the LSG as an Offset Smoker
The adjustable grill has two independent, insulated fireboxes. For offset-style cooking, I used one as the heat source and kept the food over the unlit side.
Either direction can work. I chose the left side for the fire and the right side for the food, although the weather later reminded me that this choice deserves a little more thought.
- Choose the fire side. I used the left firebox and its lower intake to supply the wood fire.
- Close the upper vents on that side. The goal was to avoid giving the smoke a shortcut straight out above the fire.
- Open the upper exhaust on the opposite side. This encouraged heat and smoke to travel across the food before leaving the cooker.
- Keep the fire away from the food. I positioned the optional fire-management basket toward the outside of the fire side to help contain the coal bed and increase separation.
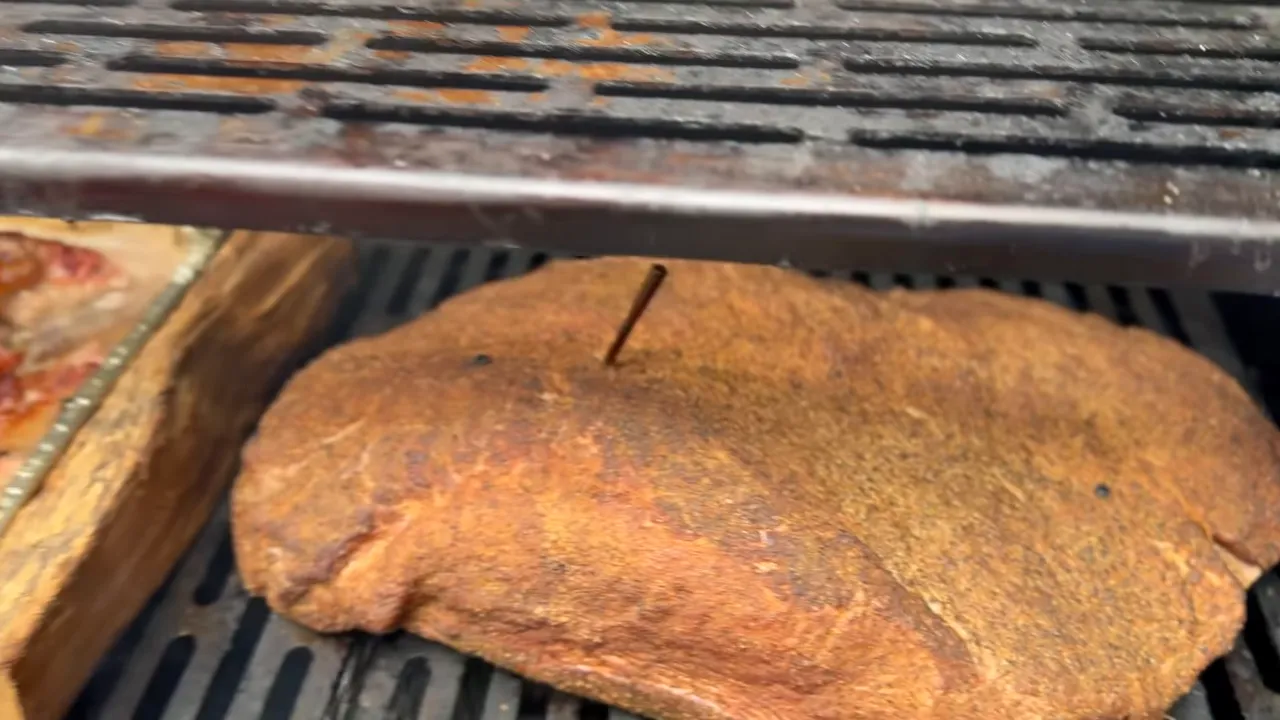
- Add a heat shield at grate level. I placed a wood split between the fire-side area and the meat to help redirect the hottest airflow up and over the food.
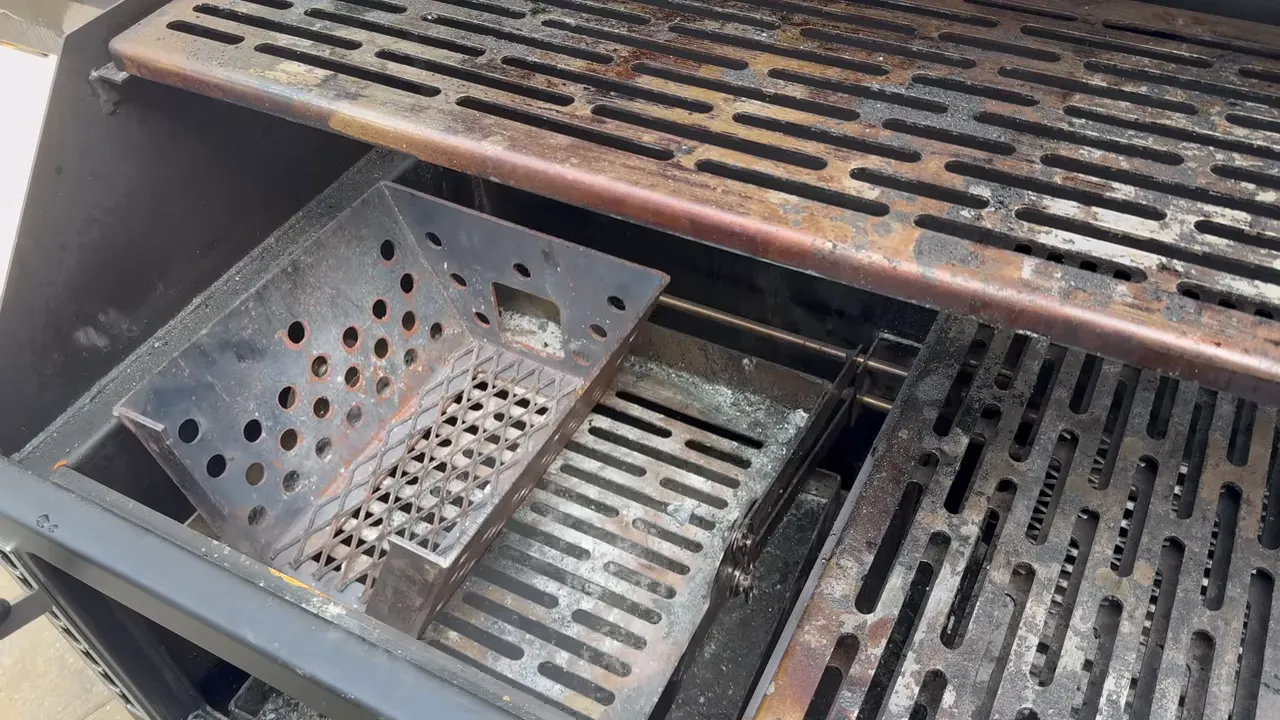
The wood-split shield was an idea borrowed from setups I had seen at Texas barbecue restaurants. It is not a substitute for managing the fire, but it gave me another way to protect the nearest food from the hottest incoming heat.
I also put a pan of brisket trimmings closer to the fire to render into beef tallow. That pan started with about two cups of water, so I did not add a separate water pan.
Getting a Full Barbecue Meal Ready at the Same Time
The grill was only half the challenge. The other half was making sure dinner was ready when the guests arrived, rather than explaining that the brisket had decided to take its time.
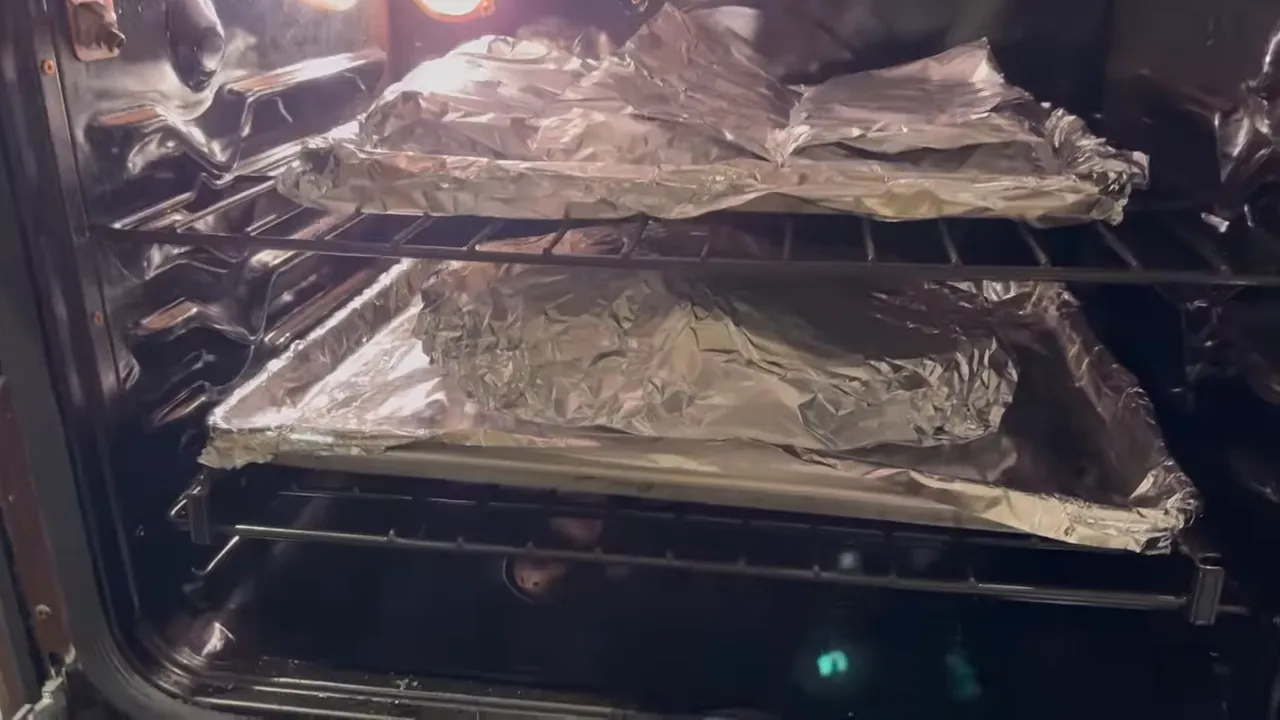
My solution was an overnight hot hold, a method I associate with the consistency and scheduling of top Texas barbecue restaurants.
Why I use an overnight hot hold
Trying to pull a brisket at precisely the right moment can feel like chipping onto a tiny golf green surrounded by water. A long, controlled hot hold gives me a much wider landing area.
Instead of chasing the final serving texture entirely on the smoker, I pull earlier and let the extended warm period become part of the finishing process. It also separates the cooking deadline from the dinner deadline.
For this cook, my planned checkpoints were:
- Brisket: Approximately 190°F to 195°F internal before a roughly 30-minute counter rest, wrapping with tallow, and an overnight hold.
- Ribs: Approximately 155°F to 160°F internal before wrapping with ghee or butter and brown sugar for the extended warm finish.
- Holding oven: Approximately 150°F, using an oven whose normal 170°F minimum I could adjust downward.
Those pull temperatures describe this specific extended-hold method, not ready-to-serve tenderness targets. The ribs, in particular, were not being declared finished when they left the smoker. Temperature alone also does not guarantee that a particular oven, timing, or cut will reproduce the result.
For any overnight hold, verify actual temperatures rather than trusting the oven dial. Keep food at 140°F or above during hot holding, and use appropriate cooking, cooling, and reheating procedures. The USDA safe-temperature chart provides a useful safety reference.
Brisket: dry brine and tallow in the flat
I trimmed the full packer brisket and dry-brined it overnight with Diamond Crystal kosher salt. The idea was to season the meat itself, not just build flavor on the surface.
Diamond Crystal is less dense than table salt, so an equal-volume measure contains considerably less sodium. That distinction matters when changing salt brands; equal spoonfuls are not interchangeable.
Since prime brisket was not available at Costco, I used a choice brisket and injected previously rendered beef tallow into the flat. I think of this as a way to help the leaner section, not a literal change in the meat’s USDA grade. After preparation, it went into the refrigerator overnight.
Ribs: sweet, heat, and savory
The auction winners wanted a more competition-style flavor profile rather than a straight Texas salt, pepper, and smoke approach.
I already had three St. Louis racks trimmed to my preferred middle nine bones from preparation for a friendly backyard competition. Friendly, of course, becomes a very flexible word when rival dads are involved. First place did help.
I used leftover Heath Riles pork injection and brine mixture, then built the seasoning in layers:
- Savory foundation: Salt, pepper, and garlic.
- Color and depth: An additional barbecue rub layer.
- Controlled heat: A spicy rub on the bone side only.
- Sweet finish: Peach rub on both sides.
Putting the spicy layer on only one side gives a little kick without making every bite aggressively hot. I let the seasoning tack up for about an hour before adding the ribs to the smoker, then wrapped them with ghee or butter and brown sugar for the overnight finish.
Chicken wings: prepare ahead, cook at the event
The five pounds of wings went into an overnight refrigerated brine made with two liters of buttermilk and half a cup of salt. After draining and drying, they received the same basic flavor structure: salt, pepper, and garlic, heat on one side, and peach on both sides.
The aim was family-friendly sweet heat, with enough spice to be interesting without taking over. These wings were cooked on site, so they were not part of the LSG’s simultaneous smoking-capacity test.
For safe preparation, avoid rinsing raw poultry, which can spread contamination around the sink. Drain the brine, pat the wings dry, and cook them to at least 165°F internal.
Sausages: separate the smoke stage from service
I also wanted to separate smoking the sausages from their final preparation at the event, with the goal of better control over the casing and interior texture.
My plan was to smoke the eight sausages to about 150°F internal, transfer them to an ice bath, dry them, refrigerate them, and finish them at the event alongside the wings.
Although I initially described that as cold smoking, this was a heated smoking stage. A 150°F reading is not a universal safe endpoint for sausage. Requirements depend on the meat, whether the product is raw or fully cooked, and any validated time-and-temperature process. Do not treat this abbreviated cook log as a safe partial-cook-and-store recipe for raw sausage; follow the product’s instructions and established food-safety guidance.
What Worked: Three Advantages
1. It really can burn wood splits
This was not charcoal cooking with a token chunk of wood added for aroma. I maintained a real wood fire with visible flames, using the same general split size I burn in my larger offset.
That answers the first question decisively: the LSG Adjustable Grill can function as a wood-fired offset-style smoker.
2. Fuel efficiency was a genuine benefit
Across the cook, I added one split approximately every 40 minutes on average. That kept the fire burning and produced the smoke flavor I wanted without the constant small-split schedule of a compact backyard offset.
This matters to me because I enjoy the mobility and social side of a Santa Maria grill. I can roll a cooker out for a neighborhood gathering, but an open-air fire sends a lot of heat into the atmosphere. As the northern weather cools, that can become an expensive habit unless your wood supply is very affordable.
The enclosed LSG gave me a useful combination of mobility, real wood-fire cooking, and heat retention. I did not calculate a total fuel-cost saving here, but the interval between additions was encouraging.
3. The two fireboxes suggest another useful cooking method
This third point is potential rather than a proven result from this cook.
With both a fire-management basket and the optional charcoal basket, I would like to test starting the food over a wood-fired indirect setup, then switching sides and continuing over a charcoal-and-wood-chunk fire for a longer, lower-intervention cook.
That could offer an appealing mix of wood-fire flavor early and easier fire management later. But overnight charcoal performance was not established by this test, and I would not call it hands-off until I had validated it.
The Three Trade-Offs You Need to Know
1. Offset mode uses only part of the grill’s capacity
There is no replacement for displacement. Once one side becomes the fire side, you cannot count the whole grill as indirect smoking space.
I fitted one full packer brisket, three trimmed racks of ribs, and eight sausages by using the available grate levels. That is a respectable amount of food, but it pushed this configuration to its practical limit for my cook.
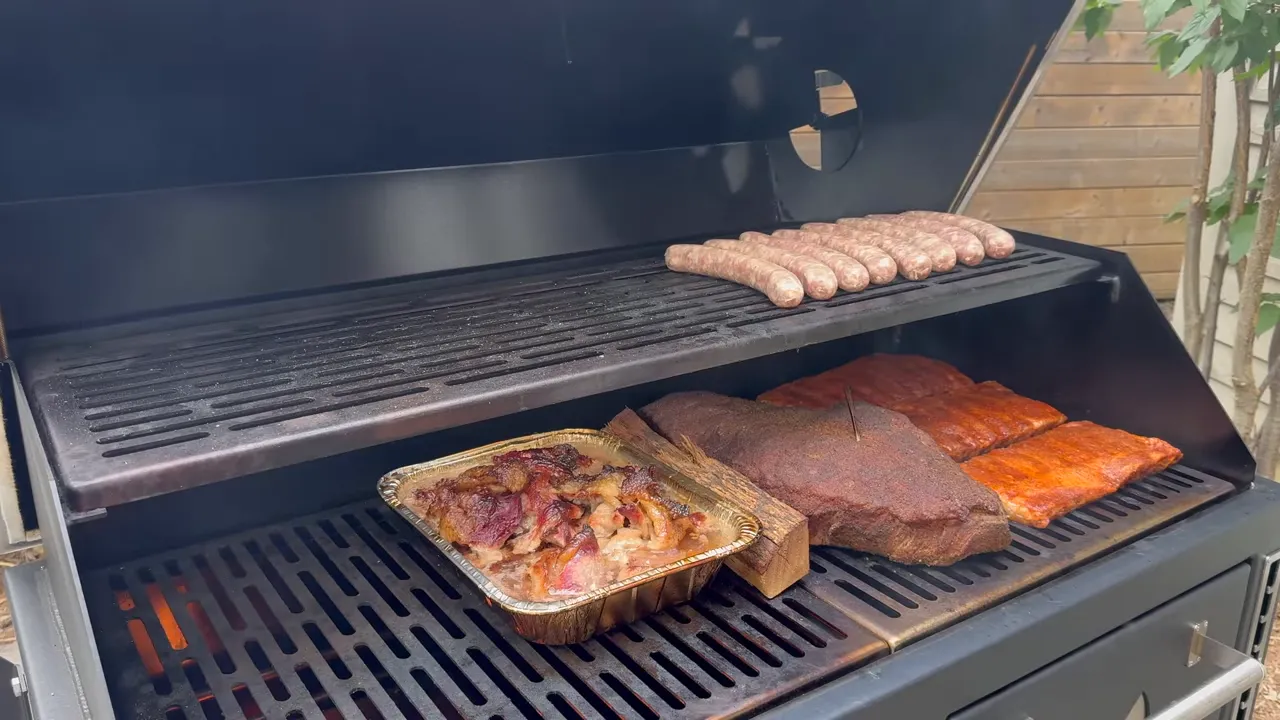
If you routinely need several briskets at once, this is not a replacement for a larger dedicated offset. My meal for 20 also included sides and wings cooked separately, so that head count should not be treated as a fixed capacity rating.
2. The draft was sensitive to wind
The side of my house can turn into a wind alley. I selected my intake and exhaust direction without paying enough attention to that, and strong gusts caused some reverse draw early in the cook.
I moved the grill out of the direct wind, which helped. Still, the experience highlighted a difference between this vent arrangement and the larger, fully heated stacks on some dedicated offsets I have used.
With the LSG, I needed to pay a little more attention to placement, vent adjustment, and what the fire was doing. Choose the cooking location and airflow direction together rather than treating them as separate decisions.
3. The smoke flavor leaned bold
I liked the smoke profile, and so did the guests. But smoke preference is like coffee or wine: bold is not automatically everybody’s favorite.
With one larger split burning visibly and the vents adjusted to maintain 250°F to 270°F, the food landed toward the stronger end of the smoke spectrum. Adding another large split would have pushed the temperature beyond my target.
For a lighter profile, closer to what I have enjoyed at Franklin Barbecue, I would use smaller, approximately 6-inch splits with more open airflow. That means more frequent fire tending.
So the choice is not simply good smoke versus bad smoke. It is a balance between flavor intensity, airflow, split size, and how often you want to feed the fire. This is a familiar compromise on smaller patio offsets, too.
The Verdict: Can It Be Your Only Smoker?
The guests gave the food an enthusiastic two thumbs up. Nothing in their feedback suggested they felt shortchanged by the smaller cooker, and I was very happy with how the meal came together.
For someone cooking three or four briskets a year, occasional ribs, and plenty of other meals over direct heat, the LSG Adjustable Charcoal Grill makes a strong case for itself. Its advertised versatility includes vertical smoking and direct grilling, while this cook demonstrated that occasional real wood-fired offset cooking is comfortably within its abilities.
I would choose a larger dedicated offset if frequent, high-capacity wood-fired smoking were the main job. I would also expect to do more fire-management work if an especially light smoke profile were the priority.
But if the question is whether one versatile backyard grill can scratch that occasional offset itch and still turn out a serious barbecue feast, my gamble paid off.
It can. Just buy it for the way you actually cook, not for the number of jobs on a feature list.
Thanks to Dalstrong for sponsoring this project. Their knives are a regular part of my barbecue preparation because I enjoy their sharpness, reliability, and design.
|


