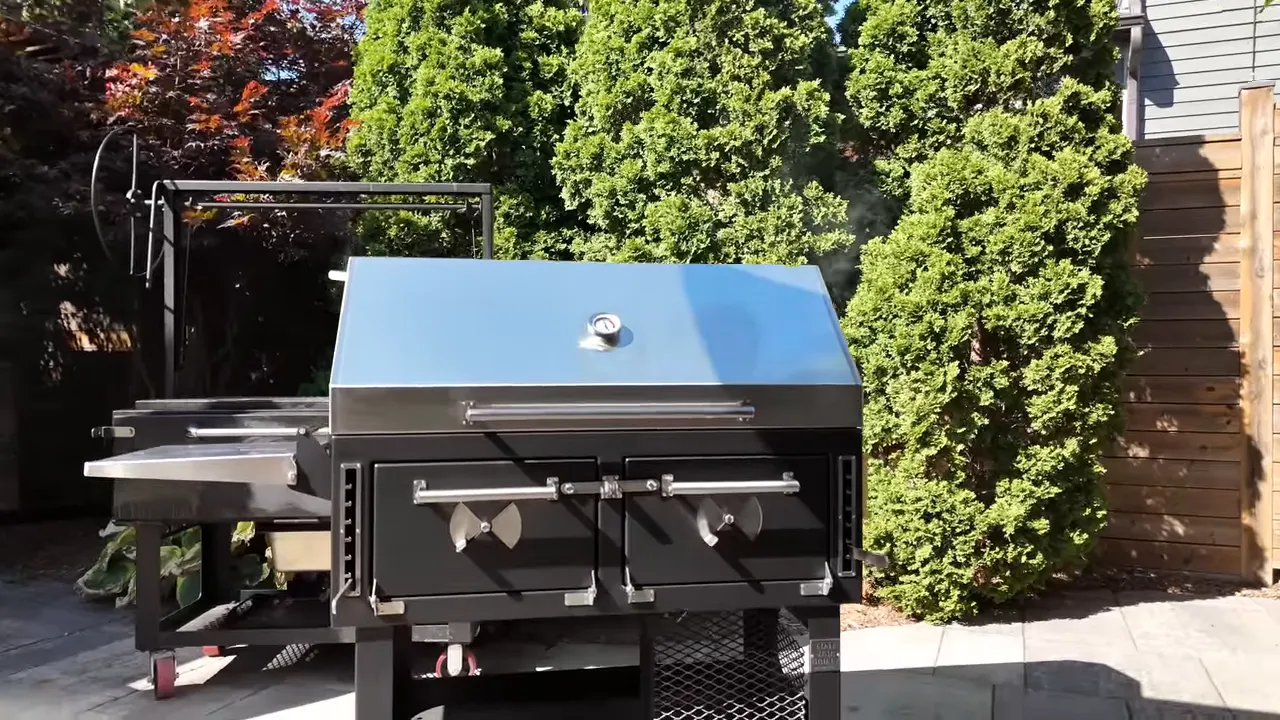
Some of my favorite barbecue bites in Texas weren't brisket. They were backyard-style chicken halves cooked by Cooper at Bar-A-BBQ. That chicken sent me down a rabbit hole that ended with a Lone Star Grillz 48 x 24-inch adjustable charcoal grill in my backyard.
The appeal is simple: offset-style smoking, vertical smoking, and direct heat cooking in one cooker. Add independently adjustable fireboxes, a covered cooking chamber, and plenty of room, and this starts to look like a very interesting replacement for my Santa Maria grill.
But versatility on paper is one thing. Managing a wood fire and putting juicy, smoky chicken on the dinner table is another. For the first cook, I wanted to find out whether this grill could keep the live-fire experience I love while addressing some of the practical challenges of an open Santa Maria.
Disclosure: Lone Star Grillz provided product/sponsorship for this first look and cook. Dalstrong also sponsored the cook.
Table of Contents
- Key Takeaways
- How a Texas Chicken Cook Started the Search
- Why Replace a Santa Maria Grill?
- Three Ways to Use the LSG Adjustable Charcoal Grill
- First Cook: Bar-A-BBQ-Inspired Smoked Chicken Halves
- A Sweet and Tangy Rib Glaze for Chicken
- Crisp the Skin, Then Set the Glaze
- First-Cook Verdict: A Very Promising Starting Point
Key Takeaways
- Independent fireboxes and vents support offset-style smoking, direct grilling, and vertical smoking in one cooker.
- The covered design addresses my Santa Maria concerns about fuel use, weather exposure, and storage.
- Smoke chicken indirectly, crisp the skin with controlled direct heat, then set the glaze away from flames.
- The first chicken cook was encouraging, but brisket, overnight performance, and winter efficiency still need testing.
How a Texas Chicken Cook Started the Search
At Bar-A-BBQ, I had a chance to cook alongside Cooper and experience his Low Country direct heat cooker. I loved using it, but more importantly, I loved the food coming off it.
There's something different about direct heat. I already knew that from my Santa Maria, but Cooper's covered cooker offered another advantage: it wasn't immediately sending all that heat into the atmosphere.
Then I got home and looked up his cooker. The price was $13,500. That was a little outside my snack bracket.
There are smaller Low Country models, along with options from companies such as Pitts & Spitts, Chud, and Lone Star Grillz. My search wasn't an exhaustive comparison of every direct heat cooker available, but when I compared cost against cooking area, the LSG stood out for value.
I also had a good experience with my Lone Star Grillz Santa Maria. Meeting Chris and the team and visiting their shop had given me confidence in both the people and the construction. The combination of value, build quality, and flexibility pushed this adjustable charcoal grill to the top of my list.
Why Replace a Santa Maria Grill?
I originally picked up a backyard Santa Maria to answer a bigger question. I've had this dream of a barbecue trailer with an offset smoker, and many of those rigs offer a Santa Maria as an option. Before committing to the whole setup, I wanted some hands-on experience.
I'm glad I did. It taught me exactly what I love about that style of cooking, along with what doesn't fit quite as well into my climate and routine.
Three Things the Santa Maria Does Brilliantly
- Flavor: Rotisserie hog, turkey, picanha, chicken, and everything else I've cooked on it have delivered outstanding results. Fuel is flavor, and live-fire cooking makes that connection very clear.
- The social experience: This is a barbecue party machine on wheels. Roll it out front with the neighbors or serve straight from it in the backyard, and people naturally gather around.
- Capacity: A large direct grilling surface lets me cook for a group without managing several fires across several different grills.
That last point matters even if you own plenty of cookers. Having enough equipment isn't always the same as having an easy cook. Sometimes one large fire and one generous cooking surface are exactly what you want.
Three Practical Holdbacks
First, fuel consumption. An open grill loses a tremendous amount of heat upward. That's less bothersome on a beautiful summer day, but it becomes much more noticeable through a cold spring, fall, or winter. In my experience, the Santa Maria has produced my most expensive cooks for fuel.
If you've got a convenient wood supply, that may not concern you. If you're buying and hauling all your cooking wood, it's worth thinking through before committing to an open-fire cooker.
Second, maintenance in a damp climate. I bought the upgraded cover, but I wish I'd also chosen stainless steel grates. The carbon steel grates still wanted to rust through our cold, wet months. A cover helps, but it didn't eliminate that maintenance.
Third, you're right beside the fire. That's part of the charm, but in the middle of summer it can be seriously hot. There have been cooks where the routine was almost tend the food, cool off in the pool, and repeat.
None of these points makes the Santa Maria a bad grill. They're reasons that my next cooker needed to preserve the flavor, capacity, and social side while making the rest a little easier.
What the Covered LSG Changes
The adjustable charcoal grill has a gasketed cooking chamber, dual-wall insulated fireboxes, and a substantial 304 stainless steel hood. Those features give it a better starting point for retaining heat than an entirely open cooker, although long-term efficiency still needs more testing.
It also remains mobile, offers a large cooking area, and fits in my shed. That last detail is a bigger benefit than it sounds. My Santa Maria's side brasero, tall rotisserie structure, and wheel make storage challenging. Being able to put the LSG away once it's completely cool should make caring for it inside and out much easier.
Three Ways to Use the LSG Adjustable Charcoal Grill
The full product name is a mouthful. The easiest way to understand it is as three cooking arrangements sharing one chamber.
1. Offset-Style Smoking
This isn't a traditional offset with a separate firebox hanging off one end. Instead, it has two independently controlled fireboxes beneath a shared cooking chamber, with separate lower air intakes and upper exhaust vents.
To establish left-to-right airflow:
- Build the fire in the left firebox.
- Open the left lower air intake.
- Close the left upper exhaust.
- Close the right lower air intake.
- Open the right upper exhaust.
- Place the food on the right, away from the fire.
The idea is to bring air into the fire side, draw heat and smoke across the food, and exhaust it from the opposite end. You can reverse that arrangement to run the fire on the right.
That gives this grill offset-style functionality, but a proper brisket cook is still on my testing list. This chicken cook was an opportunity to learn how the fire behaves before risking a brisket.
2. Direct Heat Grilling
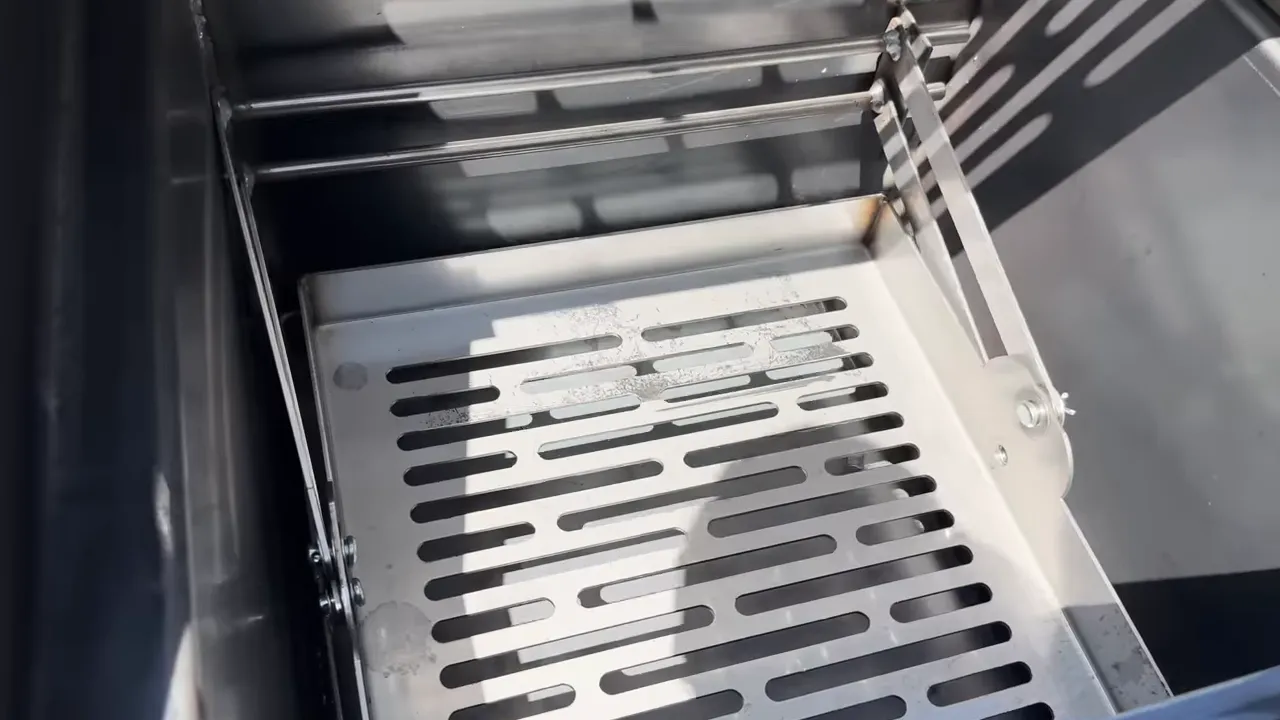
Each firebox raises and lowers independently. There's roughly 16 inches from the bottom to the top of the firebox area, with almost 12 inches of adjustment available. I added the cool-arm levers for operating that adjustment.
Instead of moving the food grate up and down as on a Santa Maria, you're changing the fire's distance from the food.
You can use one side or both sides, with 48 inches of cooking width available. That is a lot of real estate for a backyard gathering. There's even enough left-to-right space to contemplate a suitably sized whole hog, though that wasn't part of this first test.
3. Vertical Smoking
The cooking racks have about 8 inches of clearance between the lower and upper positions. That matters much more with bulky food than it does with a rack of ribs.
I learned that lesson cooking multiple 5 to 8-pound pork shoulders on a kamado. With roughly 5 inches of clearance in that setup, the lower shoulders wouldn't fit beneath the upper rack. I ended up propping the rack up with foil balls to gain a little more room.
The extra clearance here should be much more accommodating. For vertical smoking, the fire can sit low and the food high, with drippings falling onto the charcoal or wood below. Alternatively, you can combine the upper rack with an offset-style arrangement to keep the fire away from directly underneath the food.
Construction Details and Optional Baskets
The details are part of what impressed me. The fire grates, hardware, and internal metal components described in this setup use heavy-gauge 304 stainless steel. The fireboxes have dual-wall insulation, and there's an insulated divider between them.
The adjustment mechanism is also isolated from outside air. The visible lever opening isn't simply an uncontrolled air leak into the firebox. That's the sort of small construction detail that inspires confidence.
I added two optional accessories:
- A charcoal basket: Intended to hold a larger charcoal load for longer cooks. An overnight run without adding fuel is something I still want to test.
- A fire management basket: Holds wood splits in a tighter group to help maintain a concentrated coal bed.
Neither basket is required to burn a live wood fire. For the first cook, I chose the fire management basket.
First Cook: Bar-A-BBQ-Inspired Smoked Chicken Halves
Chicken halves were the obvious starting point. They were what inspired the search, and they gave me a chance to try indirect smoking, direct heat crisping, and glazing in one cook.
Prep and Season Three Chickens
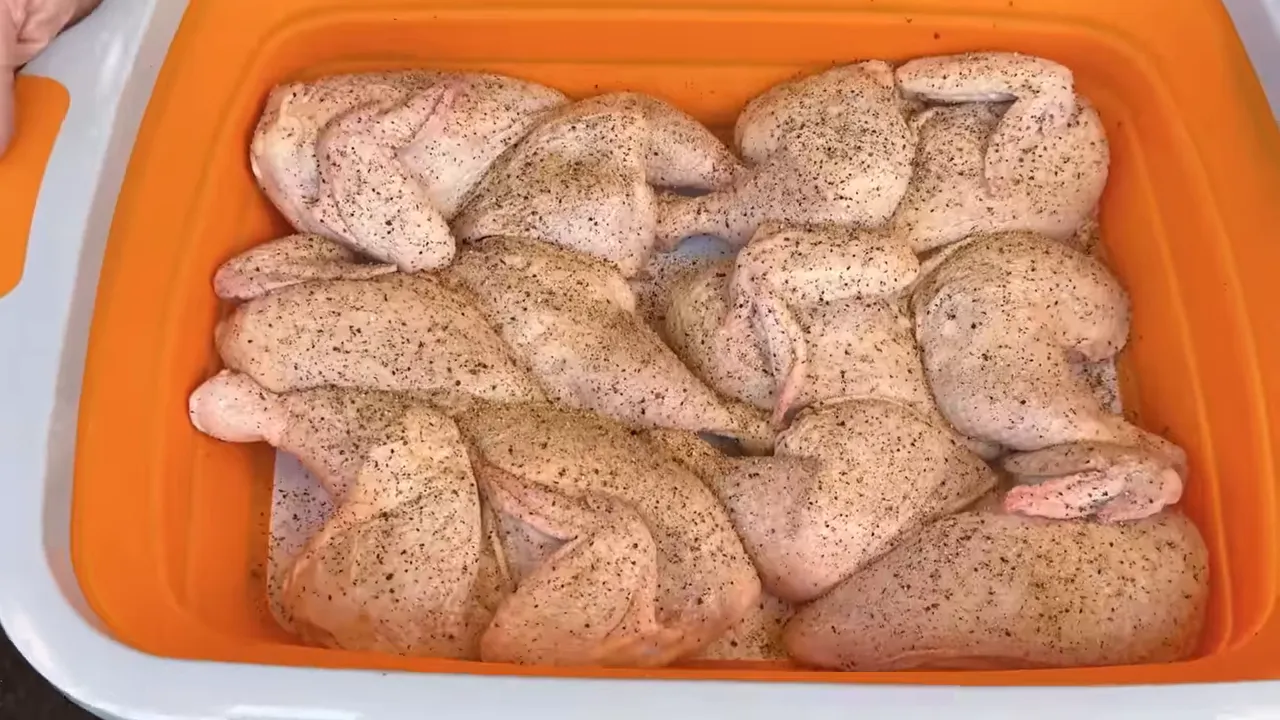
I started with three whole chickens, divided into six halves. Cut along the backbone and split each bird into halves, keeping enough rib cage and cartilage intact to support the pieces.
For a regular spatchcock chicken, I sometimes spend more time removing rib bones. Here, I wanted that structure left in place so the halves would hold together during handling.
The seasoning is straightforward:
- Freshly cracked coarse black pepper, approximately a 16-mesh grind.
- Seasoning salt on both sides.
My Pepper Cannon was set about 23 clicks back from its finest setting, which gives me approximately the pepper texture I use in many barbecue rubs.
Cooper uses Rio seasoning salt. I've also tried Fiesta and Lawry's, and they're similar enough for this purpose that I wouldn't ship a bottle across the country if another suitable seasoning salt were available locally.
Season both sides, then refrigerate for a short dry brine while getting the grill ready. I didn't use a fixed overnight brining schedule for this cook.
Start With Charcoal, Then Add Post Oak
I put a bed of charcoal in the fire management basket and lit it with my GrillGun. Once that was building heat, I warmed a post oak split near the fire before adding it.
The goal was to get the wood warming and shed some surface moisture so it would ignite cleanly. Then I closed the cooker, gave the fire air, and adjusted based on the temperature rather than assuming I already knew this grill's ideal vent positions.
The chicken went on the indirect side. During the cook, the temperature near the food tracked around 230 to 240°F.
At about 45 minutes, I added the second wood split. That was an encouraging early result. Based on my open-fire cooking experience, I would have expected to use dramatically more wood over that period on the Santa Maria, perhaps eight to ten times as much.
That's a first-cook observation, not a controlled fuel-efficiency test. Still, it immediately made me feel better about one of the main reasons for changing cookers.
Check More Than One Chicken
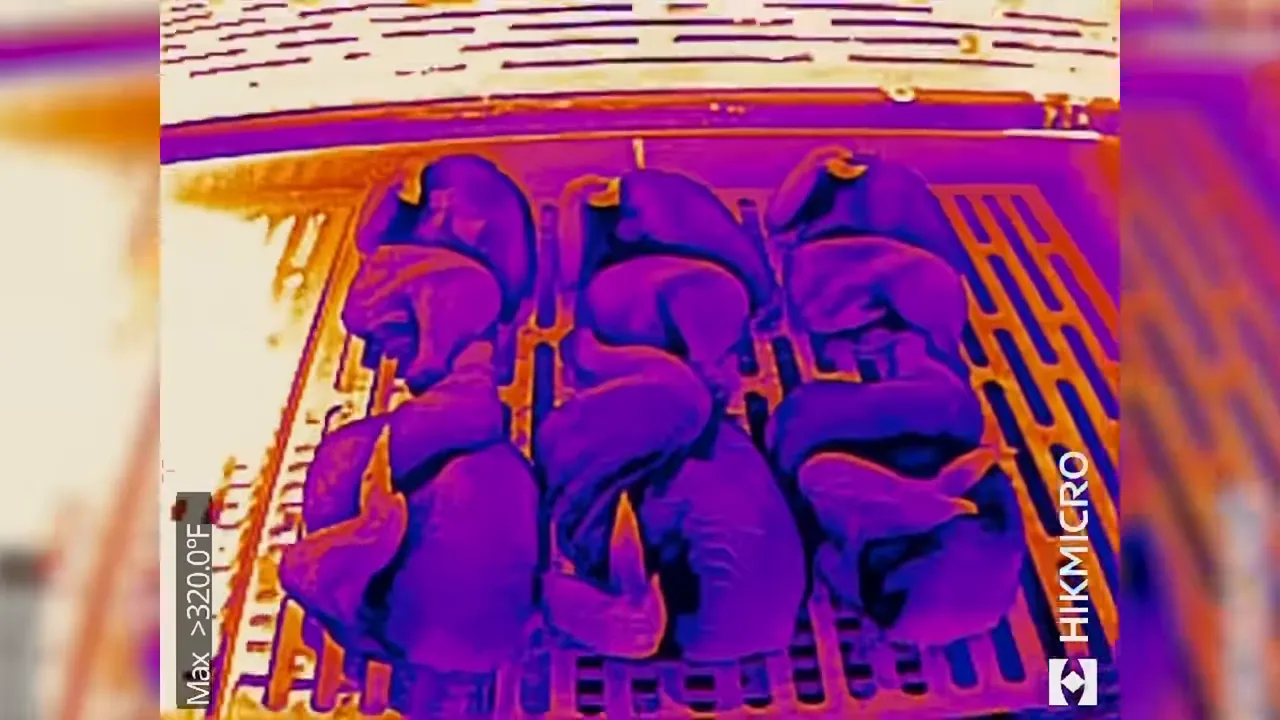
I only had a continuous probe in one piece, so I checked several other breasts with an instant-read thermometer. The pieces were tracking closely, with the chicken nearest the fire just a few degrees ahead.
I rotated them to even things out. An infrared inspection also showed the pattern I wanted: substantial heat on the fire side and a cooler zone where the chicken was cooking.
A Sweet and Tangy Rib Glaze for Chicken
Cooper's rib glaze is excellent on chicken. He has an updated paid recipe, which I purchased, but this batch follows the earlier version he shared publicly rather than giving away that newer recipe.
I scaled the batch to make just over a liter. Here's the ingredient lineup:
- 1 1/4 cups ketchup
- 1/3 cup brown sugar
- 1/3 cup white sugar
- 2/3 cup honey or maple syrup
- 1/3 cup apple cider vinegar
- 1/3 cup white vinegar
- 1/3 cup water
- 1/3 cup Worcestershire sauce
- 2 teaspoons black pepper
- 2 teaspoons cumin
- 2 teaspoons onion powder
- 2 teaspoons garlic powder
Mix everything thoroughly. I like maple syrup here. It's an option I suggested to Cooper, and it mixes into the glaze a little more easily than honey.
For spraying the chicken, I thinned the glaze with about another 1/3 cup of water. The aim was a lighter coating than the normal rib glaze, with enough time left in the cook for it to tack up.
Crisp the Skin, Then Set the Glaze
The original plan was to start moving the chicken toward direct heat as the breasts approached about 140°F internally, then give the skin 10 to 15 minutes to crisp.
The fire had other ideas.
That second split still had more energy than I wanted. Putting the chicken immediately above the flame would have torched it, so I used the grill's available height and adjusted the fire instead of blindly sticking to the schedule.
The useful lesson is to respond to the fire you've got, not the fire you expected. A controlled coal bed and an actively flaming split aren't interchangeable when you're cooking chicken skin.
The skin was already in good shape from the smoking stage. It needed only about five minutes skin side down before I moved the halves back to the cooler side.
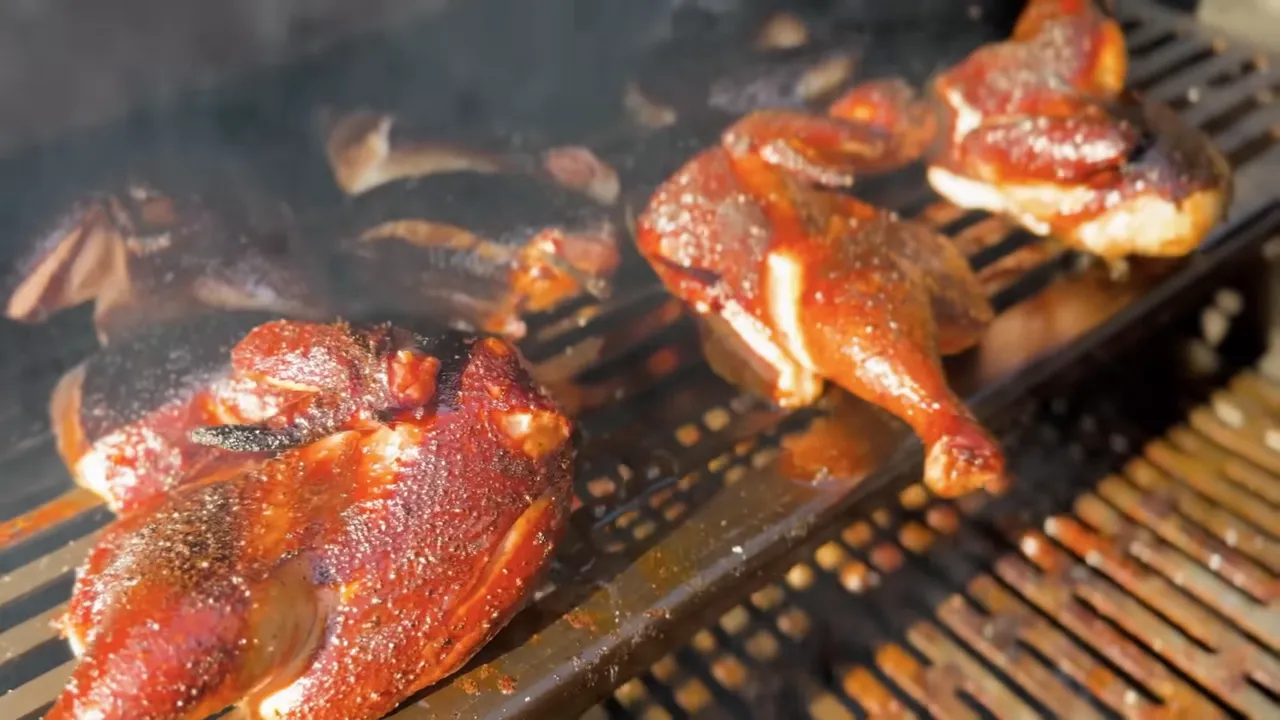
With roughly 20 minutes left in the cook, I sprayed on the diluted glaze and let the chicken finish indirectly. That gave the glaze time to set without exposing all that sugar to the most aggressive heat.
A Note on Temperature and Timing
The cook was pacing toward roughly 90 minutes, similar to the method I'd used with Cooper. Treat that as a planning estimate, not a promise. Fire intensity, chicken size, rack position, and weather all affect the finish.
I had set a 150°F probe target during the cook, but that setting alone is not a complete food-safety instruction. For a straightforward home-cooking endpoint, follow the USDA safe minimum internal temperature guidance of 165°F for poultry, checked with a food thermometer. The 140°F point above is a cue to begin the crisping stage, not a serving temperature.
First-Cook Verdict: A Very Promising Starting Point
The finished chicken had excellent color, noticeable smoke, nicely textured skin, and plenty of juice. Even the breast meat was a treat. For a maiden voyage on an unfamiliar cooker, I was very happy.
More importantly, this cook demonstrated useful flexibility rather than just a long feature list. I could run a wood fire on one side, smoke the chicken on the other, use height to manage the crisping stage, then return the food to indirect heat to set the glaze.
There are still things to prove. I haven't yet established overnight charcoal performance, tested it through winter, or put a brisket through a full offset-style cook. Those are separate tests, and I'm not going to pretend one batch of chicken answers all of them.
But the early signs are encouraging: substantially lower wood use than I'm accustomed to with open-fire cooking, closely matched chicken temperatures across the indirect zone, and the ability to change cooking methods without lighting another grill.
I've always found that the first cook on a new grill is rarely your best. If this is the starting point, we're in for a treat. Don't be afraid to fire it up.
Thanks to Dalstrong for sponsoring the cook. Their knives are tools I regularly reach for because of their sharpness, reliability, and feel in the hand.
|


