This used Kamado Joe was supposed to be a roughly 90% off steal. After getting it back together and cooking dinner for my family, I thought the hard part was behind me.
Then I removed the cover, sent the Kontrol Tower top vent crashing onto the patio, and found myself staring at another broken part.
That is how a bargain grill starts to feel like death by a thousand parts. But before buying a replacement vent, I wanted to answer two questions: could I repair the broken hardware, and could I finally get rid of that flaking paint?
The good news is that my repair worked. The bigger question was whether this Facebook Marketplace rescue still made financial sense after the necessary replacements and a few upgrades I couldn't resist.
Key Takeaways
- An M6 threaded repair restored my broken Kontrol Tower without buying a replacement vent.
- Removing flaking paint and polishing cast aluminum worked, but required hours of sanding.
- Extra chimney gasket material corrected the loose fit that caused my vent to fall.
- Necessary repairs and optional upgrades brought the total to CAD $920, still 63% below new.
Table of Contents
- Why the Kontrol Tower Fell Off
- How I Repaired the Broken Kamado Joe Top Vent
- Removing the Flaking Paint and Polishing the Cap
- Fixing the Loose Fit So It Wouldn't Happen Again
- The Mandatory Replacement Parts
- The Optional Upgrades and Why I Chose Them
- Did Buying a Used Kamado Joe Actually Save Money?
- Still a Smoking Deal, Just Not a Parts-Free One
- Help Me Improve My Kamado Guides
Why the Kontrol Tower Fell Off
My project started with a damaged Kamado Joe Classic II. Its original dome had been destroyed, and I brought it back to life using a Series I replacement dome I found secondhand, along with some persuasion to straighten damaged hardware.
What I missed was the difference in gasket thickness around the chimney. The Series I material was thinner than the material used on the Series II and III, leaving my Kontrol Tower barely gripping the dome.
The cover caught the vent. When I pulled the cover away, the vent came with it and hit the ground, breaking the screw that connects the vent components.
The important lesson is to check the fit, especially when mixing replacement parts from different grill generations. A cap can look properly installed while having very little holding it in place.
How I Repaired the Broken Kamado Joe Top Vent
A replacement Kontrol Tower was about $110 at my local barbecue store. That was more than I had paid for the replacement dome, so repairing it was worth a try.
This was a repair to a broken connection screw, not a way to rebuild missing chunks of cast aluminum. The vent components themselves were still usable.
The hardware and tools I used
- An Allen key to attempt removal of the original screw
- A drill and suitable drill bit to remove the broken metal
- An M6 tap to cut replacement threads
- An M6 bolt and a securing nut
- A grinder to create clearance for the replacement hardware
I started with the least destructive option: trying to back out the screw with an Allen key. No luck. That meant moving to the drill.
- Drill out the broken screw material. I removed the remaining damaged metal from both mating components.
- Cut new threads. Using an M6 tap, I rethreaded the connection so an M6 bolt could hold the pieces together.
- Install the replacement bolt. The new hardware restored the connection between the vent components.
- Add a nut for extra security. I wanted some additional insurance as the assembly went through heating and cooling cycles.
- Check clearance. I had to grind the replacement hardware slightly so it would fit within the vent's internal profile without interference.
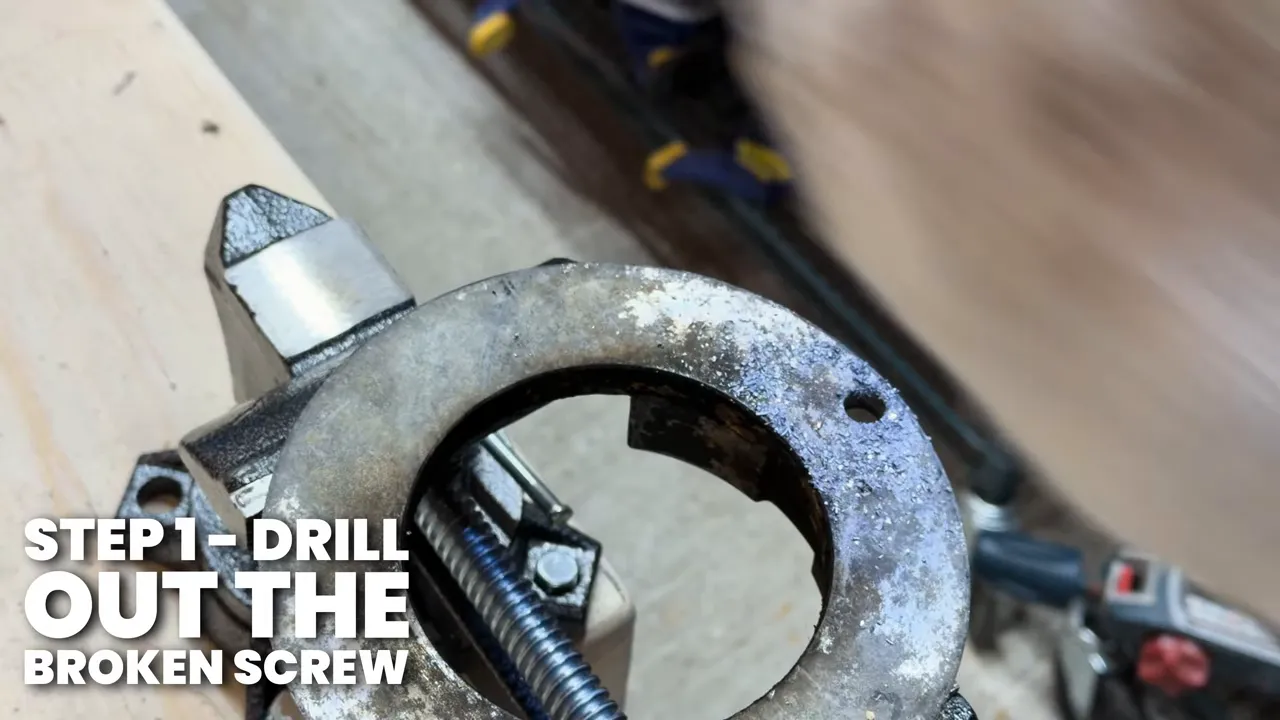
Color me impressed. The cap was back together and working, and the replacement screws cost only a few dollars. In my final accounting, I allowed roughly $6 for them.
There was a definite Red Green moment here. I might not have improved my looks, but at least I had managed to be handy.
That successful repair does not prove every dropped vent is repairable. It does show that a snapped screw does not automatically mean buying an entirely new Kontrol Tower.
Removing the Flaking Paint and Polishing the Cap
I could have stopped with a functioning vent. Perhaps I should have. Instead, the repair gave me enough confidence to tackle something that had bothered me for years: peeling paint.
I like how the Kontrol Tower provides rain protection and easy, repeatable vent settings. What I don't like is a painted surface above the cooking chamber that can shed flakes. Mine already had peeling paint, weathering, and fresh damage from the fall.
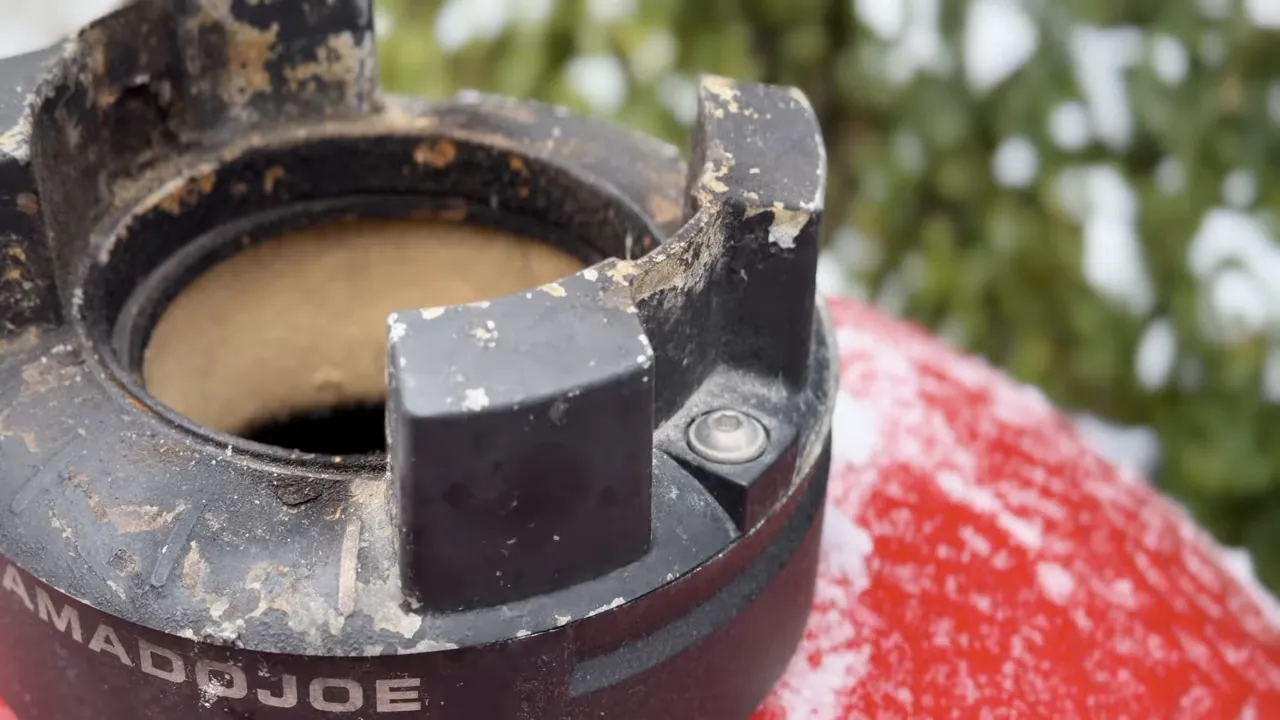
The stainless steel cap on the Kamado Joe Pro Joe gave me an idea. Could I polish this cast aluminum vent enough to get a similar premium appearance?
To be clear, polishing aluminum does not turn it into stainless steel. I was chasing the look, not changing the material.
My sanding and polishing sequence
I started with coarse sandpaper at about 80 grit to remove the old coating, then progressed through finer abrasives, including approximately 200, 300, and 400 grit, eventually reaching 1,000 grit.
That progression matters because stripping the paint and creating a polished surface are two different jobs. The coarse abrasive gets the coating off. The finer stages work toward reducing the scratches left behind.
After sanding, I used polishing compound and aluminum polish to bring up the shine.
It had been more than two decades since I last polished cast aluminum. I remembered that it required elbow grease. Apparently, I had forgotten just how much.
Cast aluminum also retains some porosity from the casting process, so the goal was a much cleaner, brighter finish, not a guarantee of a flawless machined mirror surface.
Somewhere in the middle of all that work, I rummaged through the garage and found a brand-new SmokeWare chimney cap. I could have simply installed it.
Wonderful timing.
But by that point, the project was about finding out whether the original cap could be repaired and refinished. After hours of sanding and polishing, I was happy with the result.
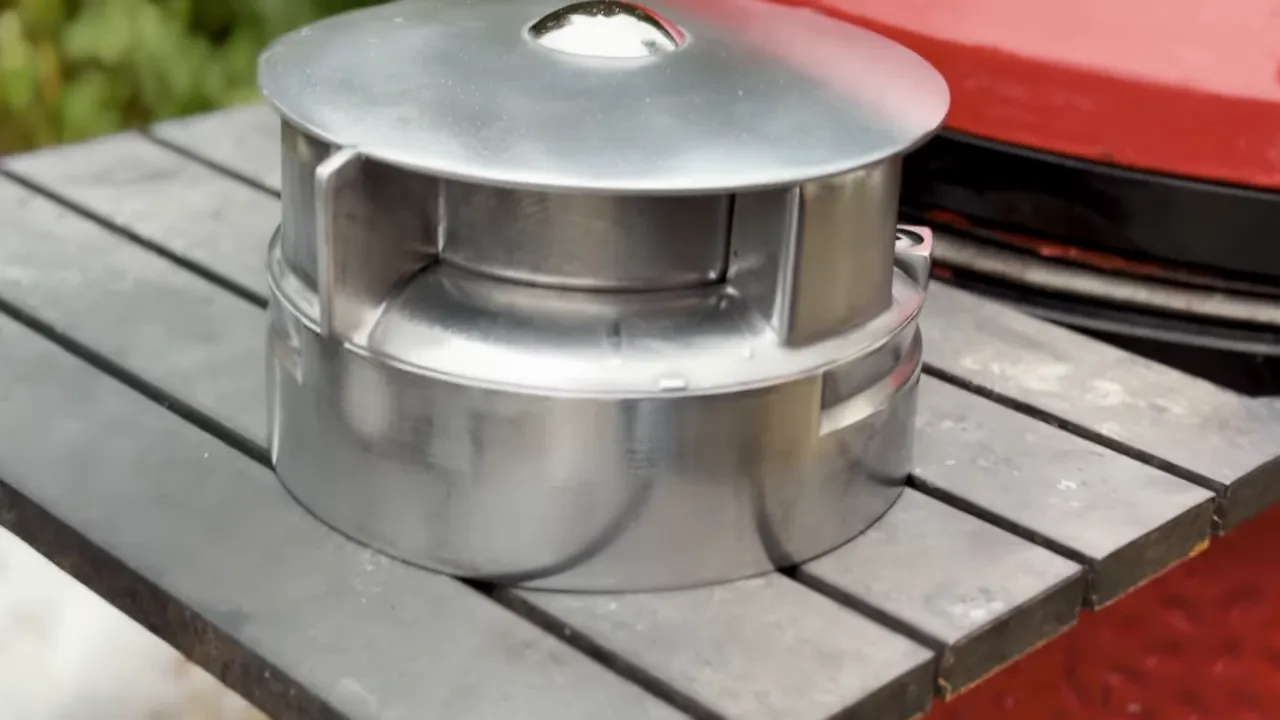
The refinishing added no separate cash expense in my project accounting because I used supplies I already had. That is very different from saying it took no resources. If you need to buy abrasives, polishing supplies, or tools, include those costs. And please budget plenty of time.
Fixing the Loose Fit So It Wouldn't Happen Again
A shiny repaired vent would not be much of a victory if the cover knocked it off again.
I cut an extra strip of felt gasket material and added it around the chimney to tighten the fit. I had spare material available, but the inexpensive replacement felt I had bought online was roughly $10 to $15.
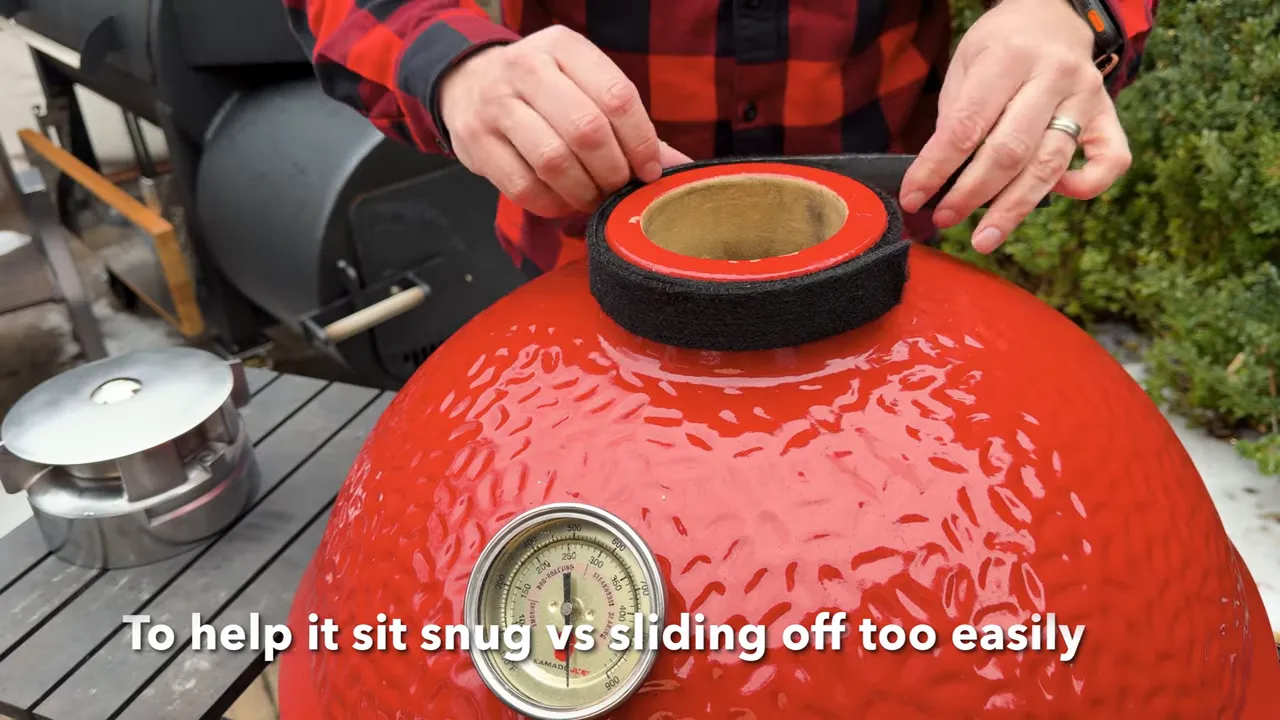
With the added material, the cap seated snugly instead of barely hanging on. I checked that it stayed in place when opening the dome, and I now had a much better fit for removing the cover as well.
Repair the damage, but also correct what caused it. In this case, the M6 hardware fixed the broken connection. The extra gasket addressed the loose mounting fit.
The Mandatory Replacement Parts
Once the vent was sorted, I could get back to the boxes of parts. I separated these into necessary replacements and optional upgrades, because otherwise it is very easy to blame the used grill for every accessory I personally wanted.
The individual reference prices below are in US dollars. They reflect the prices used during this project, not a current quote.
X Accessory Rack: $21.99
The X accessory rack was missing. I needed it to support the heat deflectors for my indirect setup, making this a necessary replacement for how I planned to use the grill.
When I collected the damaged grill, its pieces were scattered around the yard. I was focused on getting it gathered up and getting the ice and moisture out, and I missed this absent component.
Heat Deflectors: About $79.99 at the Kamado Joe Reference Price
The original heat deflectors had been destroyed in the fall and were also missing. That became very obvious when I started preparing for an indirect cook.
I bought generic replacements from Amazon for approximately 30% to 40% less than the branded parts. They looked comparable when installed, but I had not yet established their long-term durability. For the price comparison, I used the Kamado Joe reference price.
Dome Temperature Gauge: $24.99
The existing thermometer was not simply reading a little off. Its adjustment mechanism no longer worked.
Normally, the screw on the back allows calibration, but I could not bring this gauge anywhere close to accurate. Whether the fall caused the failure or not, it needed replacing.
The new gauge also looked considerably fresher than the yellowed old one, although appearance was not why it landed in the mandatory category.
The Optional Upgrades and Why I Chose Them
Kick Ash Basket and Can: Easier Cleanup
The Kick Ash Basket and Can were my biggest optional expense, with a combined reference price of $183.
Strictly speaking, the grill did not need them to cook. For my own cleanup preferences, though, they are close to mandatory.
I removed the stock charcoal grate, installed the can below the firebox, and dropped the charcoal basket into place. The basket helps keep the charcoal bed breathing and makes it easier to separate reusable charcoal from ash. The can gives me a removable container for cleanup.
The factory ash system is useful, but in my experience, depending on the model and the cook, ash can fill the collection area or get trapped behind the firebox. You can clean that out by hand. I simply prefer a setup that makes the job faster.
Series III Divide & Conquer Rack: $74.99
This is the upgrade I was most interested in from a cooking standpoint.
The Series III rack raises the cooking surface roughly an inch or two above the felt line in this Classic setup. I test-fitted it and confirmed that the dome still closed.
For nearly two years, I had been working with an engineering university to better understand what happens inside kamado-style grills. One practical takeaway guiding my setups is the value of cooking higher in the dome.
The taller rack also allows me to use a half grate in a higher position while keeping better access to the fire below. That gives me some of the flexibility I enjoy with sliding rack arrangements on my Big Green Egg setups, even though the Kamado Joe rack does not slide.
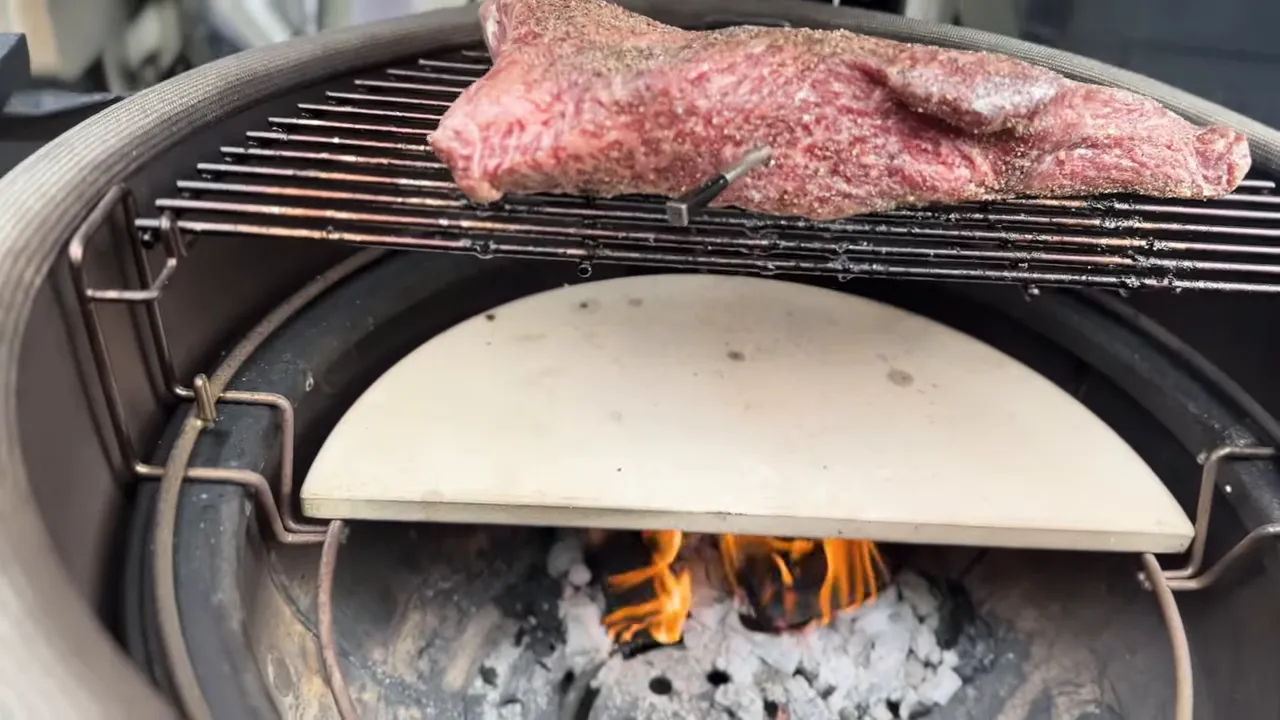
At $74.99, the Series III Divide & Conquer rack was a more economical way to gain that height and access than the alternative rack systems I was considering. For a Classic I or II owner interested in that flexibility, it is an upgrade I rate highly.
Stainless Steel Handle: $39.99
I had straightened the original damaged handle enough to use it, but some rough edges remained. Even after sanding, it was abrasive enough that I cut my finger.
I classified the replacement as optional because the old handle was still usable, but I did not want to keep grabbing something sharp. The stainless version cost a little more than the standard black replacement and matched the look I hoped to achieve with the polished vent.
Replacement Latch: $24.99
The original latch had also been hammered back into shape. Unfortunately, a mallet is not a precision alignment tool.
It remained slightly skewed, and at some temperatures it became awkward to line up. A new latch made everyday operation easier. Adding it also pushed my parts order over the free-shipping threshold, saving more in shipping than the latch cost.
Here is a useful installation detail: leave the latch hardware finger-tight until you close the dome and check alignment. Once the parts line up, tighten everything. That can save you from immediately having to loosen it again for side-to-side or vertical adjustment.
Did Buying a Used Kamado Joe Actually Save Money?
It certainly felt as though the credit card was getting a workout. But feelings are not a budget, so I added everything up.
My project totals were:
- Original purchase and initial restoration: CAD $300. This was the starting project investment, including getting the damaged grill back together.
- Additional mandatory components: CAD $175. These brought the necessary-repair total to CAD $475, approximately US $344.
- Optional upgrades: CAD $445. This included the handle, latch, taller rack, and basket-and-can setup.
- Complete project total: CAD $920, approximately US $665.
The comparison price for a new grill was CAD $2,500. At CAD $920 all-in, I was still approximately 63% below the cost of buying new.
Those project totals are separate from the individual US-dollar reference prices above. In particular, I bought less expensive generic deflectors rather than paying the branded reference price.
The repaired vent also avoided a roughly $110 replacement purchase. The hardware was inexpensive, while the polishing mostly cost me time, effort, and a little questioning of my life choices.
What I Would Check More Carefully Next Time
I should have spent a few more minutes inventorying the parts before buying. Even though the listing described the package as complete, I missed the absent X rack and deflectors. Catching those items could have helped me negotiate.
For a used kamado inspection, my experience points to a practical checklist:
- Confirm that the cooking racks, accessory supports, and heat deflectors are present.
- Check whether the thermometer can still be adjusted.
- Inspect repaired handles and latches for rough edges and alignment problems.
- Check the top vent's fit, particularly if the dome or gasket has been replaced.
- Separate the cost of making the grill functional from the cost of making it yours.
Warranty coverage also belongs in the buying decision. Before assigning value to any warranty on a secondhand grill, check the manufacturer's current warranty terms rather than assuming coverage follows the grill.
Still a Smoking Deal, Just Not a Parts-Free One
The bargain did not stay at its original headline discount. Missing parts, damaged hardware, and my own upgrade preferences pushed the total higher.
But I ended up with a restored Kamado Joe Classic II, a repaired and polished Kontrol Tower, a secure chimney fit, fresh essential components, and a cooking setup better suited to how I like to barbecue. At roughly 63% less than the new-grill comparison price, I still call that a smoking deal.
The trick is being honest about the whole project: purchase price, repairs, upgrades, and the hours you are willing to spend making it right.
And once it is right, don't be afraid to fire it up.
Help Me Improve My Kamado Guides
I am collecting feedback from people who have purchased my Kamado Joe, Big Green Egg, or Primo digital guides. As part of that feedback request, I offered a drawing for a free one-hour video BBQ coaching session, with room to discuss a challenging cook, a stubborn recipe, or whatever barbecue question has you stuck. Check the survey for participation details and availability.
|


