A great chicken wing needs more than a good sauce. We want skin that delivers on that first bite, juicy chicken underneath, and layers of flavor that make you reach for another. Add live fire, and now we’re talking.
When I visited Curtis for a backyard barbecue rescue, his biggest frustration was chicken wings that took too long and still came out with soft, rubbery skin. He called them “flubbery.” It might not be a technical barbecue term, but we knew exactly what he meant.
The fix was a combination of tools, preparation, and a cooking process with a purpose. We made two of my family’s favorites: crispy grilled buffalo wings in a rotisserie basket and sweet, spicy five-spice sticky wings. They’re completely different styles, but both belong at a game day gathering.
What You'll Learn
- Cook rotisserie wings in separate stages to render fat, crisp skin, and set the buffalo sauce.
- Leave space in the rotisserie basket so wings tumble and cook evenly over charcoal.
- Cook five-spice sticky wings indirectly at about 350°F, building the glaze with repeated thin coats.
- Prepare seasonings, sauces, and grill setups ahead to make game day cooking easier.
Table of Contents
- Better Wings Start With a Plan for the Skin
- Recipe 1: Crispy Rotisserie Buffalo Wings
- Recipe 2: Five-Spice Sticky Chicken Wings
- Preparation Is the Shortcut to Better Game Day Wings
Better Wings Start With a Plan for the Skin
With chicken wings, cooking the meat is only part of the job. You also need to render the fat underneath the skin and develop the texture on the outside. Simply leaving wings on the grill longer doesn’t necessarily get all three right.
For our buffalo wings, we give each part of the cook its own stage: cook and render, crisp over the fire, then set the sauce. For our sticky wings, we use indirect heat and build a glaze through repeated thin coats.
That distinction matters. One method is chasing a crisp, almost fried texture. The other is creating a glossy, candy-like coating. Neither should finish flubbery.
Recipe 1: Crispy Rotisserie Buffalo Wings
A rotisserie basket is one of my favorite ways to cook chicken wings on a kamado. The wings tumble over the charcoal, moving in and out of the strongest heat while basting in their own rendered fat.
It’s about as close as I can get to a deep-fried texture without actually deep-frying. And we still get the flavor of the charcoal, the dry rub, and that final grilled finish.
Make the Wing Dust Dry Rub
I like to start with salt and pepper, then build the savory flavor, color, and heat around that base.
- 2 tablespoons freshly cracked black pepper
- 2 tablespoons kosher salt
- 1 tablespoon granulated onion or onion powder
- 2 tablespoons granulated garlic or garlic powder
- 1 tablespoon paprika
- 1½ teaspoons cayenne pepper
Mix everything thoroughly. The paprika brings color, while the cayenne and the buffalo sauce supply the kick. At this cayenne level, the rub has a decent amount of heat, so adjust it to suit your crowd.
For our cook, we used 5 pounds of chicken wings. Apply the rub as an even seasoning rather than feeling you need to use every bit of the mixture.
Season Both Sides, Ahead of Time if Possible
Spread the wings out and sprinkle the rub over both sides. Hold your seasoning hand roughly 6 to 10 inches above the chicken. That little bit of height helps distribute the seasoning evenly instead of dropping it in clumps.
You can season about an hour before cooking, as we did, or give the wings an overnight dry brine in the refrigerator. If you have the time, the overnight option is great. But a last-minute wing night doesn’t need a rule book that starts yesterday. An hour beforehand is absolutely fine.
And yes, I use a dry rub even though we’re adding sauce later. That’s how we build layers:
- The rub seasons the chicken with salt, pepper, garlic, onion, and spice.
- The buffalo sauce adds its own flavor and heat.
- The final grilling stage sets the sauce and adds a char-grilled finish.
Load the Basket With Room to Tumble
Put the seasoned wings into the rotisserie basket. On the adjustable basket we used, I secured the lid in the highest of its three positions to leave room for tossing and tumbling.
That space is important. We’re not trying to clamp the wings into a solid block. We want them moving so they cook evenly and don’t stay parked over one hot spot.
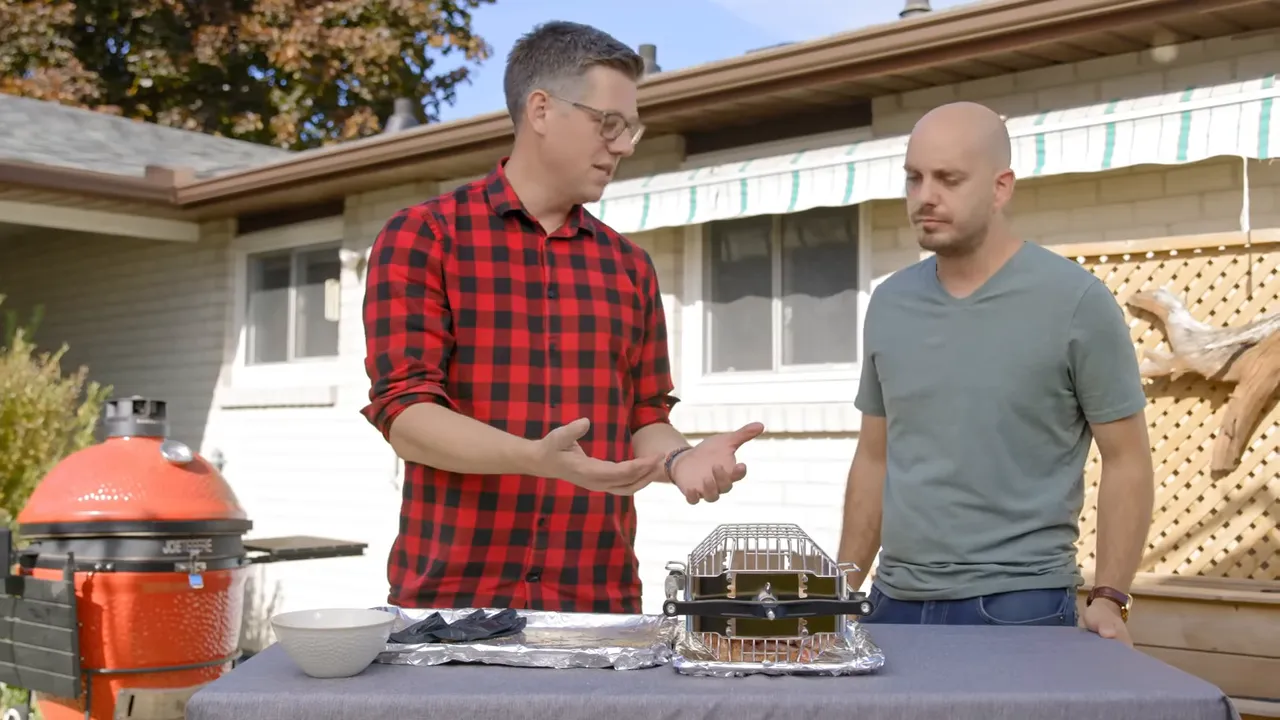
Five pounds is the most I would put in this particular basket. Treat that as a limit for this setup, not a universal capacity for every rotisserie basket.
Cook the Buffalo Wings in Three Stages
Install the basket over the charcoal and start the rotisserie. Rather than treating the cook as one long stretch, break it into three jobs.
- Stage 1: Dome closed for about 20 minutes. This begins cooking the chicken and rendering the fat underneath the skin.
- Stage 2: Dome open for about 10 to 15 minutes. Keep the basket turning over the live fire to develop the crispy exterior. Stay with the grill and manage the fire rather than leaving this stage unattended.
- Stage 3: Sauce and grill for about 5 to 10 minutes. Empty the wings into a bowl, toss with buffalo sauce, then finish directly on the cooking grate until the coating sets and develops some grilled color.
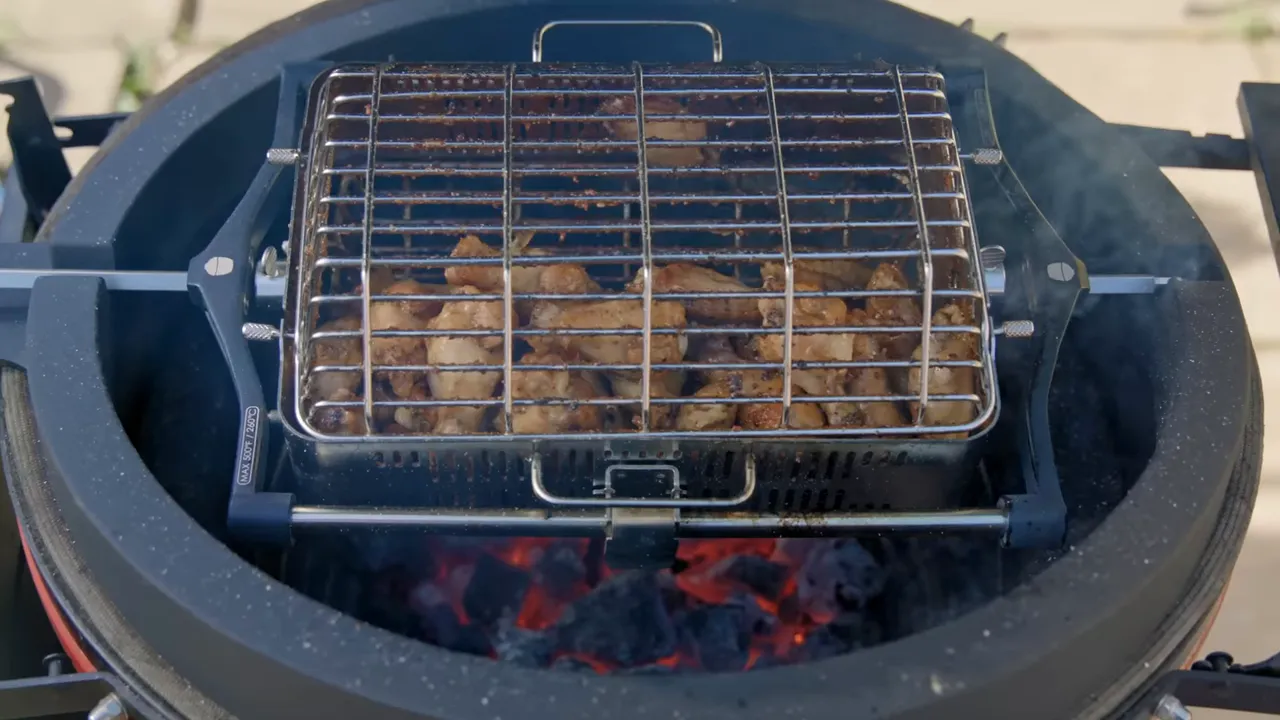
Use enough buffalo sauce to coat the wings, then turn them as needed during the final grilling stage. We’re tacking up that coating, not just serving a cooked wing with wet sauce poured over it.
The three stages add up to roughly 35 to 45 minutes, but the clock is a guide, not a doneness test. For food safety, chicken must reach 165°F internally, as listed in the safe minimum internal temperature guide. Check the thickest meat without touching bone.
The result is a wing with crisp skin, seasoning underneath the sauce, and a little live-fire character on the outside. In some ways, I prefer it to deep-fried wings because that grilled flavor gives us another layer to enjoy.
Recipe 2: Five-Spice Sticky Chicken Wings
These are my family’s version of meat candy. Sweet, savory, a little spicy, and beautiful enough to become the centerpiece of the table.
The inspiration comes from RecipeTin Eats, a food blog we enjoy, with the method adapted for live-fire cooking. There’s a longer ingredient list here, so get the sauce mixed before your guests arrive. This is not the moment to discover that the ginger is hiding at the back of the refrigerator.
Mix the Five-Spice Sticky Sauce
- 1½ teaspoons Chinese five-spice powder
- 6 teaspoons minced garlic
- 1½ teaspoons sesame oil
- ¾ cup ketchup
- 6 tablespoons lemon juice
- 6 tablespoons Chinese cooking wine
- 6 tablespoons low-sodium soy sauce
- 6 tablespoons honey
- 4½ tablespoons hoisin sauce
- 4½ tablespoons oyster sauce
- 3 tablespoons chili garlic sauce
- 3 tablespoons minced ginger
Whisk everything together until well combined. You can prepare the sauce ahead, but hold off on adding the chicken until about 15 minutes before it’s ready to go onto the grill.
For safe basting, set aside a clean portion of sauce before adding the raw chicken. Keep that portion and its brush separate from the raw-chicken marinade. If you intend to reuse marinade that has touched raw chicken, bring it to a full boil first.
Set Up the Kamado for Indirect Cooking
After serving the buffalo wings, we changed the grill setup. Install the heat-deflector stones underneath the cooking grids and adjust the vents to bring the grill to about 350°F.
Get that change underway before putting the wings in the marinade. Our grill was around 300°F when we started the short marinating period, giving it time to climb toward the target while we finished the prep.
This is a different approach from the rotisserie wings. The sweet coating needs time to build without sitting directly over the fire.
Marinate Briefly and Prepare the Tray
Add the wings to the marinade, turn them until coated, and let them marinate for about 15 minutes in the refrigerator. Use that time to chop green onions and Thai red dragon chilies for the garnish.
Line a pizza tray with foil, then add parchment paper. Transfer the wings onto the lined tray by hand or with tongs, leaving the excess marinade behind rather than pouring the whole bowl over them.
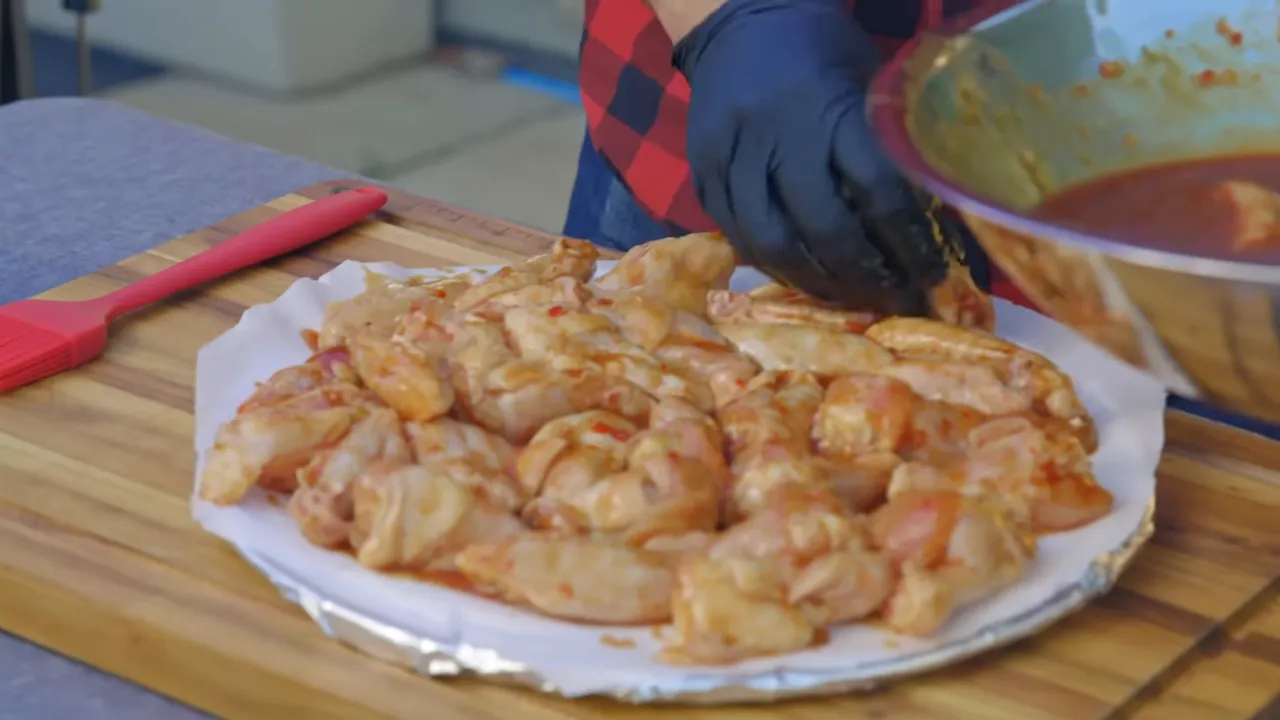
The tray helps retain the coating instead of letting it drip straight through the grate. We want sauce around the wings, but the real texture comes from the thin layers we’ll add during cooking.
Build the Glaze With Thin, Repeated Coats
Place the tray on the cooking grate over the heat deflectors. After about 10 minutes, brush on the first thin layer of the reserved basting sauce. Repeat with thin coats about every 10 minutes as the wings cook.
Several thin coats are better than one heavy coat. Each layer gets a chance to set and caramelize before the next one goes on. That’s how we create the sticky, almost candy-like exterior.

Look for the sauce to thicken, cling to the chicken, and develop a glossy, caramelized finish. Check that the wings reach at least 165°F internally before serving. There isn’t a fixed total cooking time here, so use temperature and the condition of the glaze rather than guessing from the color alone.
Garnish and Serve
Transfer the finished wings to a serving board and finish with sesame seeds, chopped green onions, and finely chopped red chilies.
The garnish lets you control the final heat level, too. Go lighter on the chilies for a milder platter, or add more for the people who like a little fire with their sweetness.
These wings hit differently from the buffalo batch. You get sweet and savory first, then the heat builds. The five-spice, garlic, and ginger bring it all together. They’re sticky, rich, and a whole lot of fun.
Preparation Is the Shortcut to Better Game Day Wings
The biggest lesson from Curtis’s cook wasn’t a secret ingredient. It was getting the little things right before they became problems at the grill.
- Season evenly. A consistent coating starts the flavor in the right place.
- Give the basket space. The wings need room to tumble over the coals.
- Cook in purposeful stages. Rendering, crisping, and setting sauce are different jobs.
- Prepare the next grill setup early. Let the kamado stabilize while you finish the food prep.
- Build sticky sauce gradually. Thin coats create the texture that one thick coating can’t.
You don’t need every wing on the table to be the same. Serve the buffalo wings first, then bring out the five-spice batch for something completely different. One delivers crisp skin and a spicy grilled finish. The other gets close to dessert-wing territory.
Either way, flubbery is off the menu. Don’t be afraid to fire it up.


