Eight full racks of baby back ribs. One Masterbuilt Gravity XT. No trimming them down just to squeeze in a bigger number.
I already knew the Gravity XT could smoke brisket and put a serious sear on a steak. The next question was whether it could feed a crowd without giving up the quality that makes the cook worthwhile.
Because fitting eight racks inside a smoker is only half the test. The real question is whether those eight racks turn out any good.
My approach was a hybrid: start low with real wood for a bold smoke profile, then switch to charcoal and a higher temperature for an easier finish. The result? Beautiful bite-through ribs, plenty of smoke, and enough barbecue to make a party very happy.
Key Takeaways
- The Gravity XT fit eight full, untrimmed baby back rib racks across three cooking levels.
- A low-temperature wood-fired start delivered the bold smoke flavor I wanted from this cook.
- Bark adhesion and probe tenderness guided the cook more reliably than a rigid timeline.
- Switching to charcoal after wrapping made the hotter finishing stage easier to manage.
Table of Contents
- How Many Racks of Ribs Fit in the Gravity XT?
- Why I Don't Cook Ribs by a Rigid Clock
- The Game Plan: Low-Temperature Smoke, Then a Hotter Finish
- Keep the Rib Prep Simple
- Set Up a Coal Bed Before Adding Wood
- Use the Bark to Decide When to Wrap
- Wrap With Ghee and Finish at 275°F
- The Results: Capacity Without Giving Up Flavor
- A Thanks to the Partners Behind This Cook
How Many Racks of Ribs Fit in the Gravity XT?
For this cook, I fit eight untrimmed racks of baby back ribs across three cooking levels. Getting them all in required mixing orientations, with some running across the grates and others positioned front to back.
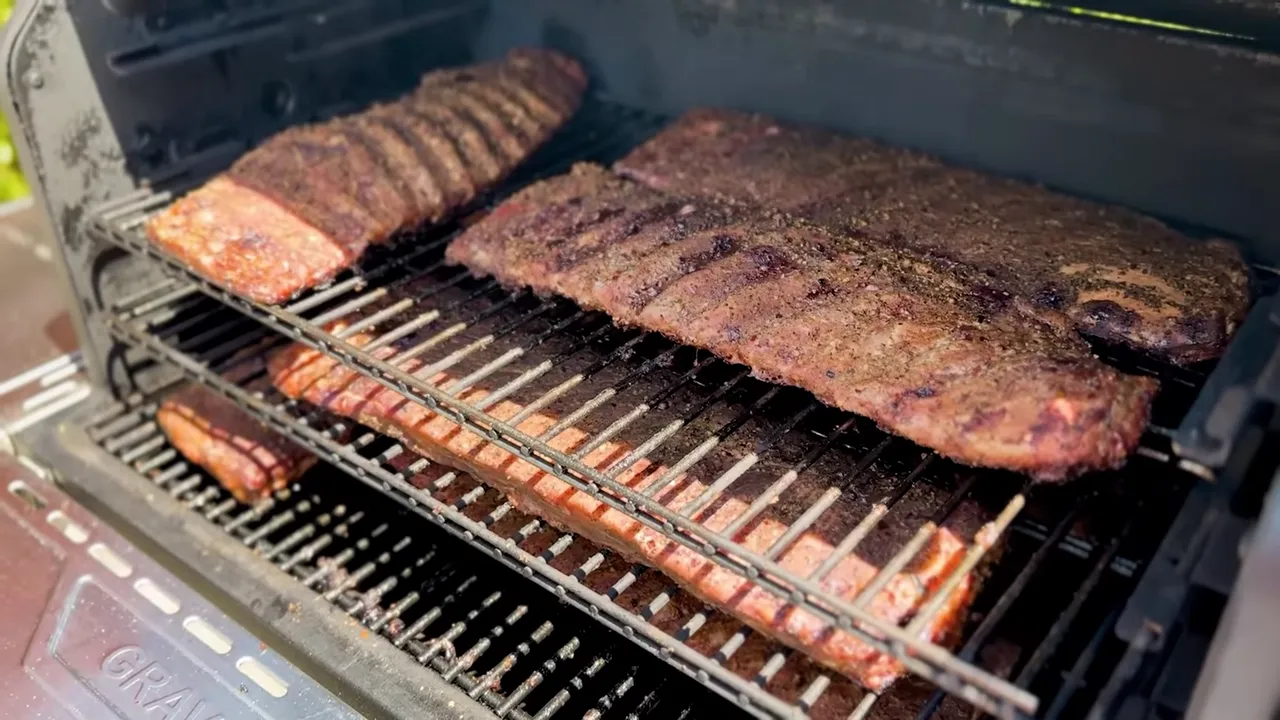
Later in the cook, the ribs shrank enough that I could rearrange them into two levels, four racks on each. That empty level might make it look as though there was room for more, but the starting capacity is what matters. You have to fit the ribs while they are still raw.
Could shorter racks or more aggressive trimming increase the count? Possibly. But I wasn't interested in cutting away good meat to chase a capacity claim. Eight was the practical limit for the full racks I used, not a universal maximum for every size of rib.
I've learned to make barbecue I'm proud of on all kinds of grills. During a visit to Bar-A-BBQ, Cooper even told me he'd be happy serving my ribs from the restaurant's cutting block. That's high praise, but that cook involved two racks. Repeating the quality across a loaded smoker is a different challenge.
Why I Don't Cook Ribs by a Rigid Clock
A packed smoker changes the cook. So do airflow, cooking temperature, altitude, and the cooker itself.
I've tested hot-and-fast against low-and-slow ribs across six smokers, and even changes in technique on the same grill produced a huge difference. A separate high-altitude versus low-altitude experiment reinforced the same lesson: a familiar method doesn't guarantee an identical result under different conditions.
A conversation with Tuffy Stone at Memphis in May brought that point home. We discussed how people can become so attached to the 3-2-1 rib method that they stop responding to what's actually happening in the pit.
A method should guide your decisions, not replace them. For this cook, I paid attention to smoke, bark development, surface moisture, and tenderness rather than forcing the ribs into a fixed schedule.
The Game Plan: Low-Temperature Smoke, Then a Hotter Finish
I like a strong smoke profile. If you enjoy bold black coffee or a big, full-flavored wine, you may understand exactly where I'm coming from.
To build that flavor, I borrowed a low-temperature starting technique Cooper shared with me. He calls it a “cold smoke” start, but that name needs a little explanation.
This is not true cold smoking. Cold smoking something like cheese happens at temperatures well below 90°F. Here, I started the Gravity XT at 180°F, so we're really talking about a very low-and-slow opening stage.
I had previously used a 160°F start for brisket on this cooker and liked how its controller managed a wood fire at that low temperature. For this load of ribs, I chose 180°F with two goals:
- Build a pronounced smoke flavor during the early part of the cook.
- Encourage an even start across ribs spread over three cooking levels.
If you prefer lighter smoke, I wouldn't copy my smoke-heavy approach unchanged. Adjust the method to the flavor you actually enjoy.
One important distinction for anyone repeating the cook: 180°F describes my test, not standard smoking guidance. The USDA's smoking safety guidance recommends maintaining a smoker between 225°F and 300°F. Keep food safety separate from the barbecue shorthand of a “cold smoke” start.
Keep the Rib Prep Simple
One of my biggest takeaways from talking with John Bates at Interstellar BBQ was the value of simplicity. Making something easier to repeat doesn't mean sacrificing flavor. Often, it means removing things that don't need to be there.
For these ribs, I used my interpretation of a Texas-style salt, pepper, and garlic rub. I developed it through a family blind taste test comparing elements of rubs from Goldee's, Black's, and Franklin Barbecue, then brought our favorite characteristics together.
I mixed enough to season all eight racks and applied it about an hour before the ribs went onto the smoker.
There's no need to invent a complicated seasoning routine for a capacity test. A familiar rub makes it easier to focus on what matters here: how the cooker handles a full load and whether the technique produces the texture and smoke flavor I'm after.
Set Up a Coal Bed Before Adding Wood
The key to my wood-fired start was having an established coal bed first. I had some charcoal left from a previous cook, which was perfect for getting things going.
- Keep usable leftover charcoal. It provides the starting fuel for the coal bed.
- Light a fire starter. I used a starter cube and a torch.
- Preheat the cooker. Give the pit time to absorb heat while the charcoal becomes established.
- Set the opening temperature to 180°F for this test.
- Add small wood splits over the hot coals. The goal is for the wood to begin burning cleanly rather than struggle to ignite.
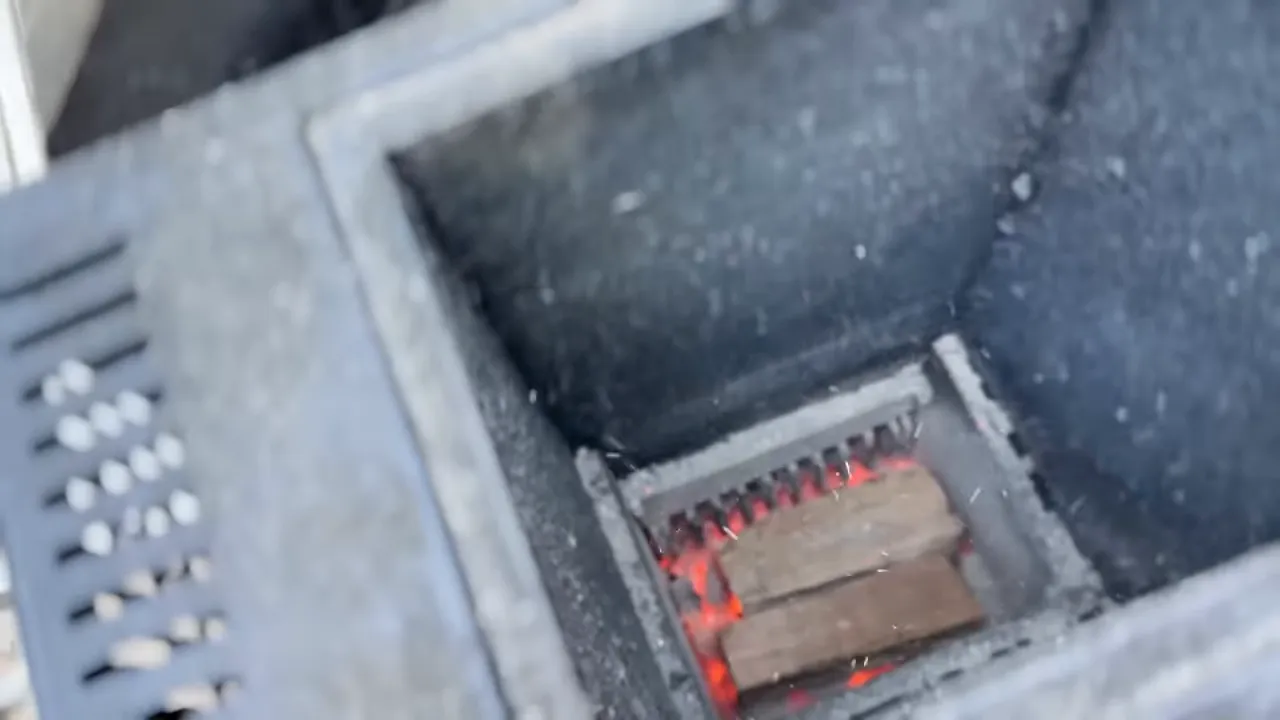
My Wood Choice: Naturally Seasoned White Oak
I used naturally seasoned white oak, cut into pieces roughly 7 to 8 inches long. I can't readily get Texas post oak where I live, but white oak is in the same oak group and has given me excellent results.
For this technique, I prefer naturally seasoned wood to the kiln-dried wood commonly sold in big-box stores. Kiln drying makes sense for transport and pest control, but I've found the naturally seasoned wood gives me the smoke flavor I prefer.
That preference isn't a reason to burn wet wood. The target is seasoned smoking wood that burns well over an established fire.
Piece size matters, too. The Gravity XT can accommodate something a little larger, but smaller splits burn more readily than oversized logs. I wasn't loading full-size firewood into the hopper.
Expect to Tend the Fire Early
This part isn't completely hands-off. During the opening smoke stage, I added one or two small pieces of wood about every 30 to 40 minutes to maintain the fire and coal bed.
That's the trade-off. You're spending a little more time interacting with the cooker to build the flavor you want.
But you don't have to do that all day. My priority was real wood smoke early. Once the bark was established and the ribs were wrapped, I could fill the hopper with charcoal and let the controller handle the heat.
Use the Bark to Decide When to Wrap
I continued adding wood until the bark was set. On this cook, that happened at approximately 160°F internal temperature.
The temperature was a useful reference, but the surface told me when to move on. Gently rub a finger across the seasoning. If it stays attached instead of smearing or coming away, the bark is set.
Don't wrap just because the thermometer reaches 160°F. Airflow, convection, smoke movement, and the amount of food inside the cooker all affect bark development.
A Full Smoker Needed Less Spritzing
I only spritzed these ribs once, using a 50/50 mixture of apple cider vinegar and water.
Eight full racks released plenty of moisture into the cooking chamber. I didn't need to keep adding more.
That's another reason not to follow a routine blindly. A single rack or a pair of racks may behave differently from a fully loaded cooker. Check the surface and respond to it rather than spraying simply because another interval has passed.
Wrap With Ghee and Finish at 275°F
Once the bark was ready, I wrapped each rack with ghee and a little rib glaze. This is a technique I picked up from Steve Gow while joining his competition team at Memphis in May.
Ghee is clarified butter. Tallow is another option, but ghee was my choice for this batch.
- Lay out a sheet of foil large enough to make a pouch around the rack.
- Add a couple of tablespoons of ghee and a little rib glaze.
- Place the ribs meat-side down into the mixture.
- Close the foil around the ribs and return them to the smoker.
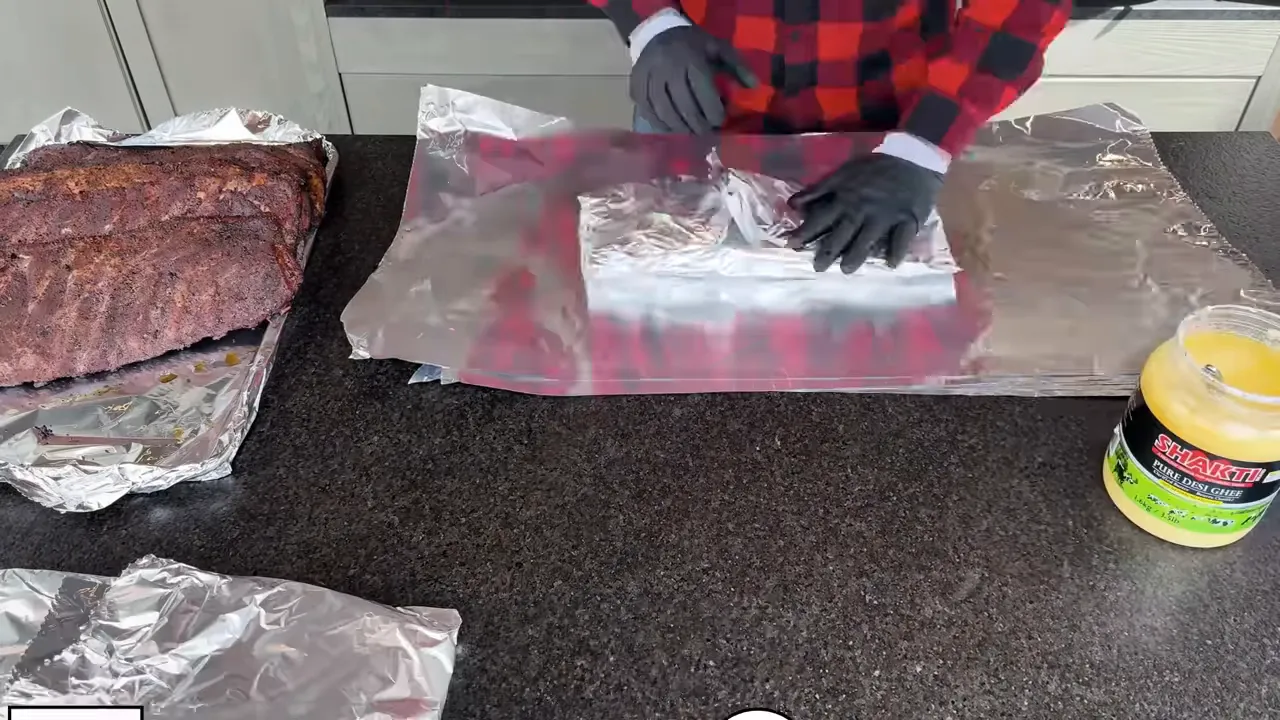
At that point, I raised the Gravity XT to 275°F and switched to charcoal for the finishing stage.
Once the ribs were enclosed in foil, tending a wood fire wasn't adding anything useful to the meat. What I needed was controlled heat. The controller took over that job, giving me time to get other things done around the house.
The ribs spent about an hour in foil during this cook. Treat that as an observation, not a promise that every rack will finish in exactly an hour.
Aim for Probe Tender, Not Falling Apart
My finishing target was probe tenderness, with internal readings generally around 195°F to 203°F.
I wanted the meat to release cleanly with a bite while still holding together. Taking the ribs too far risks moving into fall-off-the-bone territory, which wasn't the texture I was after.
After the wrapped stage, I removed the foil, applied the remaining glaze, and returned the ribs to the smoker for about 10 to 15 minutes to let the glaze tack up.
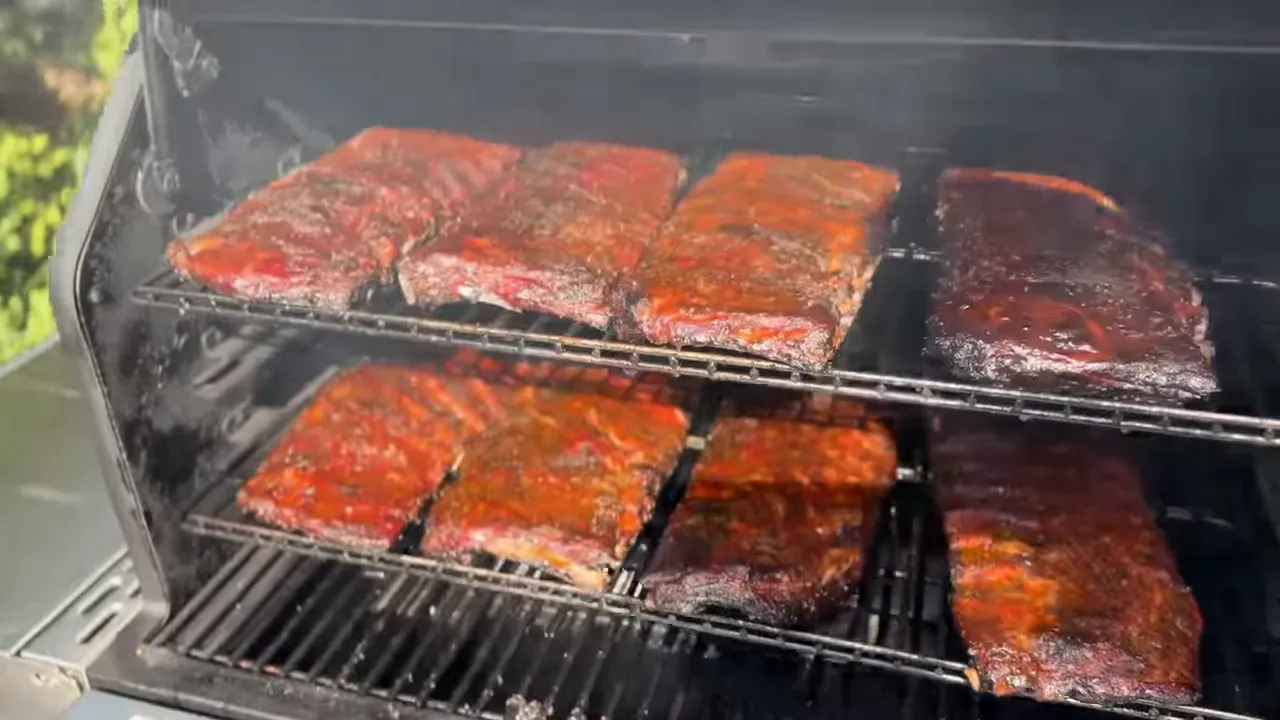
The Results: Capacity Without Giving Up Flavor
The first sample had exactly the bite-through texture I wanted. And the smoke? Right on the money.
I tried a rib from another rack to make sure the first one wasn't a lucky sample. Same result: good texture and a bold, balanced smoke profile.
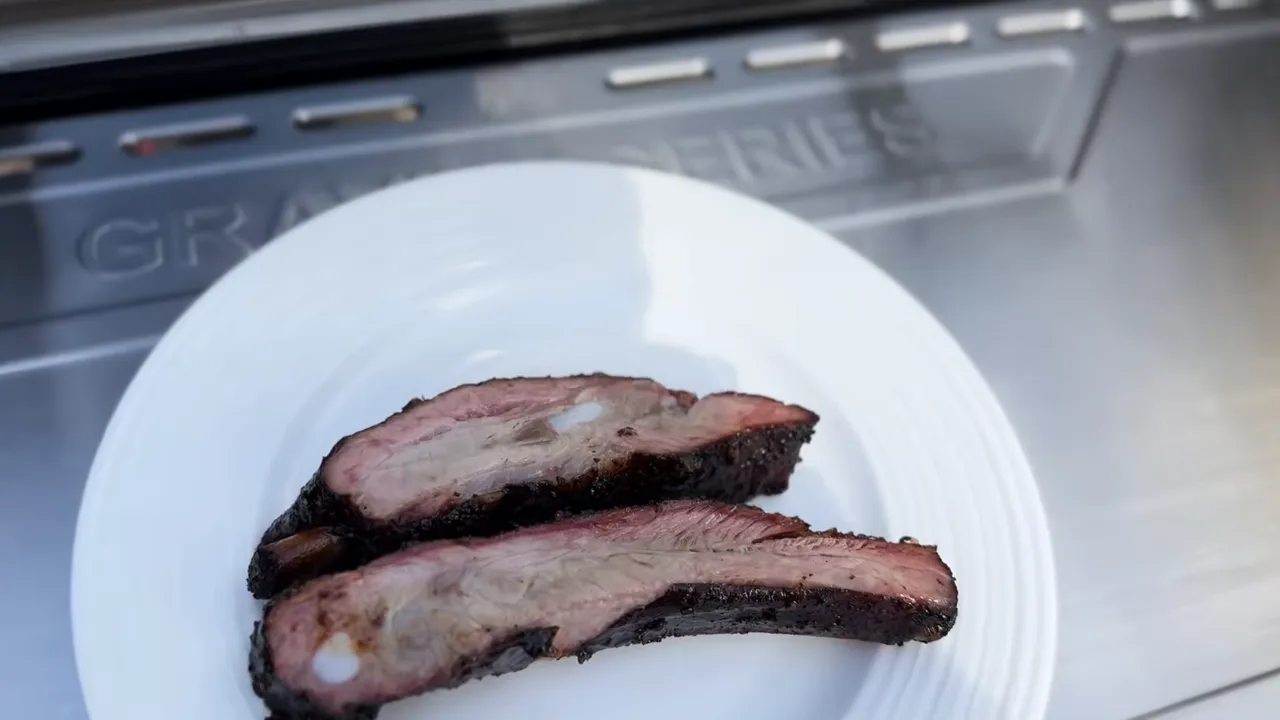
For me, the low-temperature wood-fired start was worth the extra interactions. It delivered the smoke character I was hoping for without requiring me to tend the fire through the entire cook.
That hybrid approach is the big lesson:
- Start low with wood when smoke flavor is the priority.
- Let the bark develop before moving to the next stage.
- Wrap and increase the heat to finish efficiently.
- Use charcoal and automatic temperature control when maintaining heat matters more than adding smoke.
I wouldn't call this a head-to-head victory over every offset smoker. That's not what I tested. What it demonstrated is that I didn't need an offset to produce eight full racks of deeply smoky, bite-through ribs.
The Gravity XT had already proved its searing ability and its brisket-smoking credentials. Now I can add a successful crowd-sized rib cook to that list. Color me impressed.
The cooker matters, but so do the decisions we make along the way. Don't be afraid to fire it up.
A Thanks to the Partners Behind This Cook
Masterbuilt provided product support for this test, and NEXT Insurance sponsored the cook.
If you're a small business owner, NEXT offers coverage options including general liability, workers' compensation, commercial property, tools and equipment, and commercial auto through its offerings and trusted partners. Its online platform is designed to make getting a quote, customizing coverage, and accessing certificates of insurance straightforward.
|


