St. Louis ribs are one of my all-time favorite barbecue foods. Sweet, spicy, and, most importantly, smoky. But when the smoke disappears, even a nicely cooked rack can feel like something is missing.
That was Colin’s problem. He had spent close to 10 years making ribs that friends and family looked forward to. After switching equipment, his pellet grill made temperature control easy, but the smoky flavor he loved was no longer there. He had even tried extra smoke-making accessories without getting the result he wanted.
Our backyard barbecue rescue was about bringing that flavor back on a Big Green Egg. The solution wasn’t simply more smoke. It was a deliberate fire setup, a homemade rub, and a foil-boat finish that let every layer of flavor do its job.
What You'll Learn
- Stage smoking wood and supplemental pellets to provide smoke at different points in the cook.
- Save brown sugar and finishing sauce for later rather than adding sweetness to the initial rub.
- Use open-topped foil boats to add finishing flavor while keeping the bark exposed.
- Judge doneness by probe resistance and rack flexibility rather than cooking time alone.
Table of Contents
- The Plan: Build Flavor Without Hiding the Pork
- Make My Ultimate SPG Rib Rub
- Prepare and Season the St. Louis Ribs
- Set Up the Big Green Egg for Staged Smoke
- Put the Ribs On and Bring the Egg Up to Temperature
- Spritz and Check the Ribs Around Two Hours
- Use a Foil Boat for the Final Flavor Layer
- How to Tell When the Ribs Are Done
- Slice From the Bone Side and Check the Result
- An Optional Upgrade for Less Fire Tending
The Plan: Build Flavor Without Hiding the Pork
I love that pellet grills have helped more people get into barbecue. There is no denying their convenience. For this cook, though, we wanted the charcoal-and-hardwood character Colin had been missing.
We started with fresh Ontario pork and built the flavor in stages:
- The pork: The foundation, not something to cover up.
- The rub: Salt, pepper, garlic, and supporting spices for a savory, spicy bark.
- The smoke: Cherry, oak, and supplemental pellets introduced at different stages of the fire.
- The finish: Clarified butter, brown sugar, and hot honey barbecue sauce added later in the cook.
The goal is balance. Your first bite shouldn’t taste only of salt, only of pepper, or only of smoke. Each should be present without taking over.
Make My Ultimate SPG Rib Rub
This rub takes inspiration from flavors I enjoy at Texas barbecue favorites including Franklin Barbecue, Goldee’s, and Black’s. Salt, pepper, and garlic are the backbone, but there is a little more going on than the name suggests.
For the half batch we made for this cook, combine:
- 3 tablespoons freshly cracked black pepper
- 2 tablespoons Diamond Crystal kosher salt
- 1 tablespoon Lawry’s seasoned salt
- 3/4 tablespoon smoked paprika
- 3/4 tablespoon cayenne pepper
- 1/2 tablespoon garlic powder
- 1/2 tablespoon onion powder
- 1/2 tablespoon coarse garlic
- 1 tablespoon red pepper flakes
I set my Pepper Cannon 23 clicks from its finest setting to get the pepper texture I wanted. The important part is a consistent grind that works well in the rub.
Shake everything thoroughly. The heavier ingredients tend to settle, so give the container another shake as you season rather than assuming the blend will stay evenly mixed.
Why I leave brown sugar out of the initial rub
Colin had always included brown sugar in his rib seasoning. For this method, I save it for the finishing stage. I don’t want sugar exposed to heat for the entire cook, where it can develop a bitter, burnt flavor.
We still get that sweet barbecue finish. We just add the sweetness when it serves us best.
Prepare and Season the St. Louis Ribs
Our butcher had already removed the membrane from the bone side. That gives the seasoning access to the meat rather than leaving it sitting on a barrier.
If you apply your rub earlier in the day or the night before, the salt draws moisture to the surface, helping the seasoning adhere. Keep the ribs refrigerated during that advance preparation.
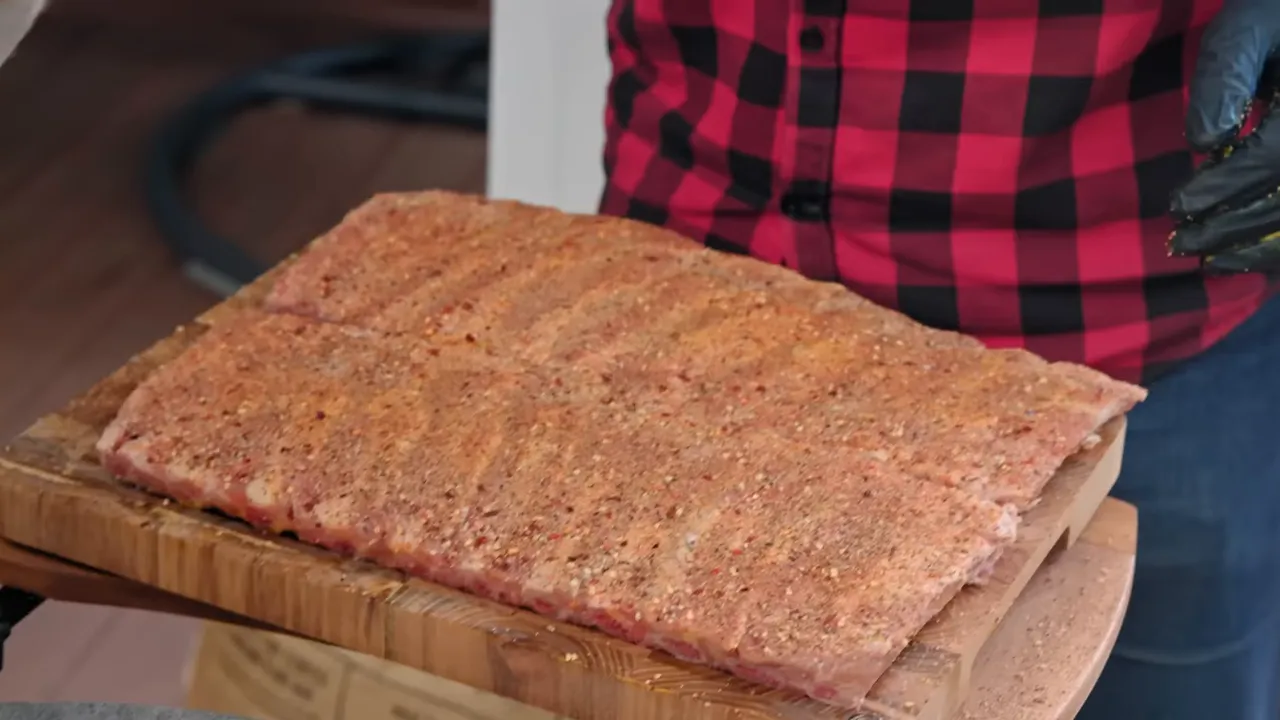
We were seasoning about an hour before cooking, so I used a little yellow mustard as a binder. You aren’t aiming for mustard-flavored ribs. You just need enough moisture to help the rub stick.
- Apply a thin coat of yellow mustard. Too much can make the seasoning slide around instead of adhering.
- Season the ribs evenly. Cover the exposed meat without burying the pork under an unnecessarily thick layer.
- Shake the rub again between applications. Keep the coarse and fine ingredients distributed.
Set Up the Big Green Egg for Staged Smoke
The fire setup is the heart of this rescue. Instead of putting all the smoking wood in one spot and hoping it lasts, I arranged the fuel to provide smoke at different points in the cook.
1. Add pellets below the charcoal basket
First, I put a small amount of barbecue pellets in the bottom of the Kick Ash Can, then installed the Kick Ash Basket above it.
The basket has open spaces that allow hot embers to fall through. As those embers reach the pellets below, the pellets can ignite and provide supplemental smoke later in the cook. This is the specific basket-and-can arrangement we used, not simply a matter of tossing pellets anywhere in a cooker.
2. Place cherry and oak beneath the lump charcoal
Next came a few pieces of cherry and oak smoking wood, distributed around the bottom of the basket rather than stacked in one central pile. Think of spreading them around the compass points so the developing fire can reach different pieces.
I filled above them with extra-large FOGO lump charcoal, which I chose for this low-and-slow cook.
3. Reserve one piece of cherry for the lit fire
I held back one piece of cherry and added it to the center after establishing a hot fire. That gave us our first application of hardwood smoke.
The intended sequence was straightforward:
- Early smoke: The burning charcoal and the cherry added to the hot center.
- Middle-stage smoke: The buried wood pieces as the charcoal fire reached them.
- Later smoke: The pellets below the basket as falling embers activated them.
That gives us a plan for smoke throughout the cook rather than one short burst at startup.
4. Install the indirect setup
With the fire established and the reserved cherry added, I installed the expander with the heat-deflector plates and cooking grate. These ribs cook indirectly, with the deflectors between the fire and the meat.
For general charcoal handling and cooker precautions, the Big Green Egg safety guidance is worth keeping handy alongside your grill’s instructions.
Put the Ribs On and Bring the Egg Up to Temperature
For this particular startup, I put the ribs on while the Egg was still coming up to cooking temperature. I wanted to use the fresh cherry smoke rather than burn through that piece of wood during a long empty preheat.
You can preheat your cooker first. The point here is to coordinate the timing of your smoking wood with the timing of your food.
Straighten the racks before closing the lid
While the ribs are raw and flexible, take a moment to square them up and straighten the bones as much as possible. The shape you give them now is the shape they will cook in.
That small adjustment makes it much easier to find the spaces between the bones when it is time to slice.
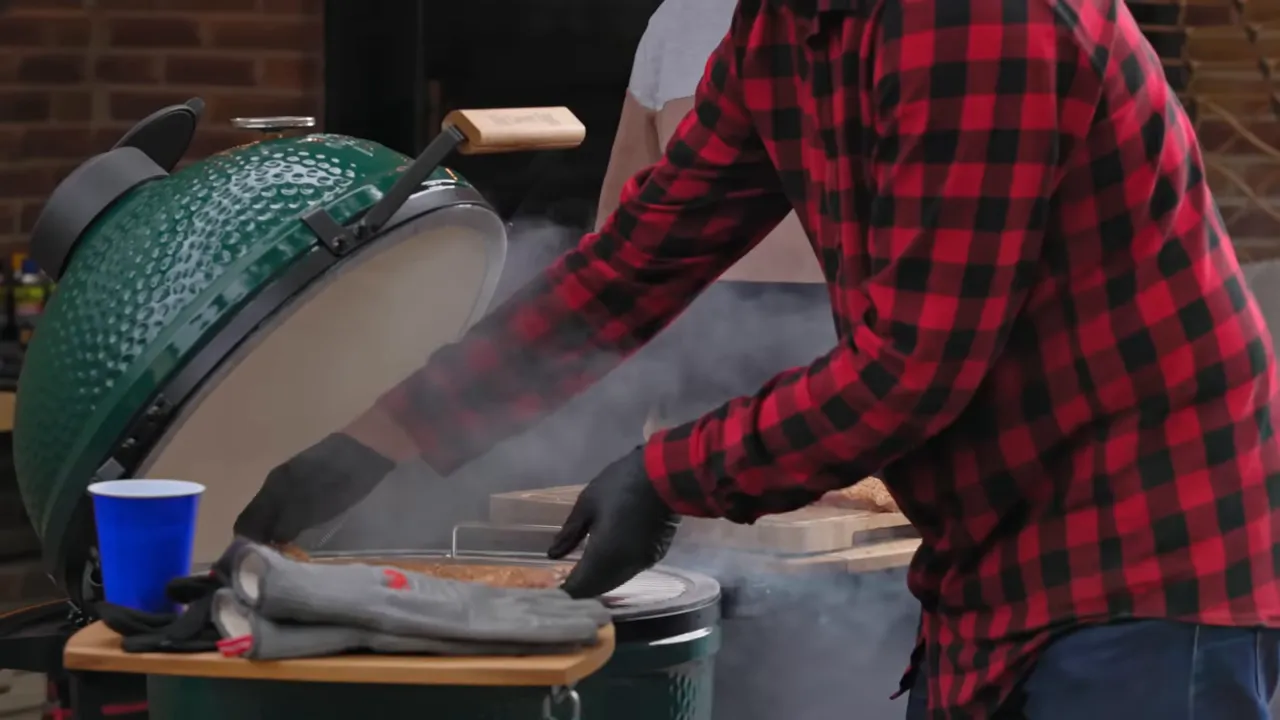
Dial back the vents as the temperature rises
I started with the top and bottom vents fully open, then began reducing airflow as the temperature climbed toward roughly 250°F to 270°F.
About 30 minutes into the cook, we had already made partial vent adjustments and were ready to settle the heat-soaked cooker. My target was around 270°F, with 300°F as the high side of the cooking range.
On Colin’s Egg, with the temperature just over 250°F, I reduced the bottom draft door to about one finger width and the top regulator opening to about one finger width. That allowed the temperature to continue climbing toward our target.
Treat those openings as the settings we used on this cooker, not a substitute for following your own temperature gauge. The important lesson is to reduce airflow as you approach the target rather than leave everything wide open until you overshoot.
Rain arrived during our cook, but it didn’t stop dinner. We made the necessary adjustments, closed the cooker, and took shelter while the Egg did its work.
Spritz and Check the Ribs Around Two Hours
Our spritz was simple: equal parts apple cider vinegar and water. I used it to keep the surface from drying out, checking about every 30 minutes and spritzing as needed.
At roughly two hours, the ribs had developed a good-looking bark and visible bone pullback. Those were encouraging signs, but they weren’t finished.
I checked two things beyond appearance:
- Probe resistance: If the meat grips the probe and doesn’t want to release it, it is still tight.
- Flexibility: A rack that remains fairly stiff when lifted needs more time.
Our ribs were close, but they still had more resistance and less bend than I wanted. That was the right time to move into the foil-boat finish.
Use a Foil Boat for the Final Flavor Layer
A foil boat supports the bottom and sides of the rack while leaving the top exposed. For this cook, that meant we could add richness and sweetness underneath without shutting the top away from the smoke.
- Lay out two pieces of foil for each rack. These form the boat.
- Add a little clarified butter. Spread it where the ribs will sit.
- Add a little brown sugar. This is where our delayed sweetness comes in.
- Add hot honey barbecue sauce. Keep it underneath the rack for this stage.
- Place the ribs on top, meat side up. Fold the foil snugly around the sides, leaving the upper surface uncovered.
- Return the boats to the grate. Give the ribs their final light spritz.
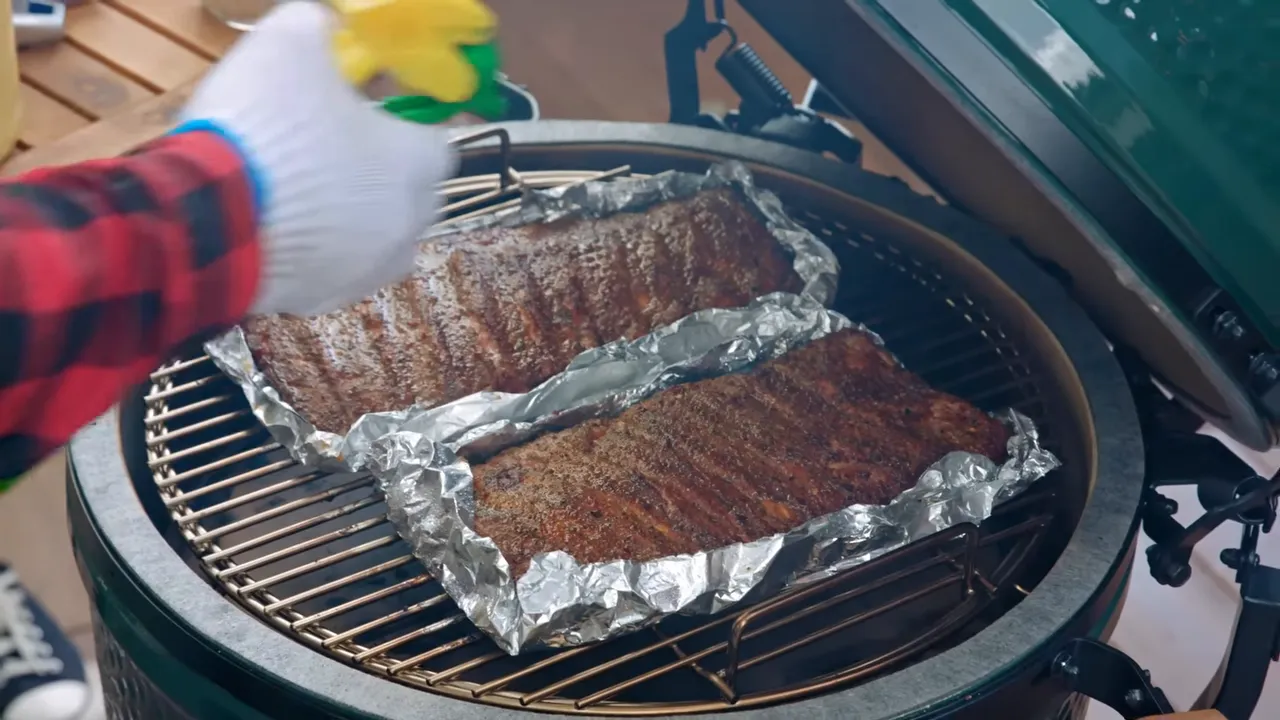
By this stage, the pellets below our charcoal basket were glowing, giving us the later smoke application we had planned at startup.
We allowed roughly another hour for the ribs to finish, using tenderness rather than the clock alone to decide when they were ready.
Sauce the top near the end
Once the ribs were nearly done, I brushed hot honey barbecue sauce over the top and gave it about 10 minutes to tack up.
That short final application gives you a set glaze rather than a wet coating of sauce. It also keeps the finishing sauce from spending the whole cook exposed to heat.
How to Tell When the Ribs Are Done
Our cook landed at about three hours. That was a great result for these racks at our cooking temperature, but it isn’t a promise that every rack will finish on that schedule.
What mattered was the feel. When I lifted the finished ribs, they had a nice flop while still holding together.
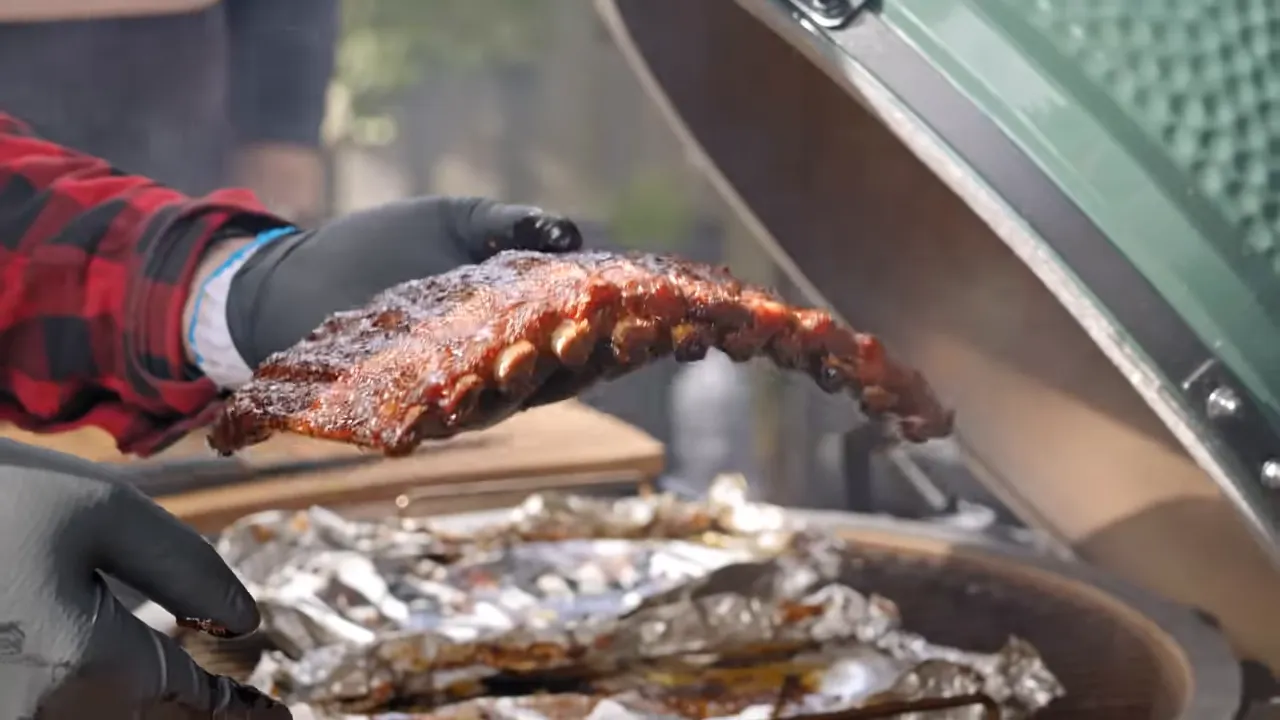
My target is a clean, easy bite, not meat that falls off the bone before you can pick it up. You should be able to bite through without a fight, while the remaining meat stays attached.
If fall-off-the-bone ribs are your preference, a full foil wrap is the direction I would take instead. For Colin’s cook, the open boat gave us the bite-through texture we wanted.
Slice From the Bone Side and Check the Result
To portion the racks, I flipped them over so the bones were easier to see. Straightening them at the beginning paid off here: the cutting paths were much clearer.
Then came the result Colin had been hoping for. The smoke ring was back, and so was the smoky taste.
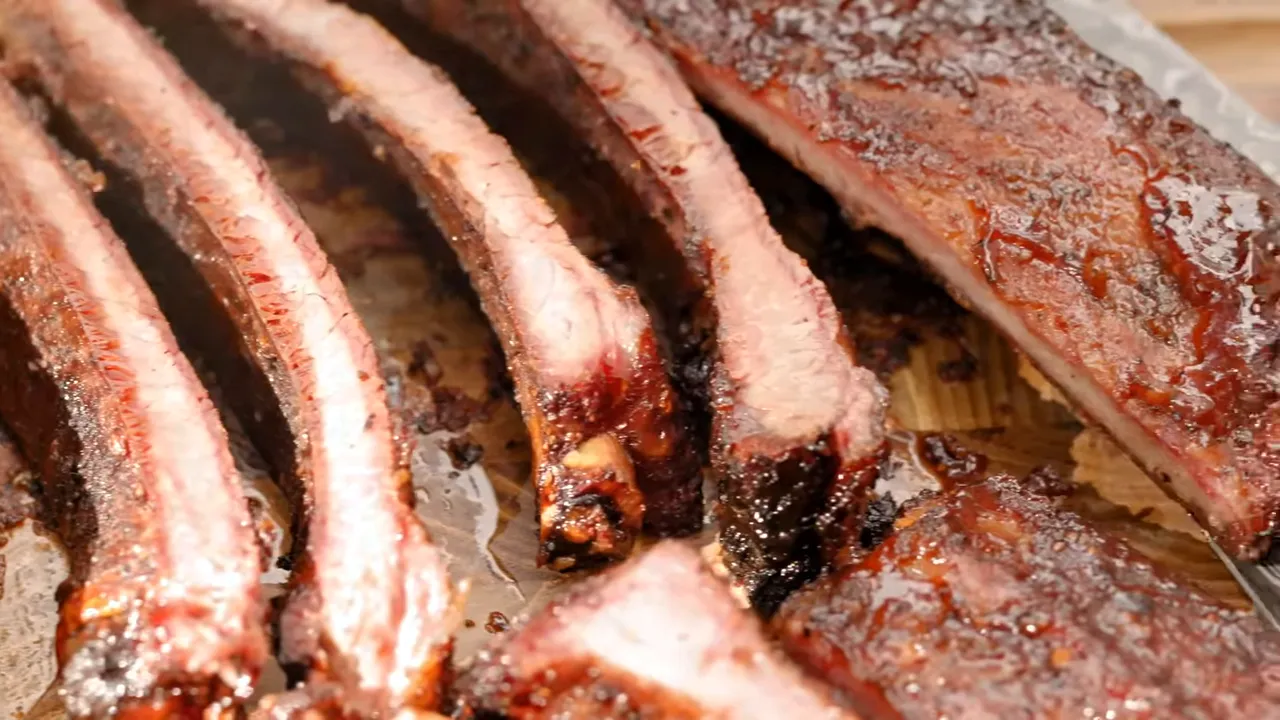
But the biggest improvement wasn’t just smoke. Colin noticed a depth of flavor he hadn’t expected: the rub, the sauce, the texture, and the foil-boat finish all working together.
That is the real lesson from this rescue. Better smoked ribs come from giving each part of the process a purpose. Season the pork without hiding it. Plan when your wood will burn. Manage the temperature as the ceramic heats up. Add sweetness late, and finish by feel.
There is nothing mysterious about it. With a thoughtful setup and a few useful cues, you can turn out St. Louis ribs that people get excited about again. Don’t be afraid to fire it up.
An Optional Upgrade for Less Fire Tending
ChefsTemp sponsored this cook. If you enjoy charcoal barbecue but would rather spend less time managing the fire, its ProTemp S1 is an optional upgrade for compatible analog grills and smokers.
The S1 provides a digital display and can work with information from up to four independent wireless probes. Paired with the optional Breezo fan, it can also automate fire management. I originally became a ChefsTemp customer through the X10 instant-read thermometer, which I liked for its performance, quality, and value.
The promotion associated with this cook offered savings of up to 25% with code SDBBQ. Check the current terms and eligible products before ordering.
|


