Juicy, smoky baby back ribs with a sweet, sticky glaze and just enough heat to get your attention. Add buttery cast iron cornbread with a golden crust, and you have a match made in barbecue heaven.
The best part? You can make the whole meal on one Big Green Egg. Smoke the ribs low and slow, let them rest while the cornbread bakes, then return the ribs to the grill for a quick glaze-setting finish.
I made this meal with Drew, a dad feeding a family of five who loved outdoor cooking but had never had the equipment to tackle a full rack of ribs. His first rib cook became a lesson in charcoal, temperature control, smoke, and a little kitchen timing. These are the same techniques you can use to build confidence in your own backyard.
What You'll Learn
- Smoke baby back ribs around 270°F before wrapping them meat side down for extra tenderness.
- Place cherry wood above and below the charcoal to provide smoke at different cooking stages.
- Bake cornbread at 375°F in a preheated cast iron skillet while the ribs rest.
- Combine reserved rib juices with barbecue sauce and vinegar for a sticky finishing glaze.
Table of Contents
- The Plan: Smoke, Wrap, Bake, and Glaze
- Prepare the Baby Back Ribs
- Set Up the Big Green Egg for Low and Slow Smoking
- Smoke the Ribs for About Two Hours
- Wrap Meat Side Down for Fall-Off-the-Bone Ribs
- Make the Cast Iron Cornbread
- Turn the Rib Juices Into a Sticky Finishing Glaze
- A Complete Backyard Barbecue Meal, One Cooker
The Plan: Smoke, Wrap, Bake, and Glaze
We cooked two racks of baby back ribs and a skillet of cornbread. Rather than trying to cook everything at the same temperature, we gave each part of the meal its own turn on the Egg.
- Season ahead: Apply the rub about an hour before lighting the grill.
- Smoke at approximately 270°F: Cook the ribs unwrapped for about two hours, spritzing when the surface starts looking dry.
- Wrap for tenderness: Cook meat side down in foil with clarified butter, brown sugar, and apple cider vinegar for about another hour.
- Rest the ribs and bake the cornbread: Raise the Egg to 375°F and bake in a hot, buttered cast iron skillet for approximately 20 minutes.
- Finish the ribs: Slice, dip in a glaze made with the cooking juices, and return to the grill for about 10 minutes.
Those times are a guide to organizing the meal, not a reason to ignore what the food is telling you. Our goal was very tender, fall-off-the-bone ribs, so that final hour in foil was an important part of the plan.
Prepare the Baby Back Ribs
Start with two racks of baby back ribs. We used Ontario pork, and the butcher had already removed the membrane from the bone side, which made preparation especially simple.
Check yours before seasoning. With the membrane removed, pat the racks dry with paper towels.
My Ultimate SPG Rub
Salt, pepper, and garlic are the foundation, but this version adds savory depth, color, heat, and some coarse texture. Mix the following in a shaker or jar:
- 2 tablespoons freshly cracked black pepper
- 1 tablespoon Diamond Crystal kosher salt
- 1 tablespoon Lawry’s seasoned salt
- 1 tablespoon granulated garlic
- 1 tablespoon granulated onion
- 2 teaspoons paprika
- 2 teaspoons cayenne pepper
- 1 tablespoon coarse garlic
- 1 tablespoon red pepper flakes
Drew’s family asked for a kick, and this blend delivers. If your family prefers less heat, dial back the cayenne and red pepper flakes.
Be careful when substituting salt by volume. Different salts do not pack into a tablespoon the same way. If you replace Diamond Crystal with a denser salt, start with less rather than assuming a tablespoon is a tablespoon. The seasoned salt also contributes saltiness.
I like granulated garlic and onion here because their texture holds up nicely in the rub. The coarse garlic and pepper flakes give the finished mixture a little more character.
Pat the Seasoning On, Don’t Rub It Off
Season the bone side first, using enough to give that side some flavor. Flip the racks and season the meat side evenly.
Despite the name, you do not need to rub the rub into the ribs. Pat it gently into place. Dragging your hand across the surface can push the seasoning right off.
Seasoning about an hour before lighting the grill gives the salt time to draw out a little moisture, helping the coating become tacky and adhere. Keep the ribs refrigerated during the wait.
A Probe Can Help Take Away the Guesswork
I do not normally use a wireless probe for ribs, but it was a useful confidence builder for Drew’s first cook. Insert it into the meat between the bones, following the probe manufacturer’s insertion requirements and avoiding contact with bone.
We set the temperature target to 203°F. Treat that as a useful checkpoint, not a guarantee of your preferred texture. Temperature information helps you follow the cook, while tenderness tells you whether you have reached the result you want.
Phone alerts also make it easier to step away and spend time with the family without feeling completely disconnected from the grill. Think of it as a baby back rib monitor.
Set Up the Big Green Egg for Low and Slow Smoking
Good temperature control starts before the ribs go on. Get the fire, smoke wood, and ceramic components working together, and the rest of the cook becomes much easier.
Clear the Ash and Fill the Charcoal Basket
Inside the Egg, the ceramic fire bowl and fire ring make up the firebox. We fitted an ash can underneath a charcoal basket, which simplifies cleanup: shake the basket so loose ash falls into the can, then remove and empty the can once everything is cold.
For this low and slow cook, fill the charcoal basket to the top. I think of the basket like a gas tank. A full tank gives you plenty of fuel for the cook, whereas a short session for burgers or chicken breasts needs much less.
Layer Cherry Wood for Staged Smoke
Cherry and pork are a beautiful combination. Place several chunks around the bottom of the basket before covering them with charcoal. I spread them around different points of the basket rather than piling them all into one spot.
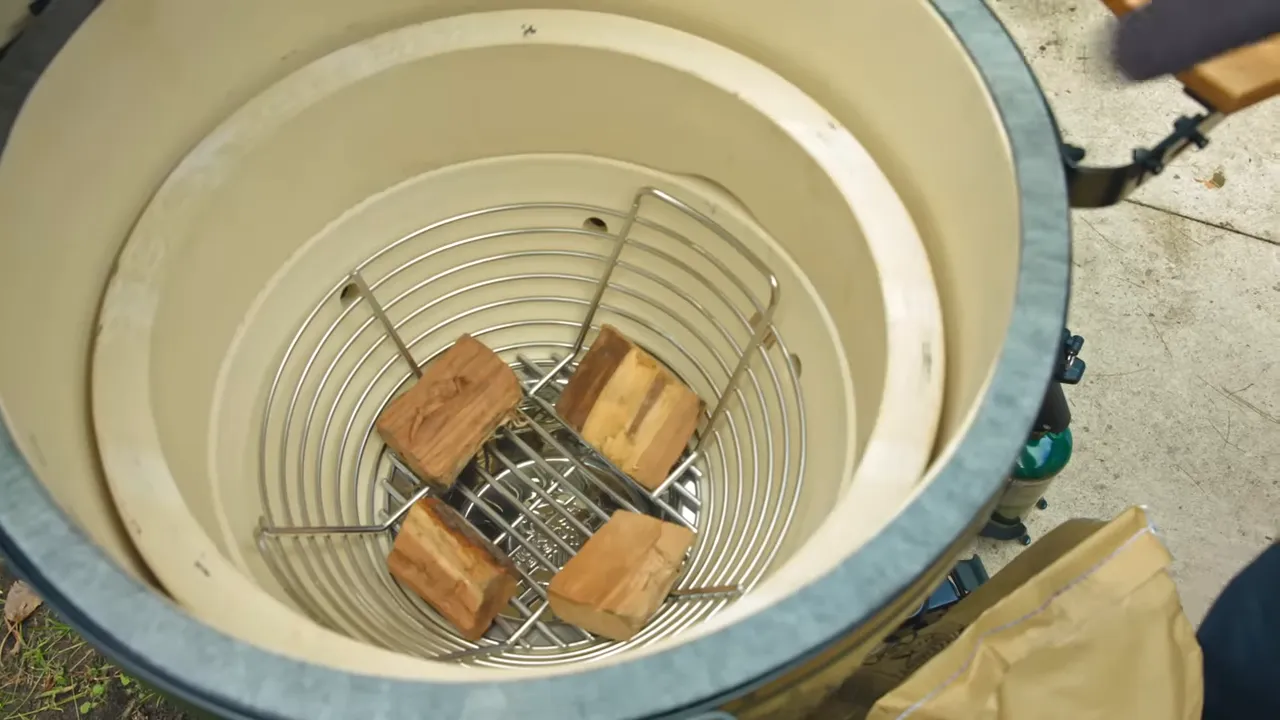
Light the charcoal in the center. We used a grill torch, then added one final piece of cherry near the lit area using a high-heat glove. That top piece supplies the first hit of smoke, while the buried pieces begin contributing later.
Warm the Ceramics Before Restricting Airflow
Install the rack system and half-moon heat deflectors, initially leaving a wedge-shaped opening between the stones. I call this the missing-pizza-slice configuration.
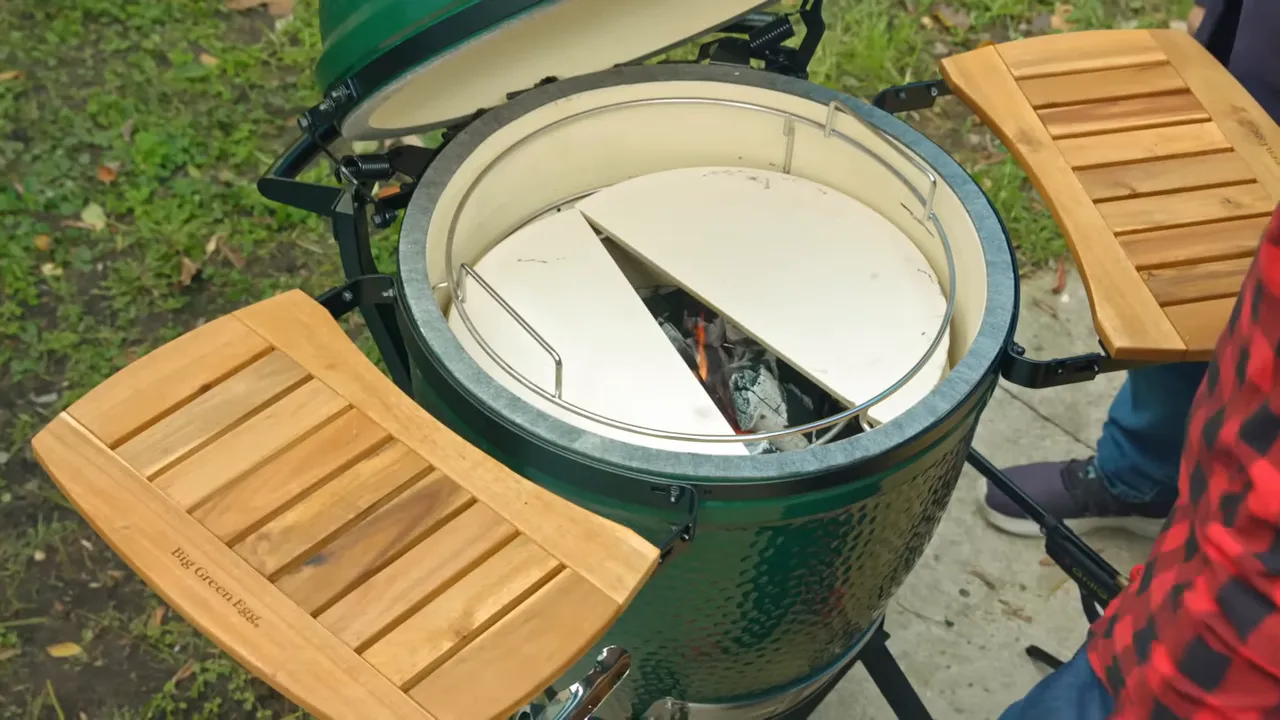
Close the dome and initially leave the vents open so the fire can warm both the deflectors and the ceramic dome. You want heat stored in the cooker, not just a rising number on the thermometer.
Once the Egg is warming, reduce the bottom draft door to roughly one finger’s width and narrow the top regulator opening to a similar starting point. On this setup, that helped settle the grill around 270°F.
Finger-width settings are a starting reference, not a universal calibration. Follow the thermometer and adjust for your own cooker. Push the deflector plates together to complete the indirect barrier, then install the cooking grids.
We also installed a raised grid and placed the empty cast iron skillet on it. That let the skillet heat soak throughout the rib cook, getting a head start on the crust we wanted later.
Smoke the Ribs for About Two Hours
Place the racks bone side down on the main cooking grid. Leave space between them so heat and smoke can circulate around both racks.
Close the dome and let the Egg do its job. This first stage builds smoke flavor and color before we move into the tenderizing stage.
When the surface starts looking dry, lightly spritz with a mixture of 50% apple cider vinegar and 50% water. Check about every 30 minutes and spritz as needed rather than constantly opening the grill.
By roughly the two-hour mark, our racks had good color and the meat was beginning to pull back from the ends of the bones. That was our cue to wrap.
Wrap Meat Side Down for Fall-Off-the-Bone Ribs
Rib tenderness is a preference. Drew wanted the meat falling off the bone, so we used a foil-wrapped finish to accelerate the cook and soften the racks.
- Lay out a large sheet of heavy-duty foil for each rack.
- Add a line of clarified butter and a sprinkling of brown sugar.
- Place a rack on top, meat side down.
- Add a splash of apple cider vinegar.
- Fold the foil around the rack and seal it to retain the liquid.
- Return the wrapped ribs to the Egg, keeping the meat side down, for approximately one hour.
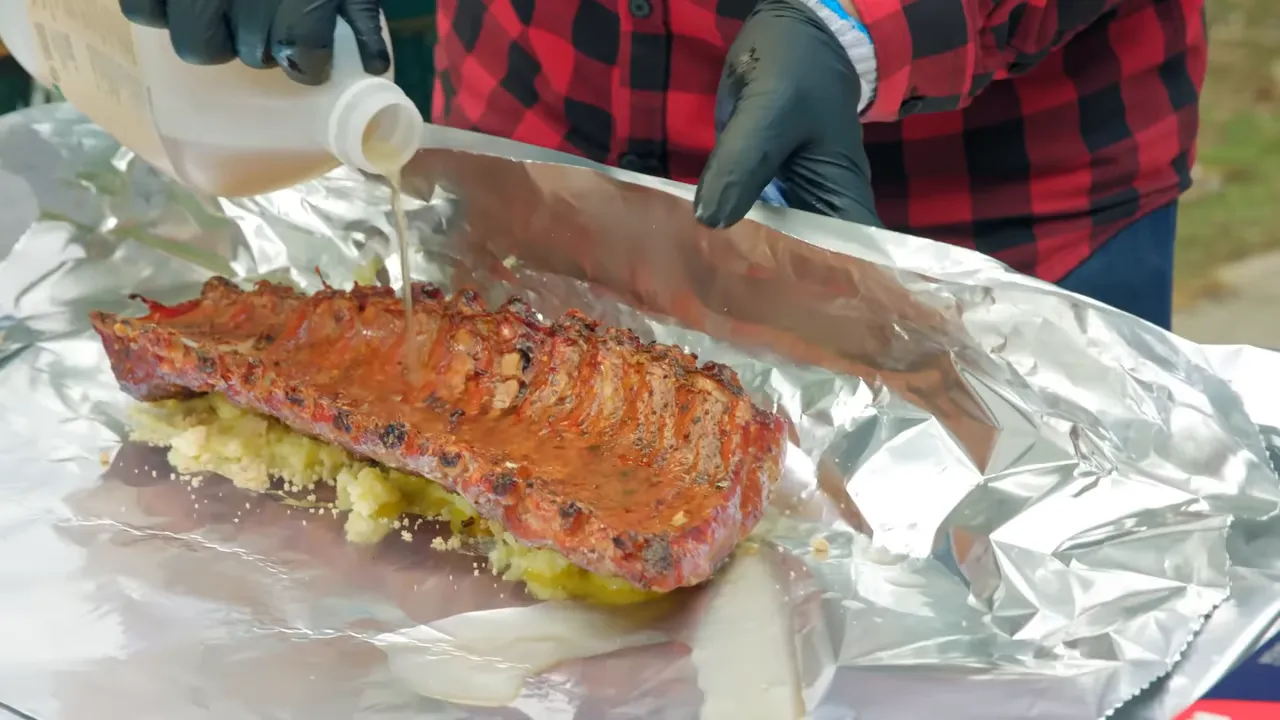
The butter, sugar, rub, vinegar, and pork juices create a flavorful liquid inside the foil. Do not throw it away. It becomes the foundation of the finishing glaze.
Once the ribs have reached the tenderness you want, take them off and let them rest in the foil while you bake the cornbread.
Make the Cast Iron Cornbread
This cornbread is buttery and tender inside, with a crust that makes the hot skillet worth the extra attention. Mix the batter during the ribs’ wrapped cooking stage so it is ready for the temperature change.
Cornbread Ingredients
- 3/4 cup all-purpose flour
- 1 1/4 cups coarse-ground cornmeal
- 2 teaspoons baking powder
- 1 teaspoon kosher salt
- 1/4 cup sugar
- 8 tablespoons unsalted butter, melted
- 2 eggs
- 1/3 cup whole milk
- 1 cup buttermilk
- Additional butter for coating the skillet
Combine the flour, cornmeal, baking powder, salt, and sugar first. Add the melted butter, eggs, whole milk, and buttermilk, then mix until combined.
And yes, stirring cornmeal might make you a little husky. I know. Corny joke.
A Hot Skillet Is the Secret to the Crust
With the ribs resting off the grill, bring the Egg up to 375°F, keeping the indirect setup in place.
The oven recipe we were working from called for 425°F, but I wanted the Egg to settle at 375°F for this cook. Since the skillet had already been warming, I gave it a brief additional heat boost with the grill torch before buttering it. That was my shortcut for getting the pan hotter without taking the entire ceramic cooker to 425°F.
The important part is the hot pan, not the shortcut. Handle the skillet with high-heat gloves, add butter, and spread it over the bottom and around the sides before pouring in the batter.
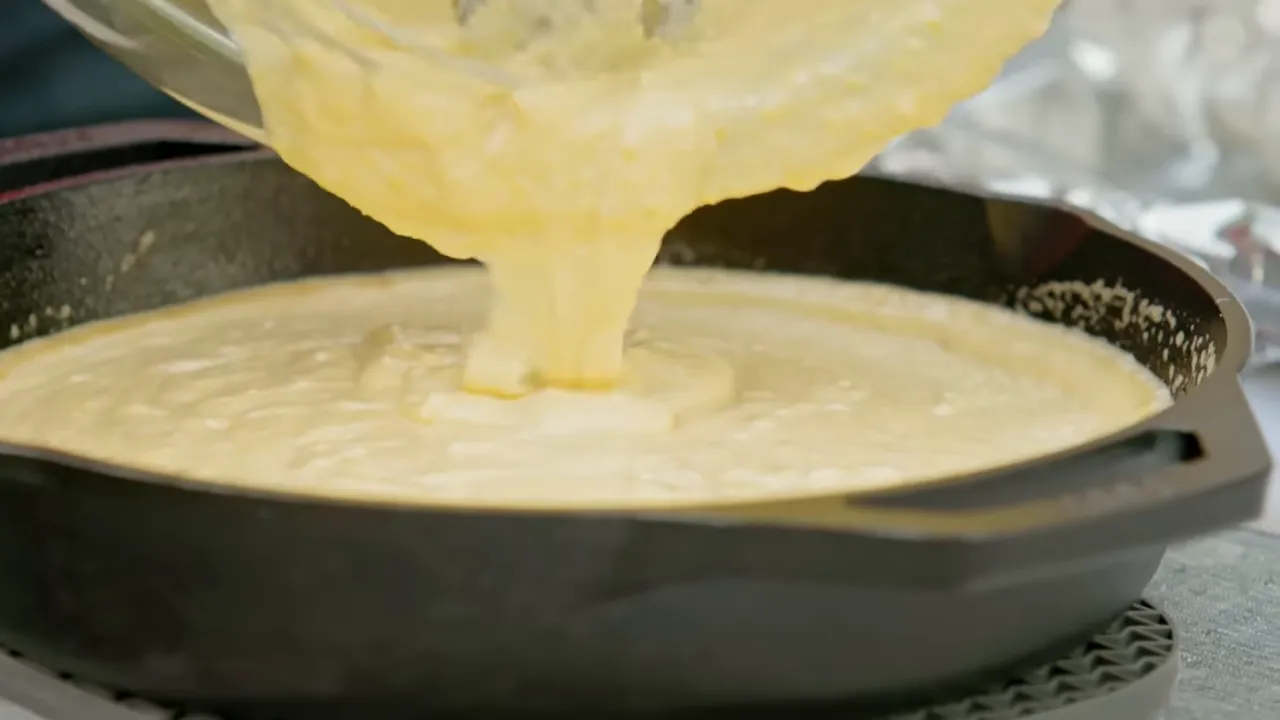
Set the skillet in the center of the grill and bake for approximately 20 minutes. Our cornbread was ready when the center measured about 210°F to 211°F.
Remove it with heat-resistant gloves and let it rest while you finish the ribs. The hot iron gives you that golden outer crust, while the inside stays soft and fluffy.
Turn the Rib Juices Into a Sticky Finishing Glaze
Open the foil carefully and pour the cooking liquid into a shallow pan. You already have clarified butter, brown sugar, seasoning, and the natural juices from the ribs working together.
Add approximately 1/4 cup barbecue sauce and a splash of apple cider vinegar, then stir. The sauce adds body and sweetness, while the vinegar balances the richness.
- Slice the rested racks into individual ribs.
- Dip the ribs into the glaze.
- Place them back on the Egg.
- Cook for about 10 minutes, just until the coating tacks up.
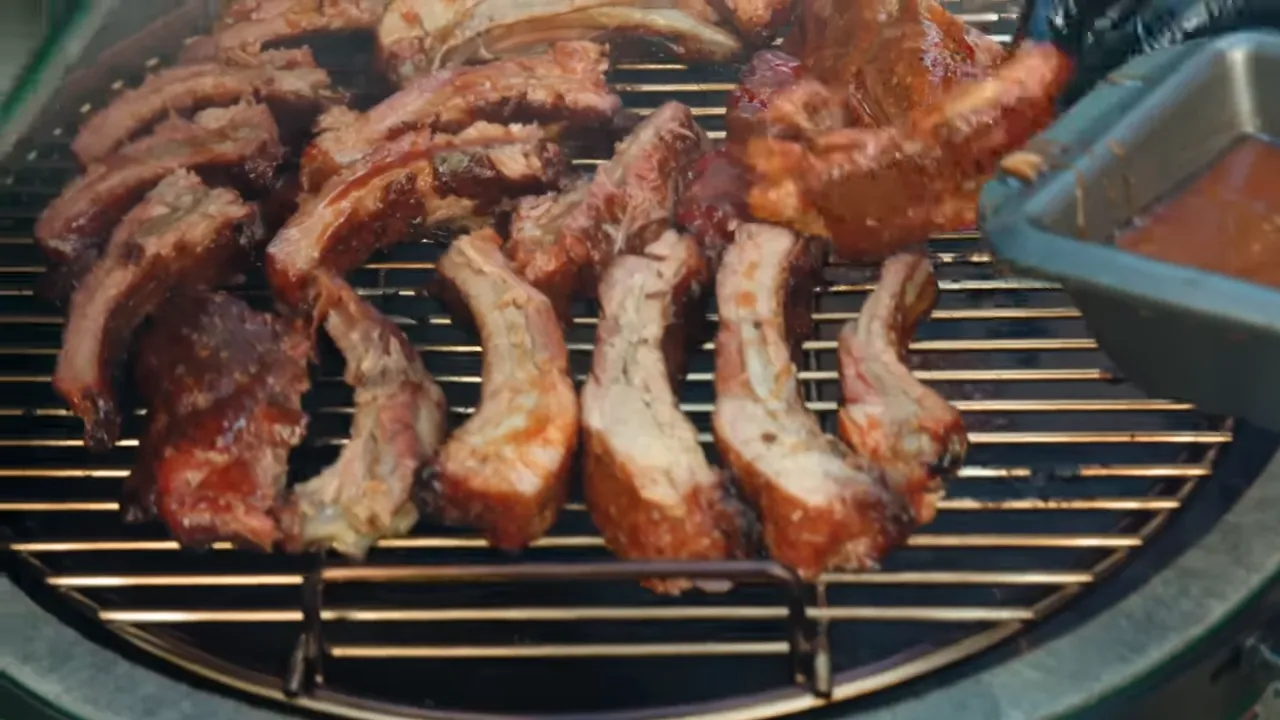
You are not starting another long cooking stage here. You are setting the sauce so it clings to the meat instead of running straight onto the serving board.
Keep clean utensils and serving surfaces ready for the finished food. The USDA’s pork handling and food safety guidance is a useful reference for preparation and leftovers.
A Complete Backyard Barbecue Meal, One Cooker
The finished ribs had everything we were after: cherry smoke, a savory garlic backbone, a little spicy kick, and sweetness from the brown sugar glaze. Most importantly for Drew, the meat released cleanly from the bones.
The cornbread brought the contrast. A browned crust outside, a buttery, tender crumb inside, and something perfect for serving alongside those sticky ribs.
But the biggest result was confidence. Drew went from thinking a full rack of smoked ribs was out of reach to feeling ready to repeat the meal himself. That is what good barbecue technique should do: make the next cook feel more manageable.
Start with a clear plan, give the cooker time to warm properly, and use each stage of the meal to your advantage. You do not need a second grill to make the side dish happen. You just need to let the ribs rest while the cornbread gets its turn.
Do not be afraid to fire it up.


