A crockpot is not the secret to incredible pulled chicken. For me, the best result comes from borrowing a few competition barbecue tricks, leaving the complicated stuff behind, and putting those techniques to work in the backyard.
I call these competition-ish chicken thighs. We are using boneless, skinless thighs instead of carefully trimmed, bone-in, skin-on competition chicken. There are no injections, no scraping fat from the skin, and no worrying about a perfect turn-in box.
What we are keeping is the part that matters for juicy chicken: a smoke bath, a covered braise, and a chili-lime sauce that brings the whole cook together. Chop it or shred it, and you have some remarkable chicken for tacos, sandwiches, or salads.
I made this batch for my niece’s wedding taco bar, with about 150 people to feed alongside carne asada and pork carnitas. That meant six pans across two Big Green Eggs. You do not need anything close to that much chicken. A single pack and one foil pan are enough to follow the same method.
What You'll Learn
- Smoke, covered braising, and a sauced finish combine backyard simplicity with competition-inspired chicken technique.
- A shallow layer of broth and clarified butter supports the moist cooking stage.
- Seasoned pan juices add flavor to chili-lime sauce, but need thorough cooking before reuse.
- Use internal temperature checkpoints rather than timing alone, especially when cooking several pans.
Table of Contents
- Why Smoke, Braise, and Glaze?
- Make the Tex-Mex Dry Rub
- Season the Chicken Before Lighting the Grill
- Set Up the Big Green Egg for Indirect Cooking at 250°F
- Build the Pans: A Little Broth, Rolled Thighs, and Ghee
- Stage 1: Smoke the Thighs Uncovered
- Stage 2: Cover and Braise
- Make the Chili-Lime BBQ Sauce
- Stage 3: Dunk, Drain, and Finish on the Grill
- Chop or Shred for Tacos, Sandwiches, and Salads
- Making a Large Batch Ahead
- The Secret Is the Method, Not the Complexity
Why Smoke, Braise, and Glaze?
Grilled chicken thighs can make an amazing weeknight dinner. But cooking thighs for chopping or pulling is a slightly different job. You want smoke and barbecue flavor without drying out the meat before it reaches the plate.
This method separates that job into three stages:
- Smoke uncovered: Give the seasoned thighs some gentle smoke at 250°F.
- Braise covered: Seal the pans with foil so the chicken cooks in a moist environment with broth, butter, and its own juices.
- Sauce and finish: Dunk each thigh in a smooth chili-lime sauce, then return it to the indirect grill to set the coating and finish cooking.
The other important trick is not throwing away all that flavor in the bottom of the pan. A little of that seasoned cooking liquid goes into the sauce, bringing the broth, clarified butter, rub, and chicken juices along with it.
Make the Tex-Mex Dry Rub
The flavor profile I am aiming for is similar to Meat Church Holy Voodoo, but this is an inspired blend, not an exact copy. My version skips ingredients such as MSG, turbinado sugar, and dehydrated jalapeño powder. It uses less sugar and familiar pantry ingredients, which is especially helpful when you have a lot of chicken to season.
This is a large batch of rub, not the amount you should put on one pan of chicken. Halve the recipe if you want a smaller shaker, and season the chicken only as needed.
Tex-Mex rub ingredients
- 1 cup Diamond Crystal kosher salt
- 10 tablespoons smoked paprika
- 6 tablespoons granulated garlic
- 6 tablespoons brown sugar
- 3 tablespoons freshly cracked black pepper
- 2 tablespoons dried oregano
- 1 tablespoon granulated onion
- 2 teaspoons chili powder
- 2 teaspoons cayenne pepper
- 2 teaspoons cumin
- 2 teaspoons celery seed
Combine everything in a large container and shake thoroughly until the mixture is uniform. Break up any pockets of brown sugar so you get consistent seasoning from the shaker.
Use the specified Diamond Crystal kosher salt for this volume-based recipe. Other salts can pack differently, so a cup-for-cup substitution may change how salty the rub tastes.
Season the Chicken Before Lighting the Grill
Lay the boneless, skinless chicken thighs flat and season the underside. Flip them over and give the top a light dusting.
Do not worry about getting a flawless coating right now. We will touch up the seasoning once the thighs are rolled and sitting in their pans. At this point, the goal is to let the salt begin working and allow the rub to tack up while the grill comes to temperature.
For each pan, have the following ready:
- Boneless, skinless chicken thighs, enough to fit snugly in one layer
- Tex-Mex rub, as needed
- Low-sodium or no-salt-added chicken broth, enough to barely cover the pan bottom
- Clarified butter or ghee, enough for a light drizzle over each thigh
- A foil pan and foil for covering
My pans held about 10 thighs each, but thigh size makes a difference. The smaller pieces in my retail pack were noticeably different from the bulk-pack thighs, so keep that in mind when checking temperatures later.
Set Up the Big Green Egg for Indirect Cooking at 250°F
This is an indirect cook from beginning to end. The same basic approach works on a Kamado Joe or Primo, although your hardware and vent positions will differ.
Start with clear airflow and a modest charcoal load
Remove the cooking racks, shake the loose ash out of the charcoal basket, and empty the ash collector. Return the basket and any usable leftover charcoal.
I use one piece of naturally seasoned smoking wood for this cook. Poultry picks up smoke readily, so this is not the time to load the fire with wood as though you were cooking a brisket or pork shoulder.
Place the wood beneath the charcoal, then add enough fresh lump charcoal for a couple of hours of indirect cooking. I remove a few oversized pieces if I have filled the basket more than necessary.
The placement matters. I want the fire to reach the wood during this relatively short cook, with the smoke passing upward through the hot charcoal. Burying the wood under far more fuel than the cook needs can delay when it starts contributing smoke.
Warm the ceramic, then settle the vents
- Light the charcoal directly above the smoking wood and let that area become well established.
- Close the dome and leave the top vent open during the initial warmup.
- Install the rack system and heat deflectors. With split deflectors, I initially leave a wedge-shaped opening to help heat reach the dome.
- Once the grill has recovered to around the cooking temperature and the ceramic is warmed, use heat-resistant gloves to close the deflectors fully.
- Reduce airflow gradually and stabilize the grill at 250°F before adding the chicken.
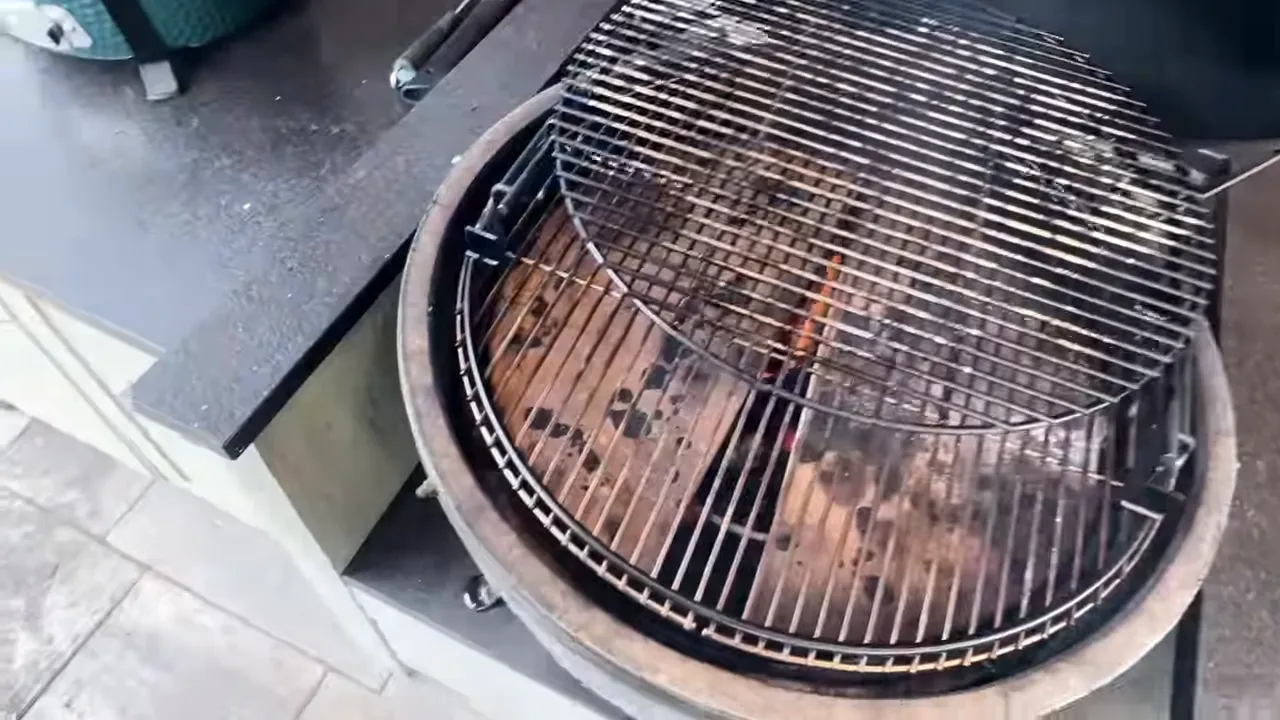
On my Big Green Egg, I bring the bottom draft door down to roughly a finger’s width. As the temperature recovers past 200°F, I begin closing the top regulator, first about halfway and then toward its final position as the grill approaches 250°F.
Those are starting points, not universal measurements. Follow the temperature response of your own grill. An expander rack is useful for a large batch, but there is no need for that extra capacity when you are cooking one pan.
|
Build the Pans: A Little Broth, Rolled Thighs, and Ghee
This is where the competition influence starts doing some useful work.
- Dust the pan: Sprinkle a light layer of rub over the bottom of each foil pan.
- Add a shallow layer of broth: Use just enough low-sodium or unsalted chicken broth to cover the bottom, roughly 1/16 inch. A full 1/4 inch is more than we need.
- Roll the thighs: Fold or roll each thigh into a compact little parcel, tidying the top as you go.
- Pack them snugly: Arrange the rolled thighs in one layer in the pan.
- Drizzle with ghee: Add a little clarified butter over each thigh.
- Touch up the rub: Once the ghee has run over the surface, add a light dusting wherever the seasoning needs evening out.
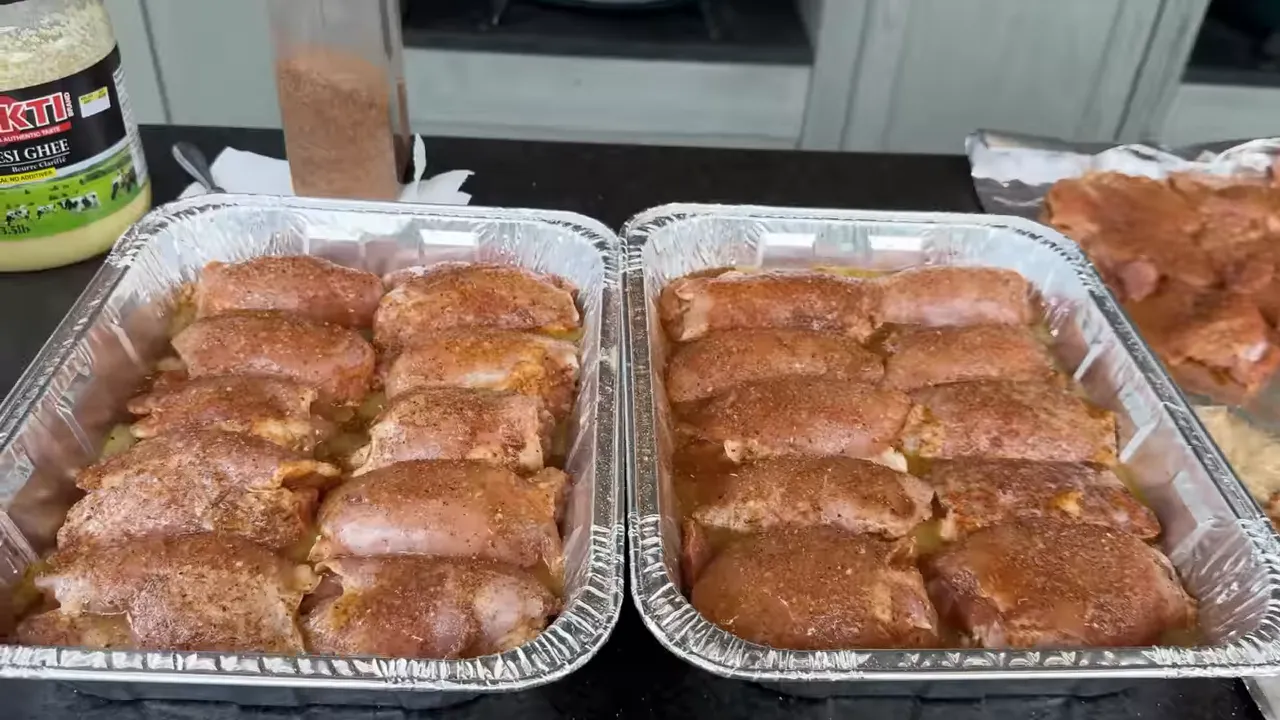
Competition recipes often place pats of butter on top of the chicken. I prefer drizzling clarified butter first and correcting the seasoning afterward, rather than having melting butter disturb the finished rub coating.
That butter also becomes part of the pan liquid, which we will use to finish the sauce. Nothing complicated, just another layer of flavor.
Stage 1: Smoke the Thighs Uncovered
Place the uncovered pans on the grill over the closed heat deflectors and cook at 250°F.
- One pan: Start checking after about 30 minutes.
- A heavily loaded grill: Allow about 45 minutes before the first stage is complete.
- Transition temperature: About 130°F internal, checked in the thickest part of several thighs.
For my large batch, I put two pans on the lower rack and one on the upper rack of each grill.
Loading a cooker with a lot of cold meat slows things down. In my experience, a near-capacity load can take roughly 30 to 40 percent longer than a smaller cook. That is why the thermometer matters more than the timer.
The 130°F reading is only a checkpoint for changing cooking stages. The chicken is not ready to eat. Keep it moving straight into the covered braise.
Stage 2: Cover and Braise
Once the thighs are around 130°F internally, cover each pan tightly with foil and continue cooking at 250°F.
The broth, butter, and released juices now create the moist cooking environment we want. This is the competition-inspired step that helps deliver the tender, juicy result without any skin preparation or injections.
- One pan: Allow approximately another 30 minutes.
- Multiple pans: Allow approximately another 45 minutes.
- Next checkpoint: About 150°F internal before moving into the sauce-and-finish stage.
Check several pieces, especially if the thighs vary in size. My pans did not all reach the checkpoint at exactly the same time, and that is fine. Work with the pans that are ready while the others catch up.
Keep the fire from running away while the dome is open
If you are covering several pans, close the bottom vent just before opening the grill. A few minutes with the dome open can give the charcoal enough extra air to drive the temperature well above your target.
Cover the pans, close the dome, and let the cooker recover toward 250°F. Then restore the bottom vent to its previous cooking position.
Do not forget to reopen it. This is a temporary adjustment while you work, not a new setting for the rest of the cook.
Make the Chili-Lime BBQ Sauce
This sauce sits somewhere between a thin competition glaze and a fuller barbecue sauce. We are not trying to impress judges with a perfectly lacquered thigh. We want enough coating and flavor to carry through the chopped or shredded chicken.
Sauce ingredients per pan of chicken
- 1 chipotle pepper in adobo
- 1 cup ketchup
- Juice of 1 lime
- A small amount of liquid from the chicken pan, added gradually to adjust consistency
For my six-pan batch, that meant six peppers, six cups of ketchup, and the juice of six limes. The pan liquid is the exception: do not assume you need all the liquid from every pan.
Combine the peppers, ketchup, and lime juice in a saucepan. Warm gently over low heat, stirring so the sugary ketchup does not scorch. You can warm the pan on the grill if you have room. I used an induction burner because the Eggs were full.
When the chicken reaches the braising checkpoint, carefully pour a little of the pan liquid into the sauce. Hold the thighs back as you pour. Start with an amount roughly equivalent to 10 percent of the sauce base, then adjust gradually.
That liquid contains the broth, rub, clarified butter, and chicken juices. It adds flavor, but too much will turn the sauce watery. I used liquid from only part of my six-pan batch.
Food safety matters here: the chicken is still partway through cooking when this liquid is collected. Bring the sauce containing those juices to a full boil before using it. Then blend until smooth, using equipment suitable for hot liquids and following its instructions. The USDA’s chicken handling guidance also explains why liquids exposed to raw poultry need thorough cooking before reuse.
The finished sauce should flow easily but still coat a thigh when you dunk it. Add liquid a little at a time rather than trying to fix an overly thin sauce later.
Stage 3: Dunk, Drain, and Finish on the Grill
Remove the thighs from the braising pans. Dunk each one completely in the hot chili-lime sauce, let the excess drain, and place it directly on the cooking grate.
Keep the heat deflectors in place. Moving the chicken onto the grate does not turn this into a direct-heat cook.
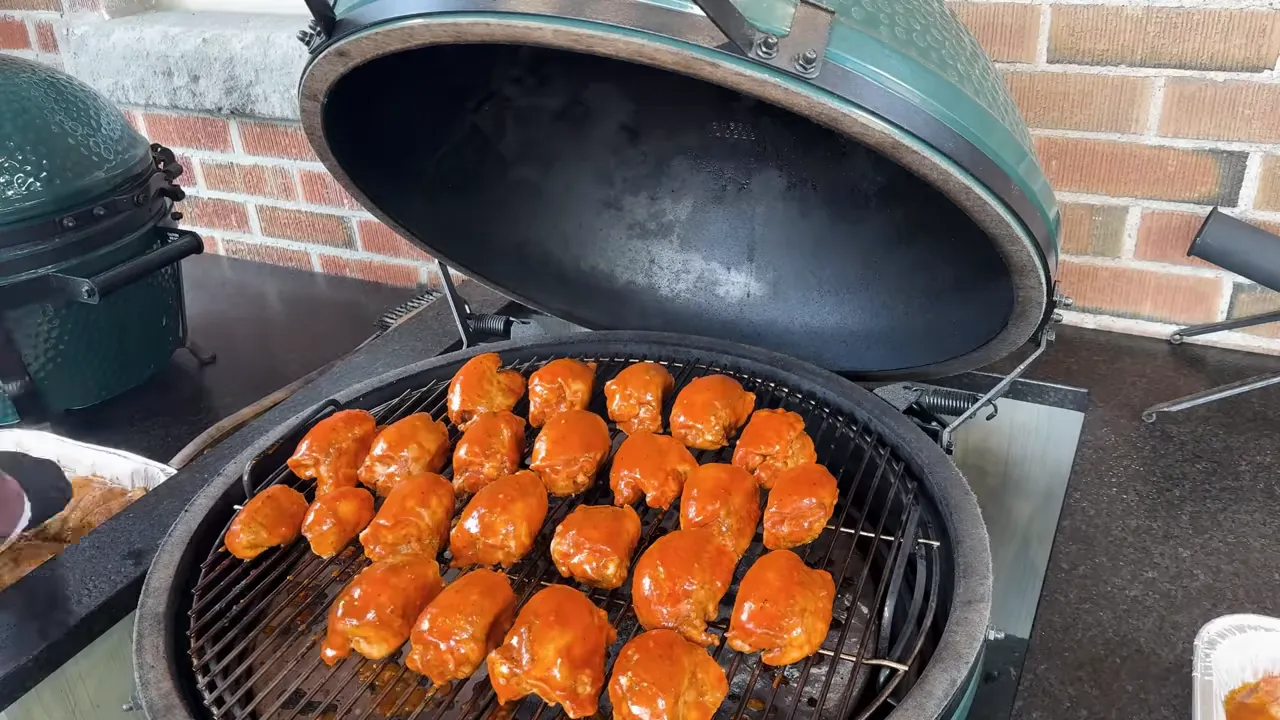
Close the dome and continue cooking until the coating sets and the chicken reaches a safe finishing temperature. There is no fixed finishing time here. Check multiple thighs with an instant-read thermometer.
My finishing checks during this cook were around 160°F. For a straightforward home-cooking endpoint without calculating a time-and-temperature hold, continue to 165°F in the thickest part of every thigh, following the safe minimum temperature guidance for poultry. The earlier 130°F and 150°F readings are process checkpoints, not serving temperatures.
If you want extra sauce for serving, keep a portion separate before dunking the partially cooked chicken.
Chop or Shred for Tacos, Sandwiches, and Salads
Once the chicken is fully cooked, transfer it to a clean cutting board. You can shred it, but I went for the chop.
Chopping works particularly well for a taco bar because you get manageable pieces with the seasoned exterior mixed throughout. The chicken is tender enough that either approach works.
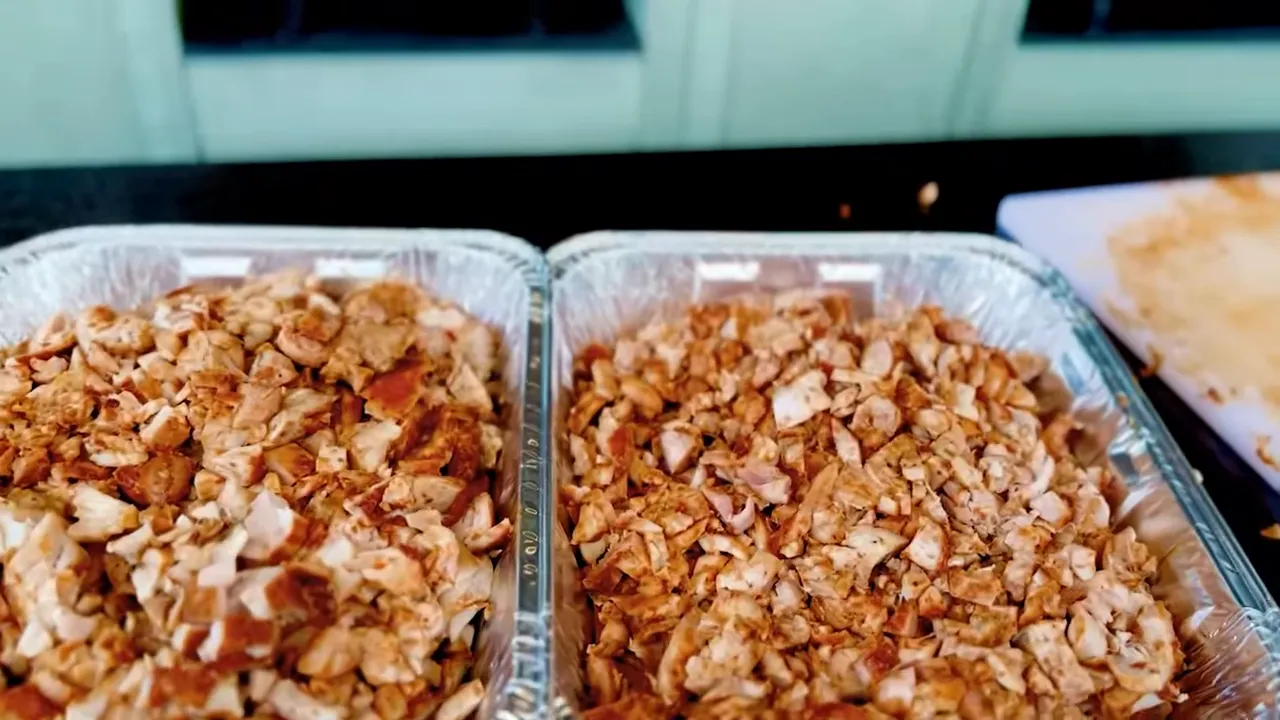
The result is juicy chicken with gentle smoke, savory Tex-Mex seasoning, and a chili-lime coating that does not disappear once the meat is chopped. Put it in tacos, pile it onto sandwiches, or serve it with a salad.
And yes, after chopping a batch this size, the pitmaster absolutely gets a snack.
Making a Large Batch Ahead
For the wedding, I chopped the chicken, vacuum sealed it, and froze it for reheating on the day. Sous vide was my planned reheating method so I could bring the sealed portions back up to temperature before service.
The important distinction is that vacuum sealing does not replace safe cooling, storage, or reheating. Fully cook the chicken first, cool it promptly in small portions, and keep it refrigerated or frozen as appropriate.
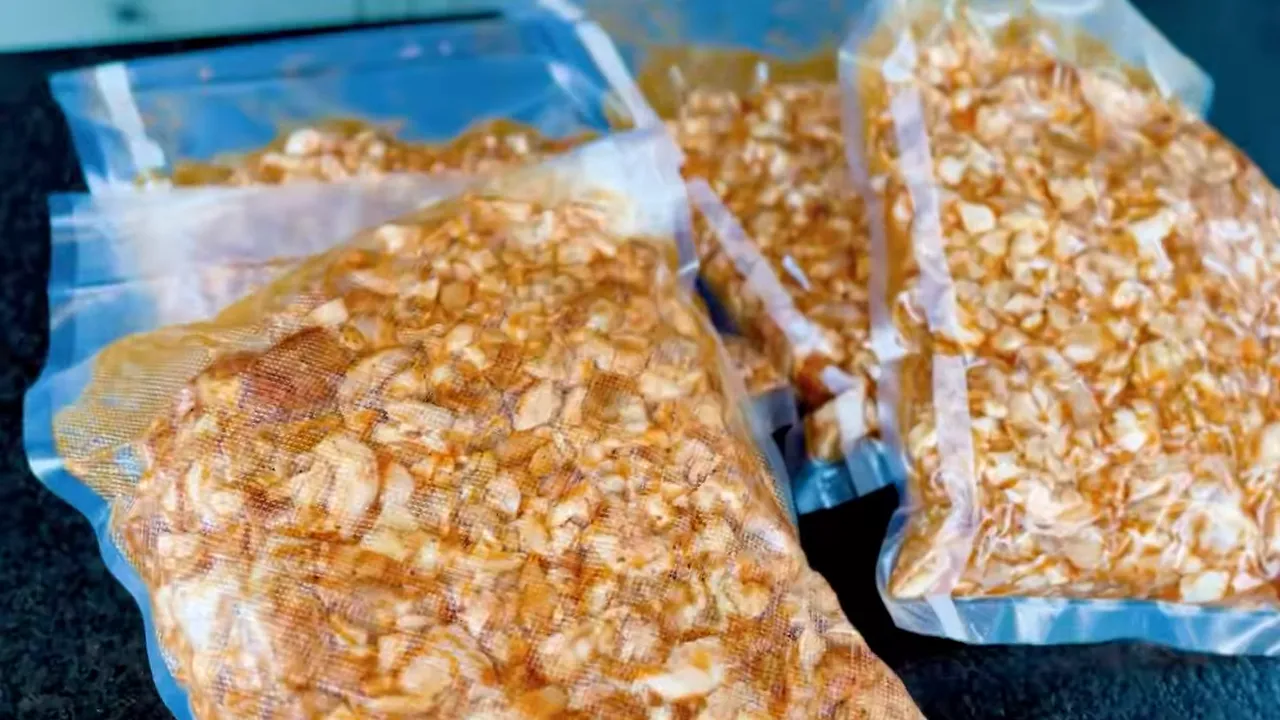
Do not treat a brief stay in a 140°F water bath as a complete reheating or pasteurization instruction. Lower-temperature methods depend on a validated process, including the time needed for the center of the food to heat through. For a simple home approach, follow the USDA recommendation to reheat leftovers to 165°F.
If you are cooking dinner rather than catering an event, you can skip the freezer entirely. This chicken is ready to enjoy as soon as it is safely cooked and chopped.
The Secret Is the Method, Not the Complexity
You do not need competition-perfect chicken to borrow the parts of competition barbecue that make dinner better.
Start with boneless, skinless thighs. Give them a restrained smoke bath. Braise them with a shallow layer of broth and a little clarified butter. Then use some of that cooking liquid to build a smooth chili-lime sauce before the final indirect finish.
That is the sweet spot between backyard simplicity and competition technique: incredible flavor, juicy chicken, and no skin scraping required. Do not be afraid to fire it up.


