Fair warning: this BBQ carne asada may make your usual takeout order a little disappointing. We’re talking ribeye with a serious crust, a tender pink center, and a smoky red pepper finishing sauce that brings everything together.
The trick isn’t just buying a great piece of beef. It’s giving seasoning, smoke, searing, and sauce their own jobs. Dry-brine the roast first, reverse-sear it gently, cut it into thick steaks to create more searing surface, then chop and toss with the finishing sauce.
I used this method for 30 pounds of boneless ribeye for my niece’s wedding. You don’t need a wedding-sized guest list to make it worthwhile. Half a roast for friends and family works with the same approach.
What You'll Learn
- Dry-brine large ribeye roasts two days ahead with a homemade Tex-Mex seasoning.
- Pull the indirect cook early to leave room for carryover cooking and searing.
- Slice smoked roasts into thick steaks before searing to create more crust.
- Toss chopped beef with a lime, garlic, and chipotle finishing sauce before serving.
Table of Contents
- Why Use Ribeye for Carne Asada?
- Secret 1: Dry-Brine with a Homemade Tex-Mex Rub
- Set Up the Big Green Egg for Smoking and Searing
- Reverse-Sear the Ribeye Roasts
- Secret 2: Make a Red Pepper Finishing Sauce
- Secret 3: Slice Before Searing for Maximum Crust
- Chop, Toss, and Serve
Why Use Ribeye for Carne Asada?
For my family of four, I might keep things simple with skirt steak and a wet marinade. Flank steak is another thin-cut option. But when I’m scaling up, I get a better result using a New York strip roast or, in this case, boneless ribeye.
A large roast is easy to manage during the gentle cooking stage. Ribeye also gives us that lovely combination of rich, juicy meat and fat. The challenge is crust: sear a whole roast and most of the meat inside never touches the hot cooking surface.
The answer is to smoke it as a roast, then sear it as thick steaks. That creates far more browned surface before the beef becomes taco-sized pieces. It’s the same kind of texture balance I love in pulled pork: some bark, some tender meat, and some rich, juicy bites.
How Much Beef Should You Plan?
For this cook, I planned around ½ pound of cooked meat per person. My estimate was that 30 pounds of raw ribeye would become roughly 25 pounds after cooking, enough for about 50 portions at that serving size.
The wedding had 150 guests, but carne asada wasn’t the only protein. I was also preparing chicken and pork carnitas. Don’t mistake the 30-pound beef batch for 150 full beef servings.
- Small gathering: Use a smaller roast or half a roast and follow the same temperature-driven process.
- Large gathering: Check grill capacity before lighting, including space between the beef and any upper rack.
- Serving estimate: Account for cooking loss and the other proteins on the menu.
Secret 1: Dry-Brine with a Homemade Tex-Mex Rub
Two days before cooking, score the fat cap, season the roast on all sides, and refrigerate it. That advance seasoning is a key part of this method.
A wet marinade works well for thin steaks, where the salt doesn’t have far to travel. With large ribeye roasts, I prefer dry-brining. It gives the salt time to work without trying to find refrigerator space for several enormous containers of liquid.
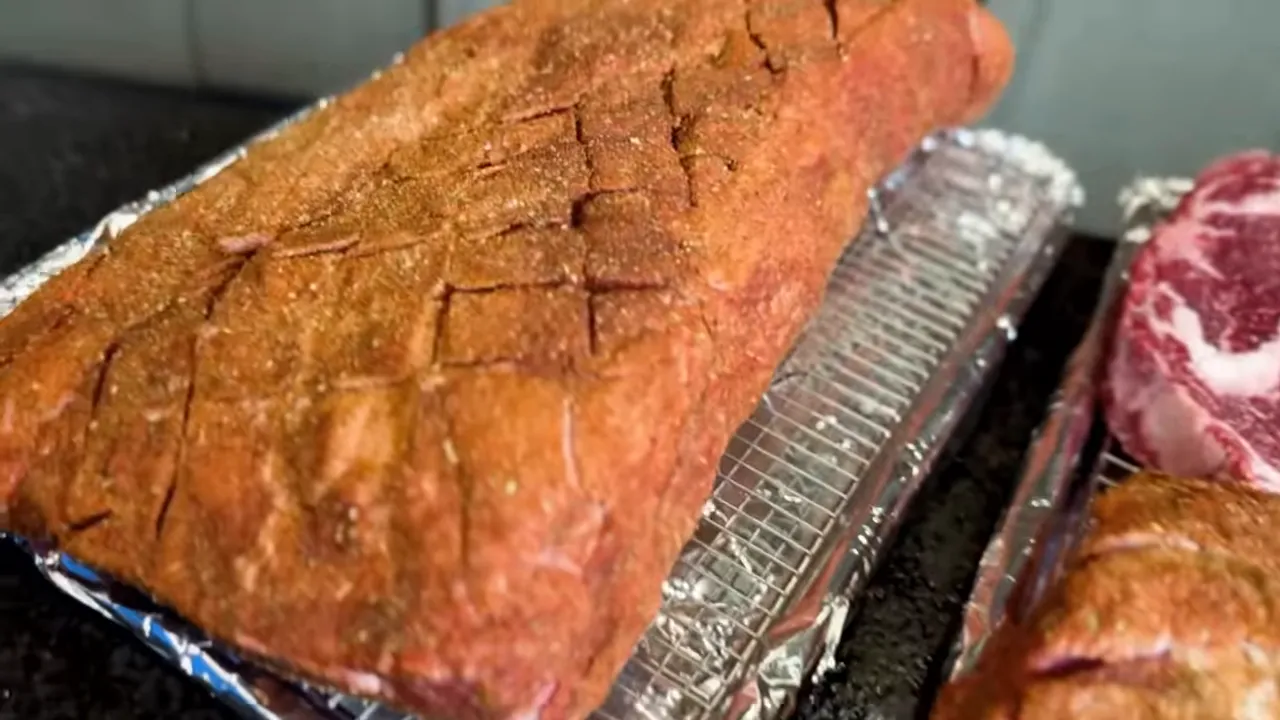
Homemade Tex-Mex Dry Rub
This is a large shaker batch, not an instruction to use the entire mixture on one roast. Halve the ingredients if you want a smaller batch.
- 1 cup Diamond Crystal kosher salt
- 10 tablespoons smoked paprika
- 6 tablespoons granulated garlic
- 6 tablespoons brown sugar
- 3 tablespoons freshly cracked black pepper
- 2 tablespoons dried oregano
- 1 tablespoon granulated onion
- 2 teaspoons chili powder
- 2 teaspoons cayenne pepper
- 2 teaspoons cumin
- 2 teaspoons celery seed
Combine everything in a container with enough room to shake thoroughly. Mix until the layers disappear and the seasoning is evenly distributed. Use granulated garlic and onion rather than the very fine powders for the texture I’m using here.
The flavor direction is similar to Meat Church Holy Voodoo, but this isn’t a clone. My pantry version leaves out ingredients such as MSG, turbinado sugar, and dehydrated jalapeño powder, while giving me the savory, smoky, gently sweet profile I want.
The salt measurement is specifically for Diamond Crystal kosher salt. Don’t assume a cup of a different salt will season identically.
Prepare the Beef Two Days Ahead
- Score the fat cap in a crosshatch pattern.
- Apply the mixed rub over the roast, including the sides and exposed meat.
- Refrigerate for two days before cooking.
- Reserve some rub for the freshly cut steak surfaces later.
Set Up the Big Green Egg for Smoking and Searing
I’m using an XL Big Green Egg with an expander rack to fit the beef. The important part of the setup is that the searing surface goes in early. Whether you use a suitable cast-iron half-moon or soapstone, it can serve as part of the heat barrier during the indirect stage while preheating for the final sear.
Build a Clean Fire
- Clean the ash from the basket and ash collection area so airflow isn’t restricted.
- Place one or two small pieces of smoking wood near the bottom of the charcoal bed.
- Add fresh lump charcoal and light it with a torch or fire starters.
- Let the lit area develop white ash before proceeding.
- Install the lower rack and the searing surface.
- Add a half-moon heat deflector alongside it, initially leaving an opening for heat to rise.
I prefer naturally seasoned smoking wood for the flavor I get from it. In my testing, soaking kiln-dried wood didn’t recreate the result I get with naturally seasoned wood, so I don’t treat soaking as a substitute.
A small practical tip for a stitched charcoal bag: start at the top left of the back side, undo the first knotted loop, then pull the stitching free. Much nicer than fighting the bag.
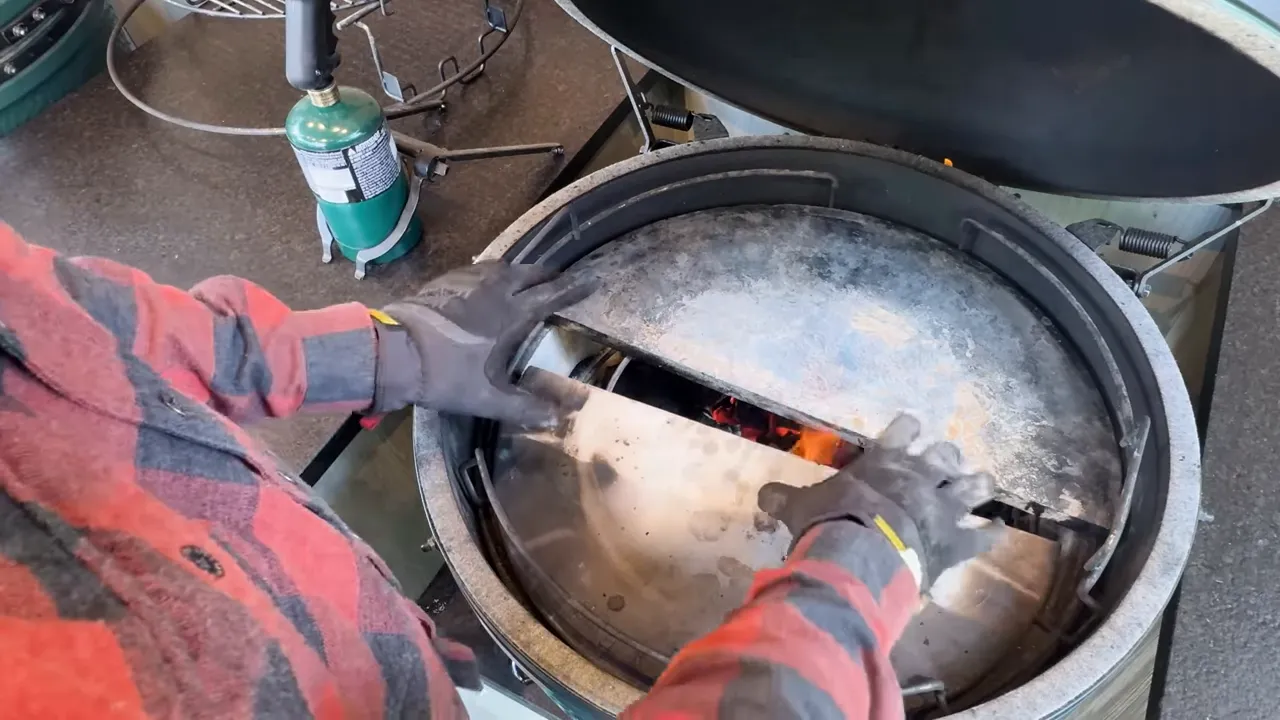
Heat-Soak the Ceramic, Not Just the Air
An early dome reading around 400°F doesn’t necessarily mean the grill’s ceramic body is fully heated. At startup, hot air and flame can raise the thermometer reading while the dome still holds relatively little energy.
That matters because kamado cooking uses three forms of heat:
- Convection: Hot air moving around the food.
- Conduction: Heat transferred through contact with a cooking surface.
- Radiation: Heat coming from the hot ceramic and other surfaces.
I want that radiant heat working for me, especially with a thicker fat cap. Give the ceramic time to warm rather than treating the first high thermometer reading as the finish line.
Once the grill is heat-soaked, reduce the bottom and top vent openings, bring the half-moon surfaces together, and settle the cooking temperature just below 300°F. Use appropriate heat protection when handling the setup. There’s no need to touch hot ceramic to check it.
If you have two suitable cast-iron half-moons, they can form a complete griddle-style barrier instead of using a separate ceramic half-moon deflector.
Reverse-Sear the Ribeye Roasts
Install the cooking grids and arrange the roasts above the indirect setup. For my large batch, the expander rack lets me use two levels.
Put a leave-in thermometer into each roast and set an alert around 120°F internal. That is a pull-point alert for this process, not the finished serving temperature.
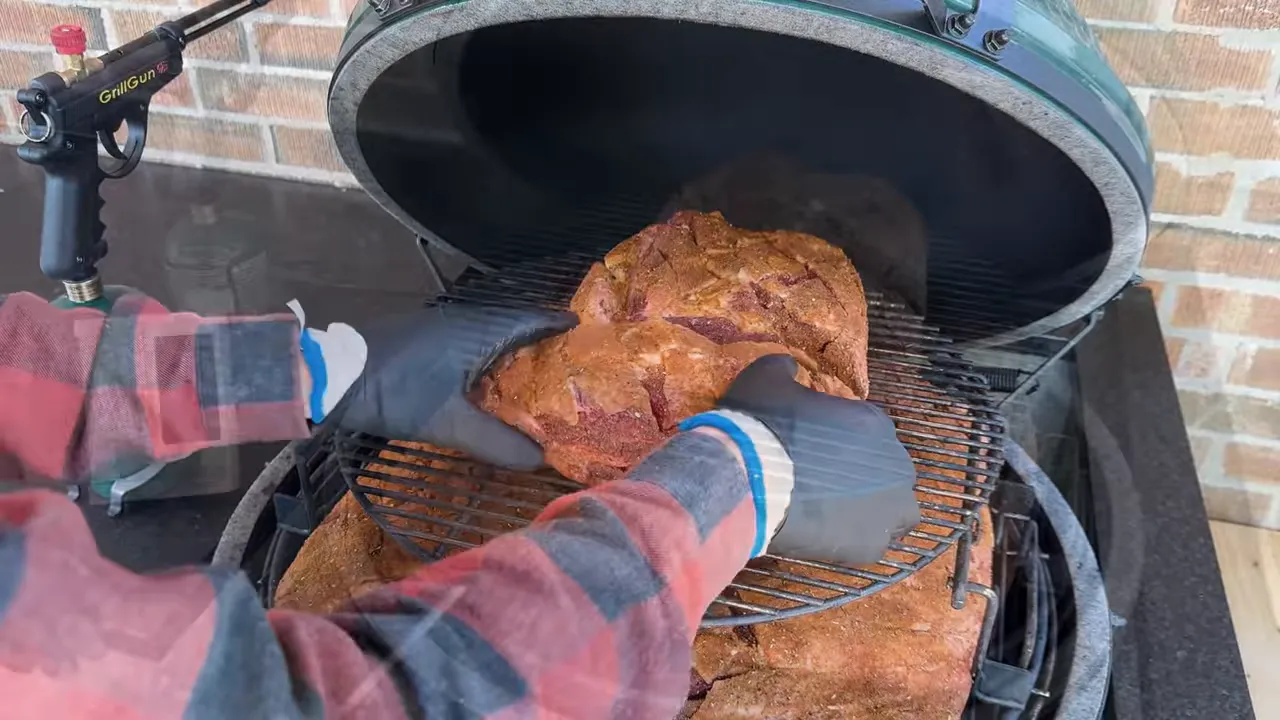
There are two reasons to stop the gentle cooking stage early:
- Carryover cooking: A roast this size can gain roughly 10°F while resting, although the actual rise varies.
- The sear is still ahead: Those thick steaks will pick up more heat when they hit the hot surface.
My goal is a medium-rare result after the whole process, not a roast that has already reached its final doneness before searing. You can always cook a little longer. You cannot uncook a ribeye.
Allow roughly an hour to an hour and a half for the initial stage as a planning estimate, but let temperature make the decision. A probe only reports what’s happening at its tip, so spot-check several locations with an instant-read thermometer before pulling each roast. Remove them individually as they become ready.
Food safety note: This method targets a medium-rare culinary result. The USDA safe minimum temperature guidance for beef steaks and roasts is 145°F followed by at least a three-minute rest, which is especially important to consider when serving a broad guest list.
Secret 2: Make a Red Pepper Finishing Sauce
While the beef cooks, blend the sauce. Instead of using a marinade on the raw roasts, I save those bright, smoky flavors for the chopped meat at the end.
The sauce brings together:
- Olive oil
- Lime juice
- Garlic
- Chipotle peppers in adobo, plus some sauce from the can
- A little Tex-Mex dry rub, optional but recommended
Blend until smooth. For the larger batch I’m preparing, I use eight garlic cloves, or roughly a heaping tablespoon of prepared minced garlic. Fresh is great if you have the time; prepared garlic is a useful shortcut when there’s a wedding-sized pile of chopping ahead.
This is a flexible finishing sauce: the lime adds brightness, the chipotles bring smoky pepper flavor, and the olive oil adds richness. Taste it before it goes anywhere near the beef.
Keep the Heat Friendly for a Crowd
The wedding version is deliberately mild. When someone asks whether the potatoes will be spicy, that’s a pretty good signal to keep the pepper enthusiasm under control.
For my own family, I’d double the chipotle peppers. For a mixed group, start restrained, taste with a clean spoon, and adjust. We’re cooking for everyone at the table, not just my personal chili-pepper preferences.
How Much Sauce Goes in Each Pan?
Start with about ¼ cup per foil pan of chopped beef, using up to ½ cup if needed. Pan size and how much meat you pack into it will affect the amount, so toss first and assess before adding more.
I expected this cook to fill about four foil pans. The sauce adds liquid and fat, which is particularly useful when the carne asada will spend some time in a warming pan. It supports the juicy texture, but it doesn’t replace proper temperature control during service.
Secret 3: Slice Before Searing for Maximum Crust
Once the roasts reach the initial pull point, take them off to rest. Open the grill vents to build the fire for searing, remove the separate ceramic deflector, and leave the preheated searing surface in place.
Now comes the step that makes this method different: cut the rested roasts into extra-thick steaks before the final sear.
If we seared the roasts whole, we’d brown the outside beautifully but leave enormous areas inside without any seared texture. Cutting first exposes those interior faces to the heat.
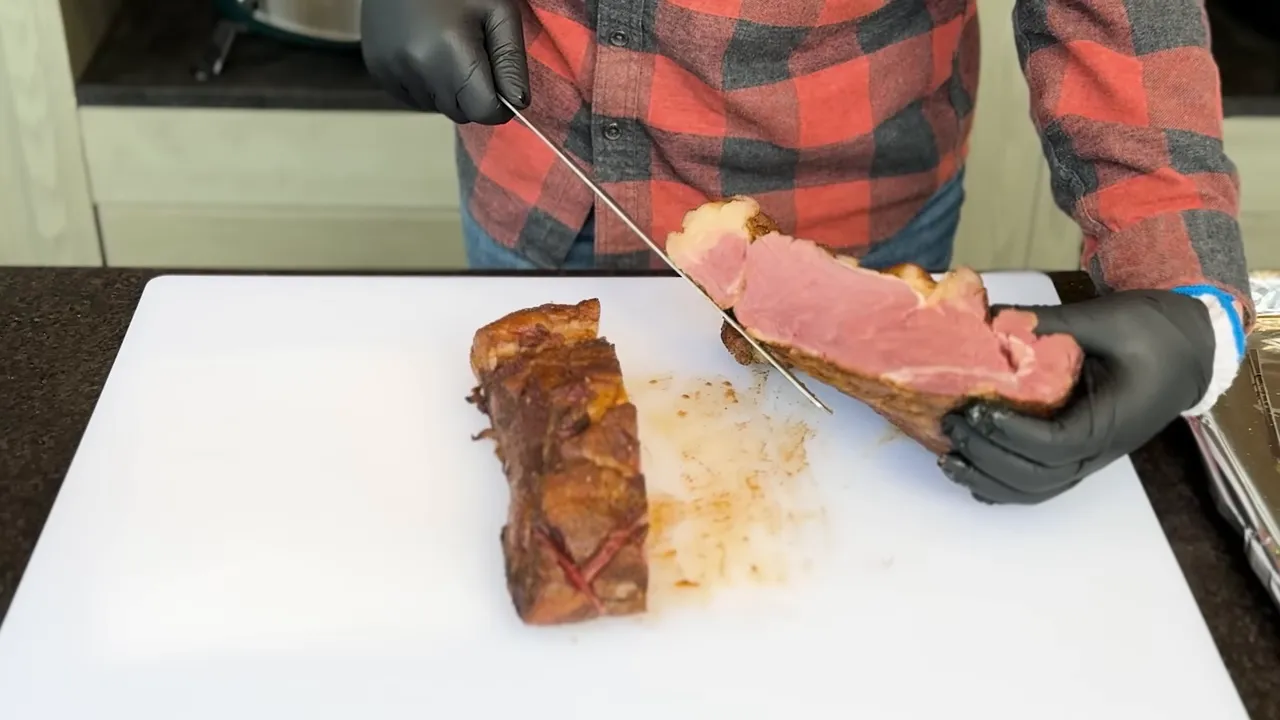
- Remove the leave-in probes.
- Slice the roasts into steaks thicker than you would normally cut for individual servings.
- Apply a little reserved rub to the newly exposed surfaces.
- Prepare to sear in batches.
Keep that second seasoning application sensible. The beef has already had two days with a salt-containing rub, so we’re seasoning the new surfaces, not starting over.
Aim for About 700°F at the Searing Surface
I’m looking for a surface temperature around 700°F, checked with an infrared thermometer. That’s the cooking surface temperature, not simply the dome reading.
If the surface is too cool, the beef spends longer cooking while you wait for browning. That can build a thicker overcooked band around the pink center. Much hotter, up around 900°F, and burning becomes a real concern.
For this setup, I agitate the coals and move them toward the back to concentrate heat beneath the searing area. Then I sear the broad faces and edges, turning as needed to build crust all the way around each thick steak.
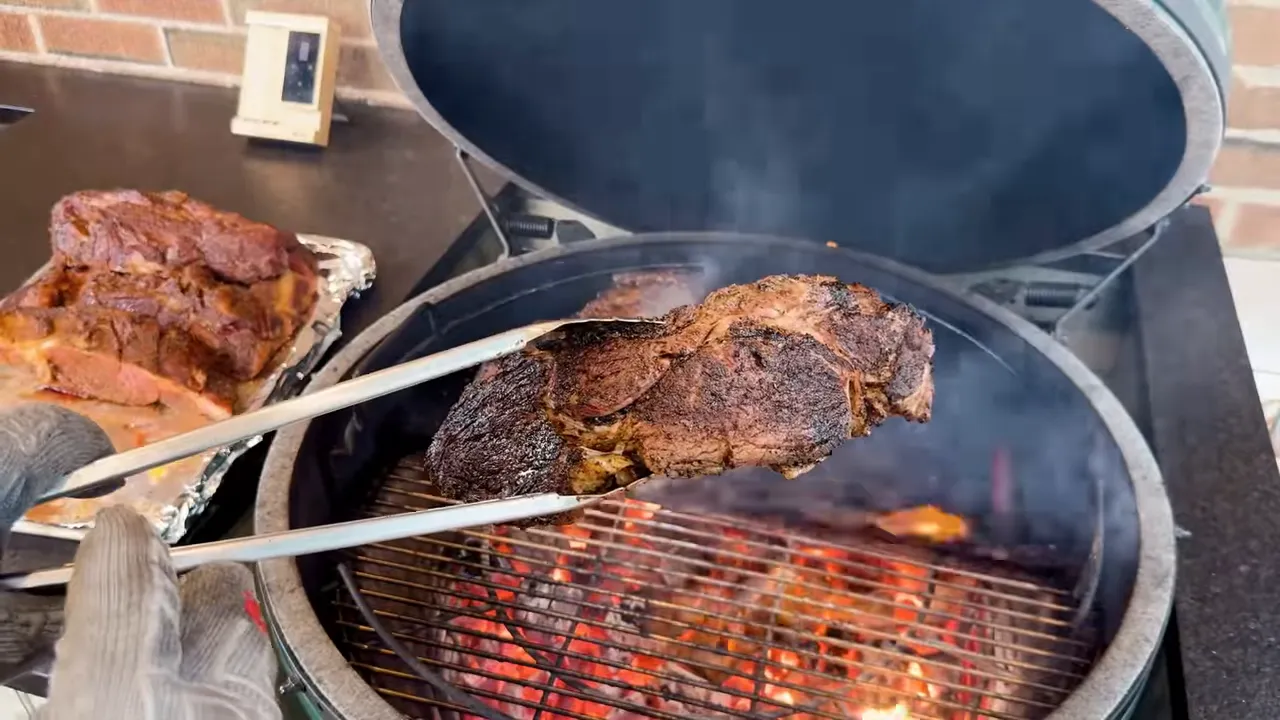
Work in batches and judge the crust rather than relying on a fixed number of seconds. The aim is fast browning without pushing the interior past your intended doneness. Keep heat-resistant gloves and long tongs handy, and manage flare-ups rather than letting flames sit against the meat.
Chop, Toss, and Serve
Once the steaks are seared, cut them into bite-sized pieces for tacos. This is where the payoff becomes obvious: dark crust around tender pink meat, without a big gradient of doneness through every slice.
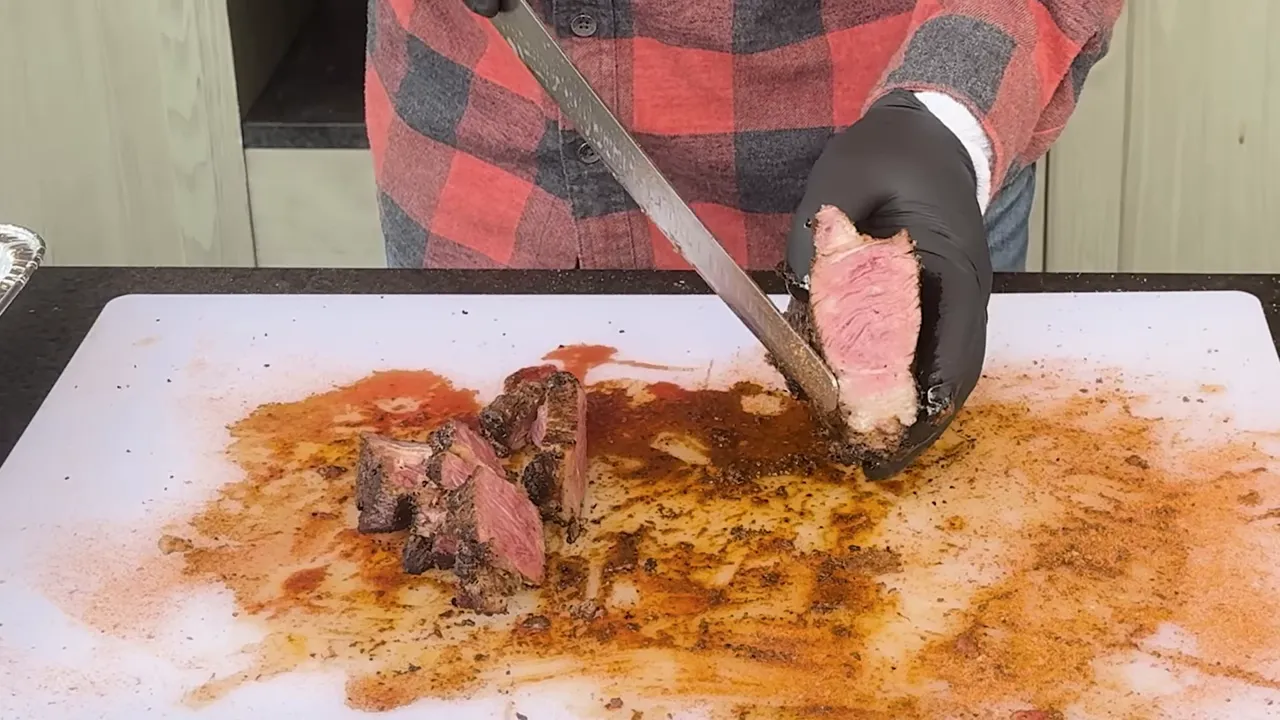
Transfer the chopped beef to foil pans, keeping the meat juices with it. Add the finishing sauce, starting around ¼ cup per pan, and toss thoroughly. You want the pepper sauce mixed with the beef and its juices, not sitting in one puddle on top.
That final toss gives us lime, garlic, smoky pepper, and a little extra richness in every serving. It’s why I prefer sauce over another dusting of dry rub for a large event.
The finished carne asada has the contrast I’m after: crusty bites, tender bites, rich ribeye, and just enough pepper kick to tie it together. It’s prime-rib-style beef turned into seriously good taco filling.
Give the dry brine time, leave room for carryover and searing, and don’t skip cutting the roast into thick steaks. Those are the details that turn a big piece of beef into carne asada worth getting excited about.
|


