My twist on party ribs starts with a cut that deserves a lot more attention: beef back ribs. Cook them over real wood coals, build a savory base, layer on a sweet barbecue glaze, and finish with cherry habanero heat. You get the rich flavor of ribeye in a sticky, smoky rib that is made for a summer gathering.
For this cook, I used my Lone Star Grillz Santa Maria and cooked the racks whole before slicing them into individual ribs. That is a little different from the individually cut party ribs that have become so popular, but the result is an absolute crowd-pleaser.
The secret is not just the beef or the live fire. It is giving each flavor its own job: savory first, sweet next, and a little kick at the end.
What You'll Learn
- Beef back ribs deliver ribeye flavor and hold their texture well when serving a group.
- Build flavor in stages with a savory rub, sweet barbecue mop, and spicy finishing glaze.
- Wrap around 175°F with ghee and glaze, then cook until the ribs are probe tender.
- Raise the grate before finishing to help prevent sugary glazes from burning over direct heat.
Table of Contents
- Why I Choose Beef Back Ribs for a Party
- Set Up the Santa Maria for Real Wood Coals
- Build Three Separate Flavor Layers
- Make the Bar-A-BBQ-Inspired Rib Glaze
- Cook, Mop, and Let the Glaze Set
- Wrap with Ghee and Glaze Until Probe Tender
- Raise the Grate Before Adding the Cherry Habanero Finish
- Slice into Party Ribs and Serve
Why I Choose Beef Back Ribs for a Party
Can you make party ribs with baby backs or St. Louis ribs? Absolutely. Both work well. But once you try the beef back rib version, you might have a hard time going back.
Beef back ribs bring that familiar prime rib and ribeye flavor, along with plenty of rendered juices. I have also found that they hold their texture, flavor, and juiciness a little better than pork ribs when serving a group. That matters when everyone is busy having a good time rather than lining up the second the ribs leave the grill.
That is a serving-quality observation, not a reason to leave cooked meat out indefinitely. For a longer gathering, follow USDA guidance for serving food safely at a buffet.
There can be a value advantage, too. Beef back ribs are what remain after the ribeye is removed, and your butcher or Costco may have an excellent deal on them. Look for racks with a generous amount of meat left on the bones. The thicker racks I found at my local Costco made this cook especially worthwhile.
Set Up the Santa Maria for Real Wood Coals
A Santa Maria grill gives you a straightforward way to manage direct heat: raise or lower the cooking grate above the coal bed. For these ribs, I cooked over wood coals rather than treating the grill like a conventional enclosed smoker.
Things move quickly over live fire, so have your rub, glaze, foil, and tools ready. The grate height becomes especially important once you start adding sugar.
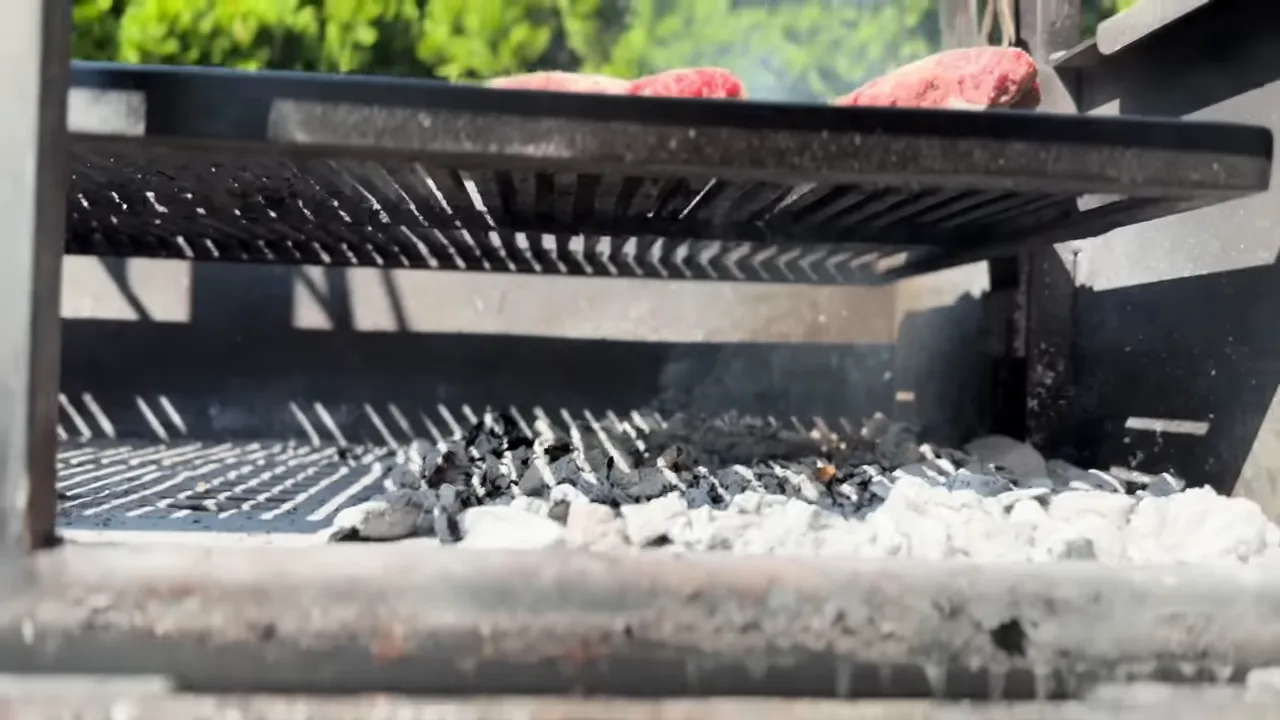
My one-year grill lesson: consider stainless steel grates
A year into using the Lone Star Santa Maria, I still love the flavor it produces. My one regret is not choosing stainless steel grates.
Before this cook, my carbon steel grates needed some attention. I added a little charcoal, scraped away the rust, and reseasoned them. It is not a deal-breaker, but in my experience that maintenance can add roughly an hour before a cook.
Once the ribs are cooking, all is forgiven. The live-fire flavor is fantastic. Still, if I were ordering again, stainless steel grates would be on my list.
Build Three Separate Flavor Layers
Rather than asking one heavily sweetened rub to do everything, I split the seasoning into three stages:
- Savory: Freshly cracked black pepper, kosher salt, onion powder, and garlic powder.
- Sweet: A ketchup-based barbecue rib glaze used as a mop during cooking and again in the wrap.
- Heat: A finishing coat of Texas Pepper Co. cherry habanero Rib Candy.
That order lets the beef remain the center of the bite. The seasoning supports it, the barbecue glaze adds sweetness, and the habanero shows up as a little kick at the finish.
Season both sides of the racks
I started with freshly cracked black pepper, using a couple of tablespoons across the top and bottom of the ribs. Then I added Diamond Crystal kosher salt, onion powder, and garlic powder.
There is no need to add sugar to this dry-rub layer. Plenty of sweetness is coming later, and keeping the base savory gives those later coats something to balance against.
Make the Bar-A-BBQ-Inspired Rib Glaze
This glaze is my adaptation of an earlier recipe Cooper from Bar-A-BBQ shared with Al from Beyond the Food TV. One change I especially like is using maple syrup instead of honey. It tastes excellent here and mixes a little more easily.
Cooper has continued refining the recipe, including after Bar-A-BBQ became a Texas Monthly Top 50 barbecue joint. I bought his updated version, but I am not sharing that paid recipe. The version below is based on the earlier publicly shared recipe, with my modifications. It is close, but it is not identical.
Glaze ingredients
This scaled-down batch makes just over a liter, enough to use throughout the cook.
- 1 1/4 cups ketchup
- 1/3 cup brown sugar
- 1/3 cup white sugar
- 2/3 cup maple syrup or honey
- 1/3 cup apple cider vinegar
- 1/3 cup white vinegar
- 1/3 cup water
- 1/3 cup Worcestershire sauce
- 2 teaspoons freshly cracked black pepper
- 2 teaspoons cumin
- 2 teaspoons onion powder
- 2 teaspoons garlic powder
Combine everything and blend until thoroughly mixed. The finished glaze should be loose enough to brush or mop over the ribs rather than sitting on the surface in a thick layer.
The sugars and maple syrup provide sweetness, the vinegars bring acidity, and the Worcestershire sauce and spices keep it from becoming just a sugary coating. This is the sweet layer, but it still has plenty going on.
If you want Cooper's current recipe rather than my adaptation, his updated rib glaze recipe is available to purchase. It is also a nice way to support the work he and his team are doing.
|
Cook, Mop, and Let the Glaze Set
Start the seasoned racks over the wood coals. Once the initial cooking is underway, begin brushing on the barbecue glaze.
When I started mopping, the ribs were already beyond what I would call medium-well if we were talking about a steak. But these are ribs, and we still have more cooking to do before they become tender.
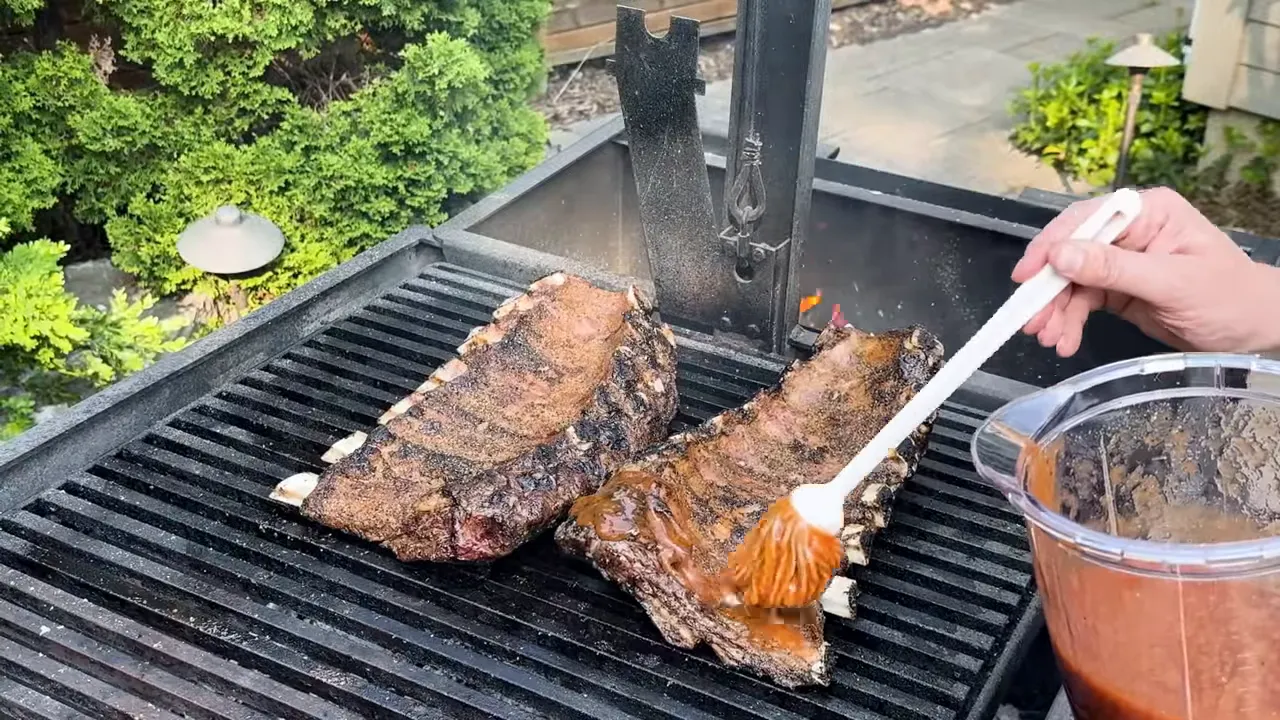
Brush one side, let the glaze tack up for a few minutes, then flip and repeat on the other side. By “tack up,” I mean allowing the wet coating to set and become sticky before turning it over.
Continue flipping and basting to build that sweet layer over the savory rub. In this cook, that stage continued for roughly another hour and a half before I checked for the wrapping point.
My instant-read thermometer showed approximately 174 to 175°F. The ribs had developed their live-fire exterior and several coats of glaze, but they were not yet probe tender. That was my cue to wrap.
Wrap with Ghee and Glaze Until Probe Tender
The foil stage helps move the cook along and gets the ribs to the tenderness we want.
- Remove the racks from the grill and place them on aluminum foil.
- Add melted ghee, also called clarified butter, along with more barbecue glaze.
- Wrap the racks tightly.
- Return the wrapped ribs to the Santa Maria, meat side down.
- Refresh the coal bed as needed and lower the grate to increase the heat.
- Check until the meat probes with very little resistance, around 200°F.
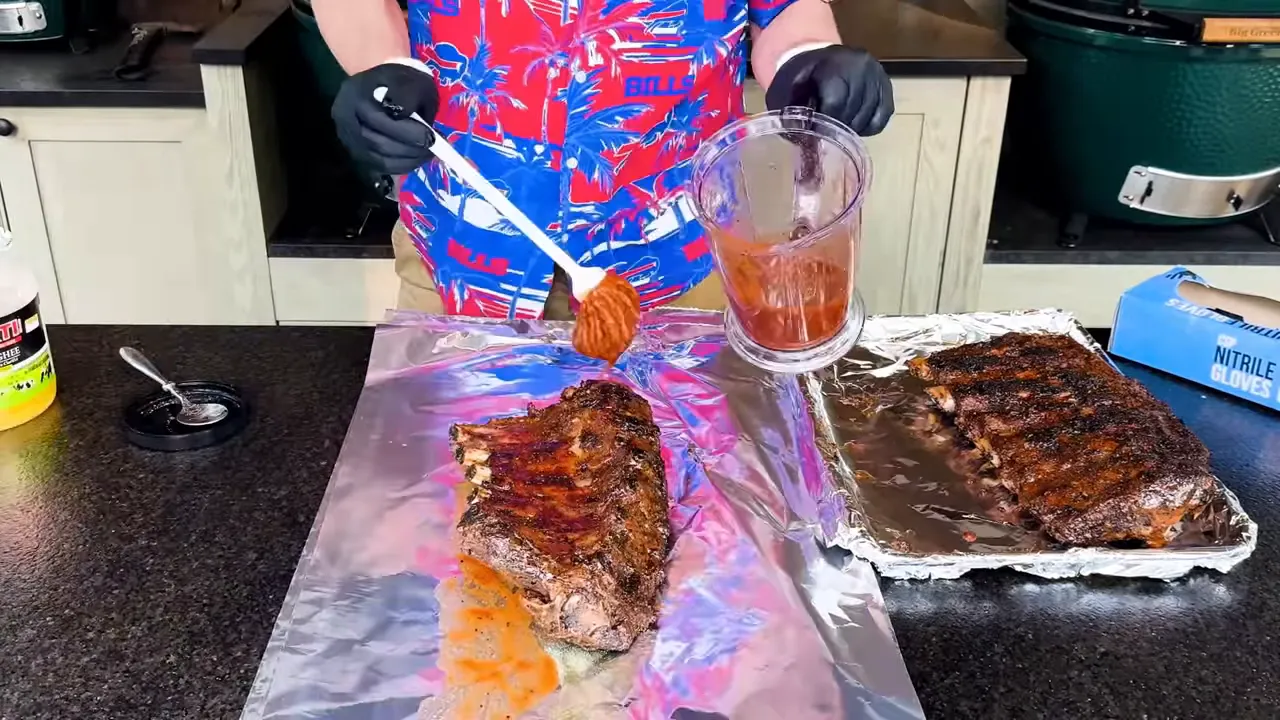
I initially expected the wrapped stage to take up to about another hour. In practice, these racks needed just over an hour and a half in the foil. They finished a little above 200°F and probed like butter.
That difference is worth remembering when planning your cook. The first estimate is not a deadline. Temperature tells you when to start checking closely, but probe tenderness is what tells you the ribs are ready.
Raise the Grate Before Adding the Cherry Habanero Finish
Once the ribs are tender, unwrap them and return them to the grill at a higher position. Now it is time for the final layer: Texas Pepper Co. cherry habanero Rib Candy.
This is a high-sugar finishing glaze, so I want more distance between the ribs and the coals. Apply the glaze and give it enough time to tack up into a glossy coating.
The cherry adds another sweet note, while the habanero gives the bite a little heat at the end. It is the finishing touch that brings the savory and sweet layers together.
The mistake to avoid: too low for too long
I did get a few burned and heavily charred spots on this batch, with two ribs particularly affected. My takeaway was simple: I had let them sit too low over the heat for too long.
Live-fire flavor is wonderful. Burned sugar is not the goal. Pay close attention once the sweet coatings are on, and use that adjustable grate before the surface gets away from you.
Slice into Party Ribs and Serve
After the finishing glaze sets, transfer the racks to a cutting board and slice between the bones into individual ribs. Cooking the racks whole and portioning them at the end gives you that easy-to-grab party rib presentation.
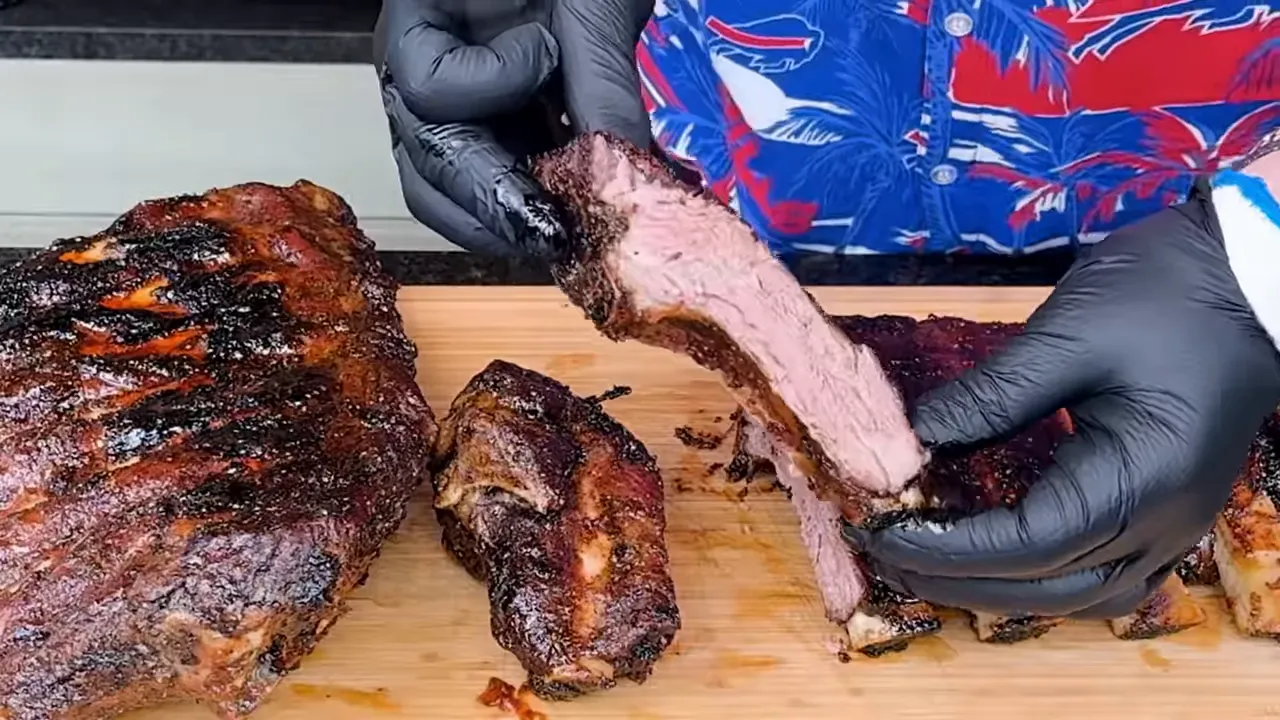
The finished bite delivered exactly what I was after: juicy beef with that unmistakable ribeye flavor, a savory foundation, sweetness from the barbecue glaze, and a cherry habanero kick right at the end.
Apart from the spots where I pushed the heat too far, the wood-coal flavor really came through. That is what makes this version special. It does not taste like beef hidden under sauce. It tastes like rich, live-fire beef with layers built around it.
Baby backs and St. Louis ribs absolutely have a place at the party. But if you find a good deal on thick, meaty beef back ribs, give them a turn over the coals. This overlooked cut can make an amazing summer treat.
Don't be afraid to fire it up.


