Pork belly deserves a little more love at the butcher counter. It is versatile, packed with flavor, and, where I shop, often close to half the price of brisket. You can smoke it like a brisket, turn it into burnt ends, build a fantastic Cubano, cook it until it pulls apart, or cure it into homemade bacon.
But this smoked pork belly banh mi might be my favorite argument for bringing a slab home.
We are talking juicy, gently smoked pork belly, crunchy bread with a warm, soft center, quick-pickled carrots and red onions, cucumber, cilantro, and a ridiculously easy coconut-hoisin sauce. Boy oh boy, does it come together.
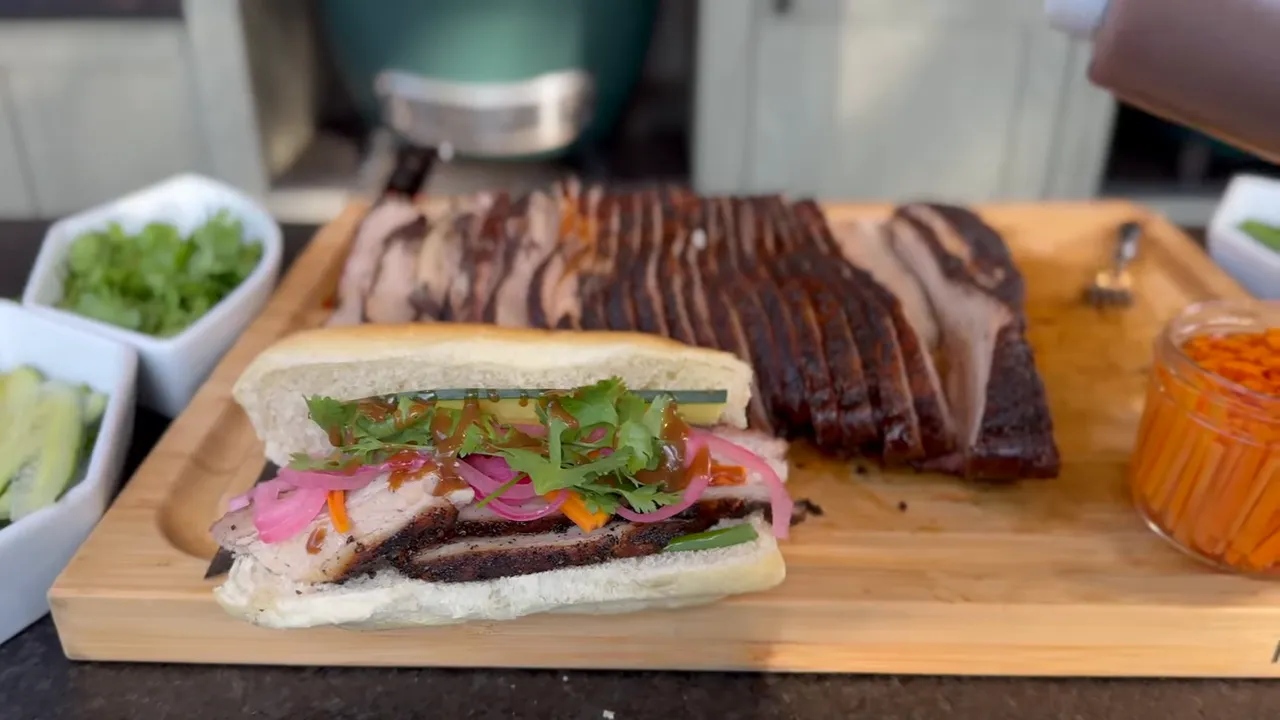
Best of all, this is an afternoon barbecue project rather than an overnight commitment. My Big Green Egg went from lighting the fire to resting the pork in about four hours. The vegetables and sauce came together while the meat smoked, leaving only the bread and sandwich assembly for serving time.
What You'll Learn
- Smoke pork belly at 280°F to 300°F for an afternoon barbecue cook.
- Use an elevated grate and double indirect setup to protect the pork from intense bottom heat.
- Make quick-pickled vegetables and a three-ingredient coconut-hoisin sauce while the pork smokes.
- Finish around 190°F to 195°F to preserve tender, sliceable pork for sandwiches.
Table of Contents
- The Game Plan: Big Barbecue Flavor in an Afternoon
- Step 1: Season the Pork Belly
- Step 2: Set Up the Big Green Egg for Clean Smoke
- Step 3: Make the Quick-Pickled Carrots and Red Onions
- Step 4: Keep the Smoke Going
- Step 5: Whisk Together the Coconut-Hoisin Banh Mi Sauce
- Step 6: Finish for Slicing, Then Rest
- Step 7: Toast the Bread and Build the Sandwiches
- Why This Pork Belly Banh Mi Works So Well
- A Note on the Big Horn Infrared Grill
The Game Plan: Big Barbecue Flavor in an Afternoon
There are two ways to approach this cook. If you decide on pork belly banh mi the same day, season the meat, get the grill going, and make your pickles while it smokes. If you have a little extra time, dry-brine the pork overnight and prepare the vegetables ahead.
I prefer the overnight dry brine because it gives the salt time to penetrate a thicker cut. It is a helpful head start, not a reason to abandon dinner if you did not plan yesterday.
- Optional advance preparation: Season and refrigerate the pork belly overnight.
- Grill temperature: Target 280°F to 300°F for this hotter, faster smoke.
- My cooking timeline: About four hours from starting the fire to taking the pork off.
- Pickling time: About 60 to 90 minutes, done while the pork cooks.
- Pork finishing temperature: About 190°F to 195°F for tender slices that still hold together.
- Resting: Allow time before slicing. I held mine for a little over two hours while waiting for friends.
The important distinction is that four hours was my fire-to-rest time, not the entire time to serving after a long hold. Use the afternoon efficiently, but let the meat's temperature and texture guide the finish.
Step 1: Season the Pork Belly
For this cook, I used approximately half of the pork belly I purchased, roughly $20 worth. The seasoning is simple: kosher salt, freshly cracked black pepper, and five-spice powder.
The rub blend I used was:
- 3 tablespoons kosher salt
- 3 tablespoons freshly cracked black pepper
- 2 tablespoons five-spice powder
Treat those quantities as a blend to apply appropriately to your piece of pork, rather than a fixed dose for every slab. The exact weight of the portion matters, and pork bellies are not all the same size.
Freshly cracked pepper brings plenty of flavor, while the five-spice gives the pork another layer that fits beautifully with the pickled vegetables and sauce.
Season the pork and refrigerate it overnight if time allows. Otherwise, season it before preparing the grill and keep moving. This sandwich still fits a same-day plan.
Step 2: Set Up the Big Green Egg for Clean Smoke
My setup has three priorities: get the ceramic dome hot, move the pork higher above the fire, and protect its underside without choking the fire down to a smolder.
Start with a clean firebox and a well-lit fire
- Remove the loose ash and charcoal debris that have fallen beneath the charcoal basket.
- Place four chunks of smoking wood underneath the charcoal.
- Add enough fresh lump charcoal for the cook.
- Light the center thoroughly. With my grill torch, I spend about a minute establishing hot coals with white ash forming on their surfaces.
- Install the rack and begin heating the ceramic dome.
During warm-up, I arrange the half-moon deflectors in an offset, pizza-slice-style configuration that allows heat to rise into the dome. The goal is to heat the cooker itself, not just get the air temperature to a number.
Cook higher in the dome
I place the pork belly on the upper level of an expander rack. If you do not have that exact accessory, the principle is still useful: get the cooking surface higher where your equipment allows.
A year-long computational fluid dynamics study I worked on with a university helped explain why I like this position. Smoke circulates through the upper part of the dome, giving food placed there more opportunities for smoke contact. A preheated dome also contributes radiant heat.
And there is a straightforward benefit: the pork is farther from the fire. We want a beautiful bark, not a burnt bottom.
Use double indirect heat
For this Big Green Egg setup, I place the convEGGtor upside down above the half-moon heat-deflector stones, leaving approximately a one-inch air gap between the layers.
Double indirect means two heat barriers separated by an air gap. It lets me burn a hotter, cleaner fire while reducing the intensity of the heat directly beneath the food.
In my testing, the second layer has reduced the surface temperature of the deflector immediately below the food by well over 200°F compared with the single-layer setup. That is why this approach has become such a regular part of my kamado cooking.
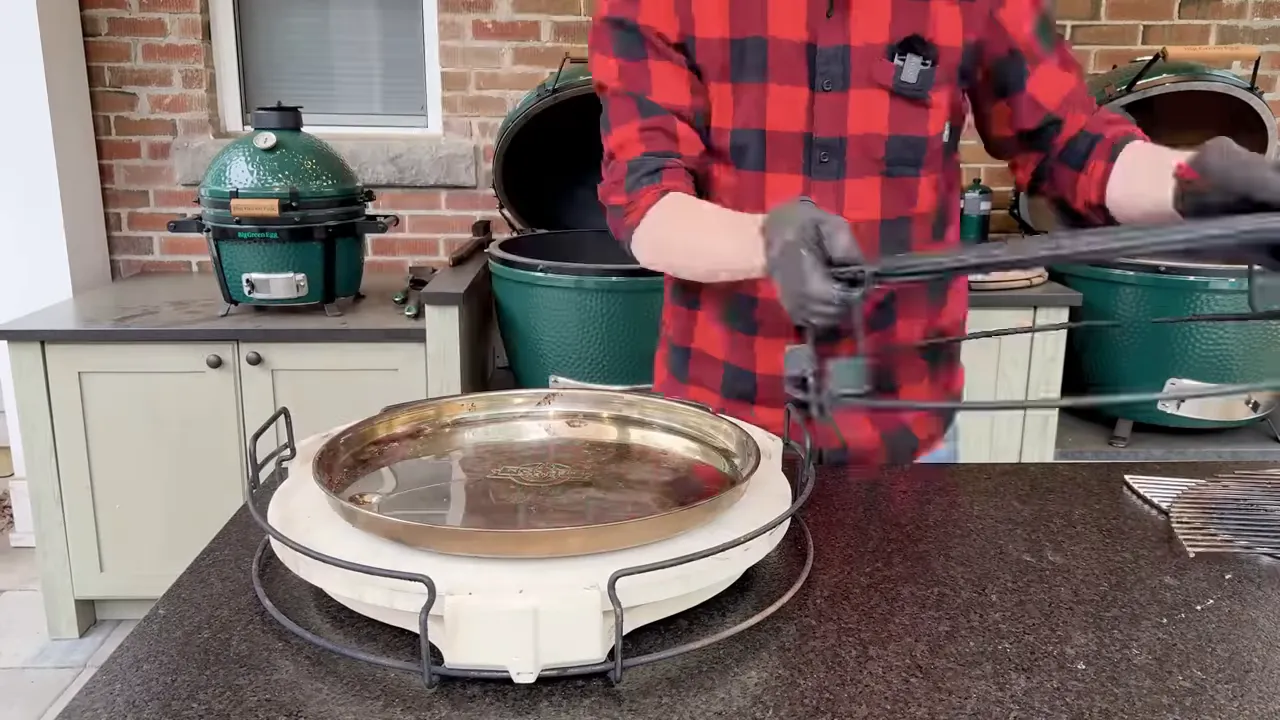
Once the dome is heated and the final setup is installed, stabilize the grill between 280°F and 300°F, then add the pork belly to the upper grate. That temperature keeps dinner moving and supports the supplemental smoking wood we will add later.
|
Step 3: Make the Quick-Pickled Carrots and Red Onions
Once the pork is smoking, get straight to the vegetables. This quick pickle is perfect when you are in a pickle. Yes, the dad joke comes with the recipe.
I use separate small jars for carrots and red onions. The brine also works with radishes if you want to change things up.
Prepare the vegetables
- Carrots: Trim the ends, cut into manageable lengths, square up the sides as needed, and slice into thin matchsticks. Make them short enough to stand inside your jar.
- Red onion: Thinly slice approximately half an onion, or enough to fill your small jar, and separate the rings.
Pack the carrots and onions into separate jars, ready for the hot brine.
Quick-pickling brine ingredients
- 3/4 cup water
- 3/4 cup rice vinegar
- 3/4 cup white vinegar
- 1 tablespoon Diamond Crystal kosher salt
- 5 tablespoons sugar
- 1 teaspoon fish sauce
White vinegar gives this brine the punch I want against rich pork belly. White wine vinegar is an option if that is what you have, although I find it a little sweeter and less sharp.
- Combine the water, both vinegars, salt, sugar, and fish sauce in a saucepan.
- Heat gently, stirring until the salt and sugar dissolve.
- Bring the mixture to a gentle rolling boil, then turn off the heat.
- Transfer to a heatproof pouring jug if that makes filling the jars easier.
- Pour over the vegetables to cover them.
- Allow approximately 60 to 90 minutes for the vegetables to pickle and cool, then refrigerate.
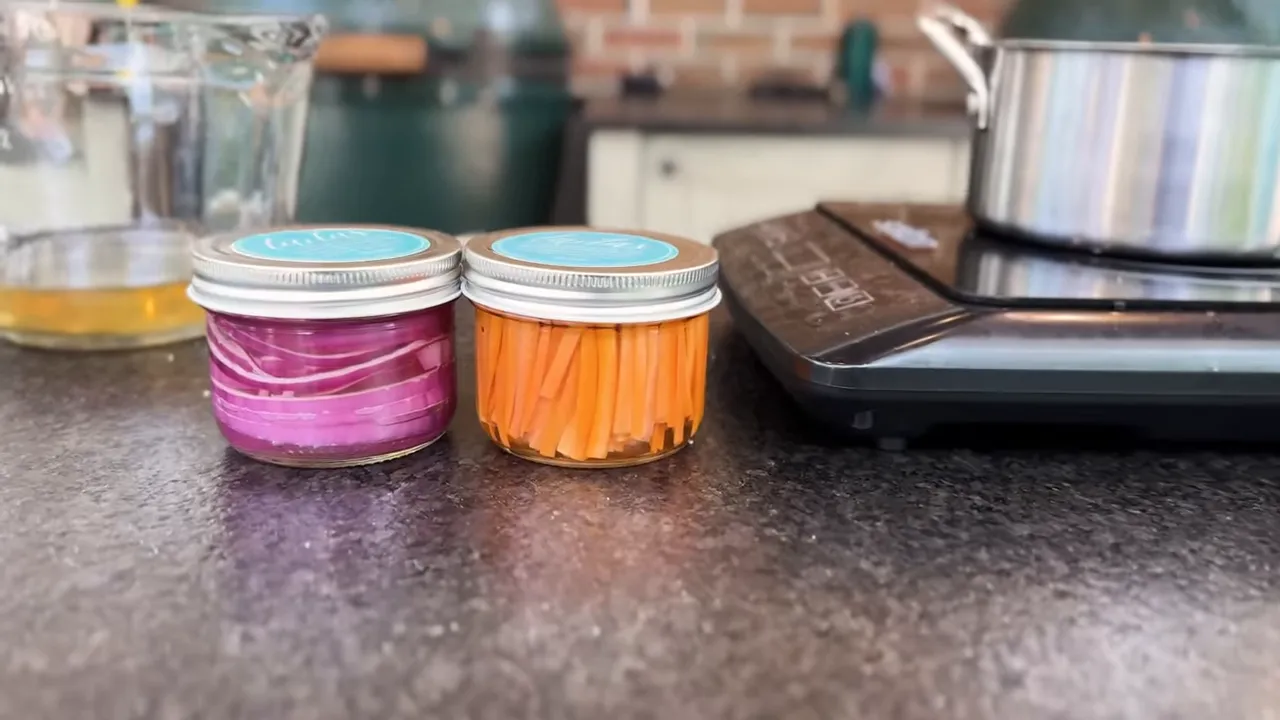
These are ready for the sandwiches later the same afternoon. I make them as refrigerator pickles, not shelf-stable preserves. Keep them refrigerated after cooling; simply closing the lids does not make them canned. The National Center for Home Food Preservation's pickling guidance is a useful reference if you want to explore longer-term preservation.
Step 4: Keep the Smoke Going
At about the two-hour mark, I check the smoking wood situation. In this cook, the four chunks underneath the charcoal, plus an additional chunk added during warm-up, had largely done their work.
To continue adding smoke without dismantling the cooking setup, I split a wood chunk into smaller pieces and feed them through the lower ash opening.
For a relatively short cook like pork belly or ribs, I want pieces approximately the size of my thumb. They fit through the opening and can combust during the remaining cooking time. A larger piece makes more sense on a long brisket cook than it does when dinner is only a couple of hours away.
From that point, I add one or two small pieces roughly every 30 minutes as needed. The goal is clean-burning supplemental smoke, not a pile of wood that sits there smoldering.
Step 5: Whisk Together the Coconut-Hoisin Banh Mi Sauce
This sauce deserves its credit: it comes from RecipeTin Eats. I have had great success adapting recipes from there for barbecue, but this sauce did not need changing.
Single-batch ingredients
- 3 tablespoons full-fat coconut milk
- 4 tablespoons hoisin sauce
- 1/2 teaspoon dark soy sauce
Whisk everything together until smooth. That is it. A little whisk-y business, and the sauce is ready.
If the coconut milk has separated while cold, gently warm the container in warm water and combine the contents before measuring.
I made a double batch using 6 tablespoons coconut milk, 8 tablespoons hoisin, and 1 teaspoon dark soy sauce. Dark soy is mainly there for color; light or regular soy sauce can be substituted.
Step 6: Finish for Slicing, Then Rest
This is one of the biggest differences between pork belly for sandwiches and pork belly cooked to shred.
I take this pork belly off at approximately 190°F to 195°F internally. It is tender, but still has enough structure to cut into slices and stay inside the bread.
Taking it all the way to the completely yielding, probe-tender texture I might seek for pulled pork, often around 203°F, would be too far for the result I want here. That number is not a universal rule for every pork belly. The objective is tender slices, not meat that collapses as you cut it.
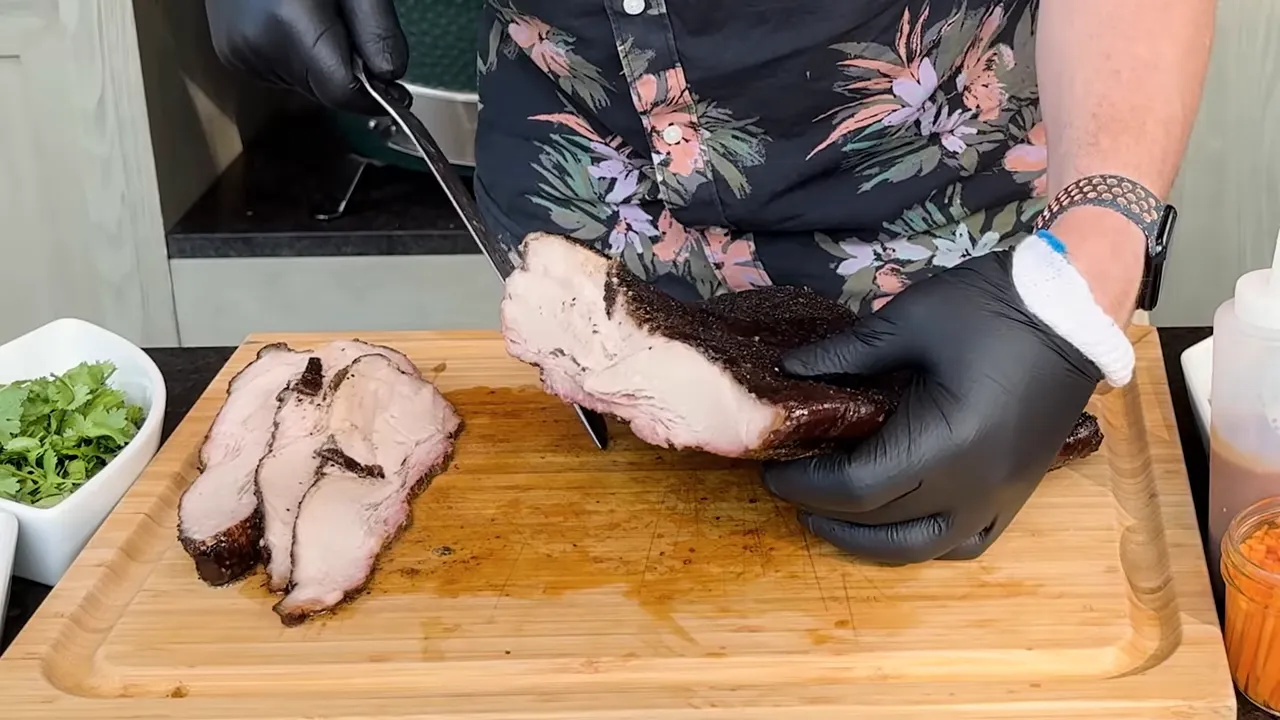
Once the pork came off, I wrapped it in foil and held it in a resting blanket inside a prep tub. I had purchased the Drip EZ prep tub and blanket for competition cooking, tailgating, and transporting food to friends, so this was a useful test of that setup.
After a little over two hours of holding, an instant-read check showed the pork just below 160°F. It was still comfortably above my 140°F hot-holding threshold.
Do not assume an insulated blanket guarantees a safe hold. Check the meat with a thermometer, especially if serving is delayed. The USDA's food-temperature guidance explains why keeping hot food at 140°F or above matters.
Step 7: Toast the Bread and Build the Sandwiches
While getting ready to serve, I reopen the grill vent and use the remaining charcoal heat to warm the buns. My Big Green Egg came up to approximately 370°F.
What I want is a little crunch on the outside while the middle stays soft and warm. The bread should add texture, not turn the sandwich into a jaw workout.
- Warm the buns until lightly crisp outside, then split them open.
- Add a couple of green shallot or scallion shoots.
- Layer in slices of smoked pork belly.
- Add the quick-pickled carrots and red onions.
- Tuck in cucumber and cilantro.
- Drizzle generously with the coconut-hoisin banh mi sauce.
Do not forget that last step. I nearly did in my excitement, and the sauce really brings everything together.
Why This Pork Belly Banh Mi Works So Well
The first bite starts with the bread: crisp outside, warm and soft inside. Then the carrots bring crunch, the onions deliver that little vinegar punch, and it all gives way to rich, juicy pork belly.
The smoke is gentle rather than overpowering. Four hours gave this pork plenty of barbecue character without burying the fresh ingredients. Then the coconut-hoisin sauce ties that richness, acidity, and freshness together.
That balance is what makes this more than a pile of smoked meat on bread. Every ingredient has a job, and none of them needs to be complicated.
Sorry, brisket. There is absolutely room for both, but for a fast, flavorful afternoon cook that impresses family and friends, pork belly makes a very convincing case. Don't be afraid to fire it up.
A Note on the Big Horn Infrared Grill
Big Horn sponsored this cook with its portable infrared steak grill. It is a separate tool from the Big Green Egg used for the pork belly, so it is not required for this recipe.
The salamander-style grill applies intense heat from above for steakhouse-style browning. The unit is promoted as reaching up to 1,500°F in three to five minutes, with adjustable rack positions, an included pizza stone, and removable stainless-steel components for cleanup. That makes it an interesting companion for a cooker that smokes beautifully but struggles with a hard finishing sear.


