A brisket with proper bark, a beautiful smoke ring, rendered fat, and only six hours of tending a smoker sounds pretty good to me. Less wood, less charcoal, and no all-day commitment to managing a fire. But brisket has a way of reminding us why the rules exist.
I wanted to find out whether I could bend those rules without ending up with dry beef and white, unrendered fat running through the middle. So I put a full packer brisket on my Big Green Egg and gave myself three tests:
- The brisket test: Develop convincing bark, a smoke ring, and, most importantly, properly rendered fat.
- The fuel test: Reduce the wood and charcoal needed compared with my usual long cook.
- The taste test: Make something I would actually want to serve.
There is one important catch right up front: this is a six-hour smoker method, not a brisket ready to eat six hours after lighting the fire. The brisket finishes cooking in the oven, then gets an overnight hot hold. That distinction is the whole reason this approach has a chance.
Key Takeaways
- The six-hour method shortens smoker time but still requires oven finishing and an overnight hot hold.
- Overnight dry brining and careful heat protection helped preserve juiciness and achieve tender slices.
- Choose a wrap based on where the brisket needs protection and how much bark development remains.
- The finished brisket looked excellent, but smoke flavor was lighter than a full smoker cook.
Table of Contents
- Which Brisket Rules Can You Bend?
- Prepare the Brisket the Night Before
- Set Up the Big Green Egg for Smoke and Heat Protection
- Manage the Six-Hour Smoke Stage
- The Four-Hour Problem: Extra Charcoal, Too Much Dome Heat
- Choose the Wrap That Solves Your Actual Problem
- Finish in the Oven Before Starting the Overnight Hold
- The Results: Bark, Smoke Ring, Fat, and Tenderness
- Did It Save Fuel, and Did It Taste Like Brisket?
- My Verdict on the Six-Hour Kamado Brisket
Which Brisket Rules Can You Bend?
Time: Shorten the smoker stage, not the entire process
One of my favorite brisket guidelines is to give the rest as much attention as the cook. A two- to four-hour cooler rest can work in a pinch, but the long hot holds used by many top Texas barbecue restaurants are a big part of the result I am trying to reproduce at home.
For this experiment, I was not willing to sacrifice that extended hold. Taking a brisket off the smoker early and slicing it shortly afterward is a very different proposition from finishing it properly and holding it overnight.
The plan was to build smoke flavor and bark outdoors, then let the oven supply the remaining heat. That reduces the fire-management commitment without pretending the meat no longer needs time.
Smoke: Keep the real thing, even with a shorter window
I wanted natural wood smoke, not liquid smoke or a curing-salt shortcut to a pink ring. A smoke ring is attractive, but it is not something we taste. A beautiful pink border cannot make up for missing smoke flavor.
With only six hours on the grill, I tried two things to encourage smoke-ring development:
- A light coating of celery seed alongside my usual salt and pepper.
- A cold start for the meat rather than letting the brisket warm up on the counter.
In my below-freezing weather, the brisket could actually get colder outside than it was in the refrigerator. A brief freezer chill, about an hour before smoking, is another approach I discussed for warmer climates. The objective is to start cold, not to warm the meat before it hits the smoke.
These were two changes made together, so this cook cannot tell us which one contributed most to the finished ring. It can tell us whether the combination produced a noticeable result.
Salt: Do not skip the overnight dry brine
Here is the rule I am least interested in breaking: salt the brisket the night before.
Salt enhances the beef flavor and helps the meat retain moisture during cooking. Although it initially draws some moisture to the surface, that is not the same as making the finished brisket drier.
The best part is that this does not require another expensive accessory or specialty ingredient. You are already trimming and seasoning the brisket. Move that work to the evening before and give the salt time to do its job.
This brisket cost me $125. At that price, taking a little extra care with preparation feels like a pretty easy decision.
Fuel is flavor: Savings come with a trade-off
Across my pellet grills, offsets, and kamados, I have repeatedly preferred the flavor from cooks that burn more fuel cleanly. On a pellet grill, for example, an insulating winter blanket can improve efficiency, but in my side-by-side tests I preferred the food from the less efficient setup.
That is my concern with this whole experiment. If we reduce the amount of fuel burned and the time spent in the smoker, are we also reducing the flavor?
The goal was to make those six hours count, then find out honestly what the shortcut cost us.
Prepare the Brisket the Night Before
I trimmed the full packer to make the height of the flat and point more uniform. That means sacrificing some meat to the burger-grind pile, but it helps reduce the difference between a thin section that finishes quickly and a thick section that needs much longer.
For seasoning, I used:
- A 50/50 salt-and-pepper blend, using Diamond Crystal salt and freshly cracked coarse pepper.
- A light additional coating of celery seed for the smoke-ring experiment.
I did not measure a separate celery-seed quantity for a repeatable recipe, so think light coating, not a heavy second rub. Then the seasoned brisket went into the refrigerator overnight for the dry brine.
I also saved the fat trimmings. Those would go into the smoker with about a cup of water to render into smoked tallow for the wraps later.
Set Up the Big Green Egg for Smoke and Heat Protection
I chose the Big Green Egg partly because it was sheltered from the slush, rain, and snow. Just as importantly, it let me manipulate where the fire sat and where the brisket sat above it.
There are three types of heat to think about in a kamado:
- Conduction: Heat transferred through the surface supporting the food.
- Convection: Hot air moving around the brisket.
- Radiation: Energy coming from hot surfaces, including the ceramic dome and deflectors.
My work examining kamado airflow and heat distribution has made me a big believer in moving the cooking surface higher. An expander rack puts the brisket farther from the hot deflectors and changes its exposure to airflow and dome radiation.
That last part matters. Getting away from bottom heat does not mean the top cannot receive too much heat. This cook gave me a useful reminder of that.
Build the fire at the back and warm the next splits
- Clean out the ash. Clear the basket so airflow is not restricted by the previous cook.
- Move the remaining charcoal to the back. This establishes a rear fire zone.
- Place small wood splits toward the front. They warm there before being moved onto the coal bed.
- Light the charcoal and add two small splits. I used a torch to help establish a clean-burning fire.
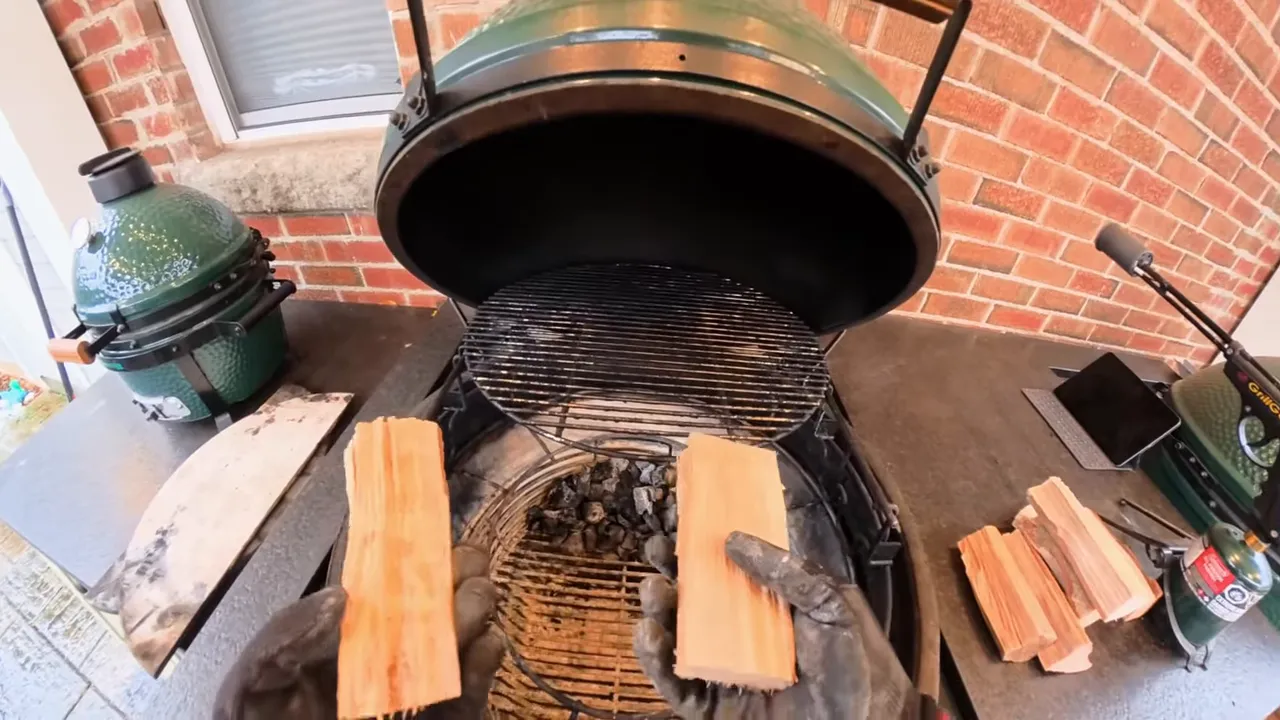
Prewarming the wood helps it catch quickly instead of spending a long time smoldering. I wanted a small live fire, not a firebox packed with more wood than it could burn cleanly.
Install deflectors without losing access to the fire
I positioned a half-moon deflector toward the back to shield the brisket from flames and direct heat and smoke forward and around the meat. With a smaller pork shoulder or beef ribs, one half-moon can sometimes provide enough coverage. A full packer brisket needs more protection, so I installed the second half as well.
The practical challenge is access. A ceramic kamado does not have an offset-style firebox door. To add splits, I needed to slide a deflector aside and return it afterward. Leaning a deflector can make access easier, but for this full brisket I chose full coverage.
My usual smoke-building approach can also include a second layer of heat protection, which I call double indirect, and supplemental wood. Pellets, chips, or suitably small splits can be useful within that setup. The principle is the same: protect the food while encouraging enough clean fuel combustion to create flavor.
These are the kinds of fire, vent, and setup details I cover in my digital guides for Big Green Egg, Kamado Joe, and Primo grills.
|
Track the flat, not just the point
I put the meat probe in the thickest part of the flat. The flat is leaner, thinner overall, and less forgiving than the point. I would rather make decisions around getting the flat right than celebrate a perfect point while the flat dries out.
The brisket went onto the elevated rack at about noon, with the six-hour smoker stage ending at 6 p.m.
Manage the Six-Hour Smoke Stage
I started with both vents fully open while the cold grill and fire got going. After the initial stage, I reduced the bottom vent to roughly a finger’s width and left the top vent fully open for the rest of the smoker cook.
Those settings describe this particular live-fire setup, not a universal vent prescription for every Big Green Egg. The important thing was maintaining enough airflow for the small wood fire to burn cleanly.
I added one or, at most, two small splits at roughly 30- to 40-minute intervals. Adding too much wood at once produced the kind of billowing white smoke I did not want. When in doubt, checking for a visibly burning flame helped confirm that the splits were combusting rather than simply smoldering.
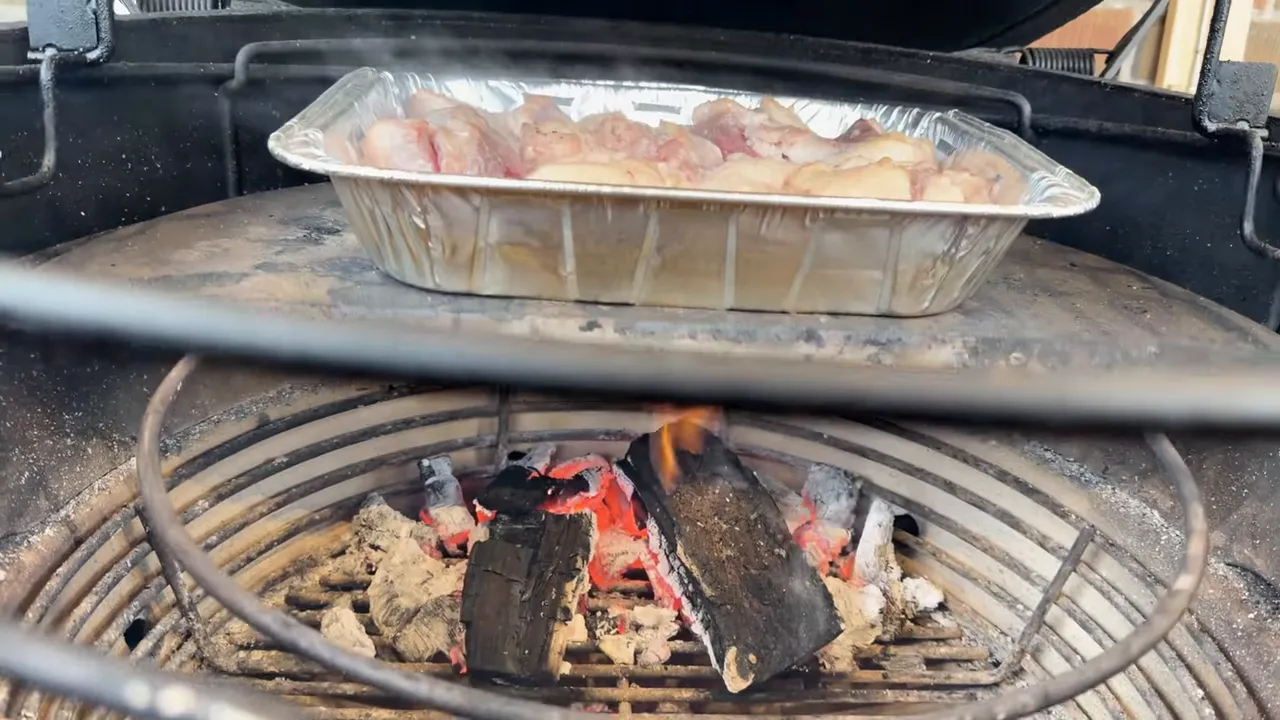
The fat trimmings and water went into a pan toward the back so I could collect smoked tallow. Once rendered, I strained that fat for use in the paper and foil wraps.
Can this work on another smoker?
The smoke-first, oven-finish idea is not limited to a kamado. The early smoke strategy changes with the cooker:
- Pellet grill: Choose a more flavorful pellet and start at a lower temperature to emphasize the initial smoke stage.
- Offset smoker: A tightly stacked bundle fire can be part of the start before cleaning up the fire and increasing the temperature.
- Charcoal kamado: Use small splits, maintain clean combustion, and protect the brisket from direct heat.
For this test, I was working toward six hours of smoke exposure rather than a particular internal temperature at the end of that stage. That did not mean the internal temperature was irrelevant. It told me how much cooking the oven would still need to do.
The Four-Hour Problem: Extra Charcoal, Too Much Dome Heat
Just over four hours in, I had burned eight miniature logs, and the coal bed was getting too small to ignite new splits immediately. I added a little charcoal to rebuild it.
That solved one problem and created another.
I underestimated how much heat those extra pieces would contribute. The cooker had been running around 250 to 260°F, then climbed to about 290°F.
A temperature graph does not need to be a perfectly flat line to make good brisket. Normal fluctuations happen in smokers and home ovens. What concerned me was not the number alone, but what the brisket was showing me.
The ends of the flat and point, plus an exposed area from trimming, were beginning to look dry and potentially scorched. The hotter dome was now radiating more energy back down onto the top of the brisket.
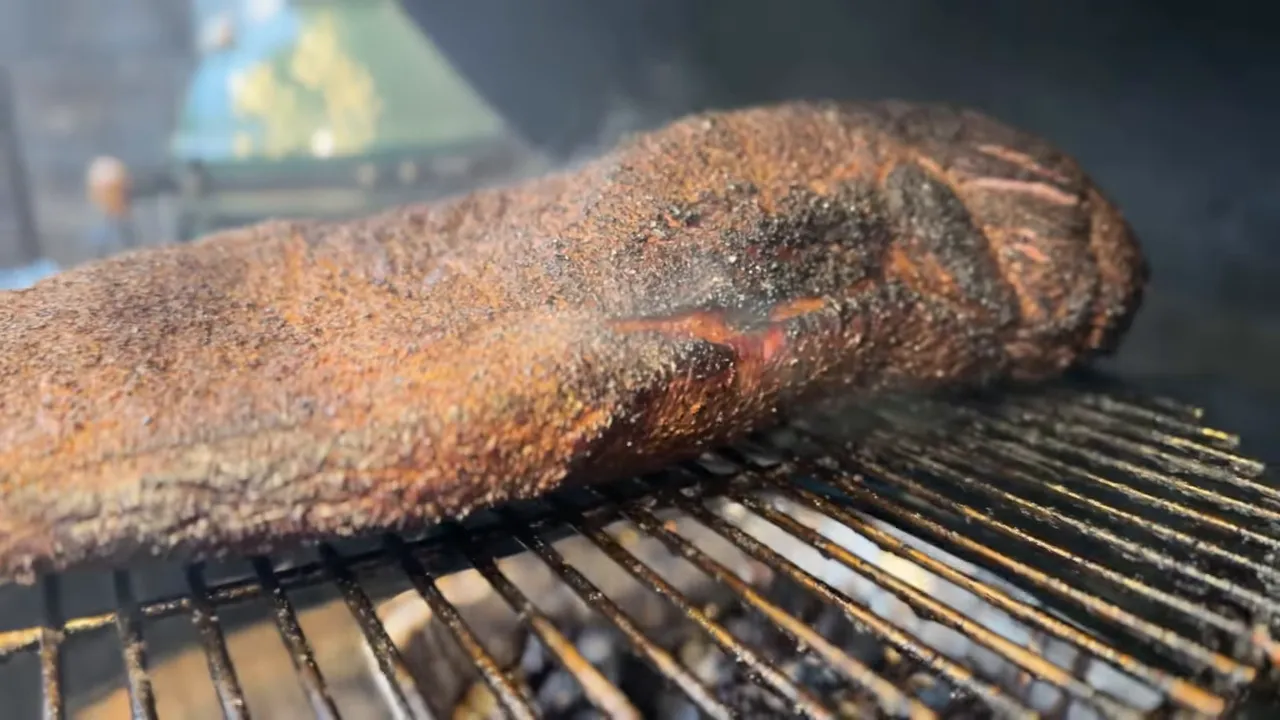
Meanwhile, the flat had entered the stall. Its internal temperature had reached just over 150°F, then slipped back into the mid-140s as evaporative cooling took hold. With less than two hours remaining in the smoker window, I wanted to protect the exterior and make more cooking progress before the oven stage.
Choose the Wrap That Solves Your Actual Problem
This is why I do not think the foil-boat-versus-paper debate has one permanent winner. Each tool solves a different problem.
- Small foil shields: Useful for protecting isolated areas, but they would not do much to help this brisket through the stall.
- A foil boat: Excellent for protecting the bottom while leaving the top exposed. Here, the elevated rack had already protected the underside, and the top was the area that needed help.
- A full foil wrap: Strong protection against further scorching and a way to soften hard spots, but it would also cut short the exterior bark development I still wanted.
- Butcher paper: A compromise that offered protection while remaining permeable enough to allow further exterior development.
I chose butcher paper with some strained smoked tallow. The goal was to soften the developing hard spots, reduce evaporative cooling, and preserve the opportunity for a little more bark development.
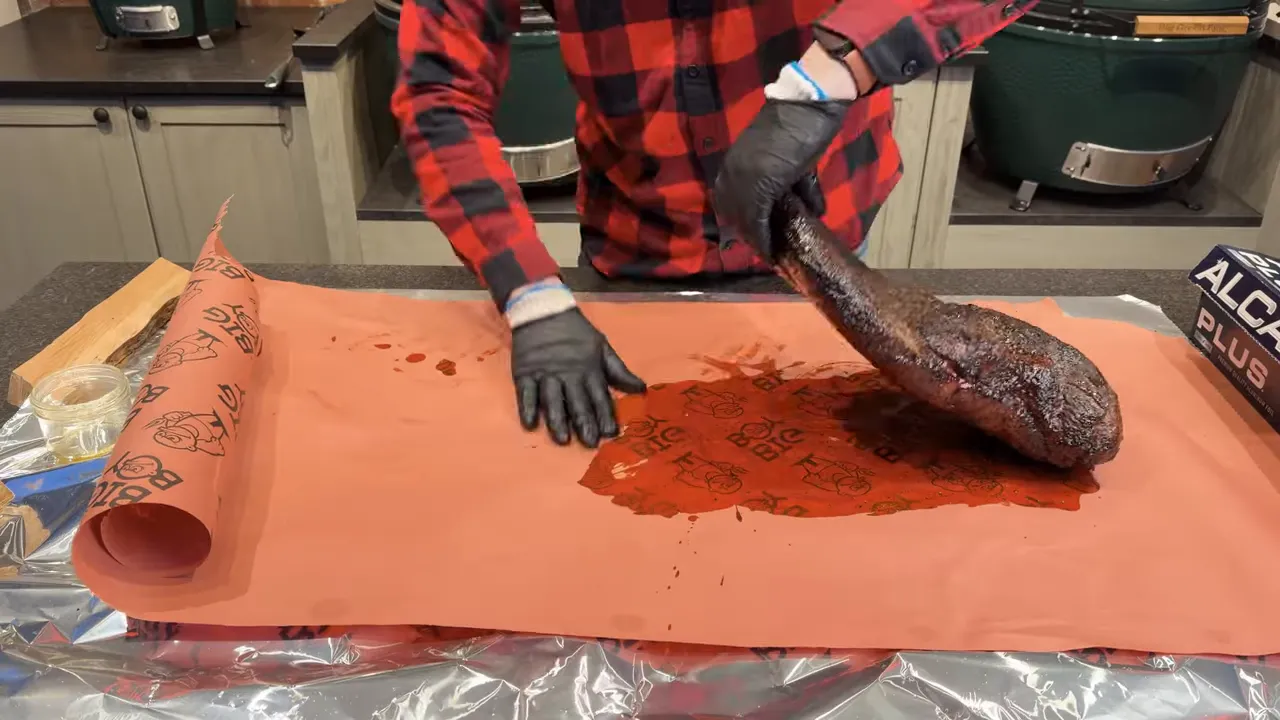
The lesson is not that paper always beats foil. It is that the wrap should match the cooker, the condition of the meat, and the outcome you need next.
Finish in the Oven Before Starting the Overnight Hold
This is the most important procedural detail of the entire method: the brisket was not finished cooking after six hours on the Big Green Egg.
At the end of the smoker stage, the internal temperature was around 165°F. Moving it straight into a 150°F holding oven would not finish the job I needed done.
The actual sequence was:
- Remove the brisket after six hours on the smoker.
- Replace the paper with a full foil wrap. Add a little more strained smoked tallow and seal the package to retain the juices.
- Continue cooking in a hotter oven. I let the internal temperature rise to about 195°F.
- Then reduce the oven to approximately 150°F for the overnight hold. Keep a probe in place and make sure the meat stays above 140°F.
My oven’s normal minimum setting is 170°F, but it allows a negative temperature adjustment that brings the actual holding temperature down toward 150°F. That is a feature of my oven, not something to assume yours can do.
Verify the actual temperature rather than trusting the setting. For additional safety context, USDA food-safety guidance recommends keeping hot food at 140°F or above.
The extended hold was an essential part of this result. We shortened the time managing wood and charcoal, not the total time the brisket spent receiving heat.
The Results: Bark, Smoke Ring, Fat, and Tenderness
The next day was even colder outside, so I moved the slicing indoors. I did not want rapidly cooling fat to confuse the assessment of how well the brisket had rendered.
Once unwrapped, the exterior looked far better than I expected from the shortened smoker stage. The bark had developed into something I would have been happy to see on a much longer cook.
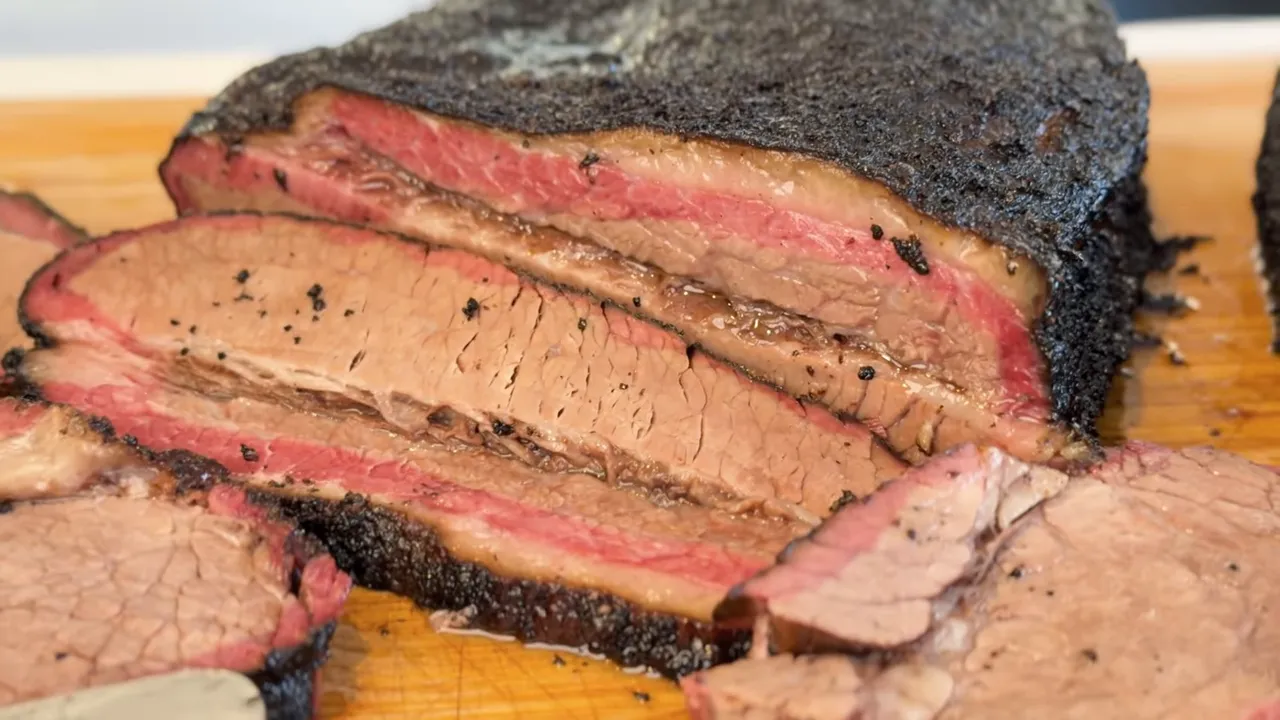
- Bark: Visually excellent, especially considering the limited smoker time.
- Smoke ring: Much more pronounced than I normally get without the celery seed and cold-start combination.
- Fat rendering: The seams looked well rendered rather than packed with concerning white fat.
- Juiciness: Plenty of visible juice without squeezing the meat.
- Tenderness: Slices bent easily and pulled apart as they should.
Both the flat and point gave me plenty to be happy about. On appearance and texture, there were very few clues that this brisket had spent only six hours on the smoker.
The smoke-ring experiment was particularly striking. I cannot separate the contribution of the celery seed from the colder starting temperature, but together they produced a bigger visual effect than I expected. Just remember: that ring is presentation, not a measurement of smoke flavor.
Did It Save Fuel, and Did It Taste Like Brisket?
I burned about 12 miniature half-splits over the six-hour smoker stage, plus charcoal, including the extra handful that caused the temperature increase.
That let me stop feeding the outdoor fire and move the remaining cooking and holding work indoors. It reduced the wood-and-charcoal commitment, but I did not calculate an exact dollar saving or account for oven energy. I would not put a precise savings figure on this cook.
Then came the taste test.
The brisket was good. Tenderness was not the catch. Fat rendering was not the catch. The catch was smoke intensity.
The outside had a lovely smoky aroma, but the overall eating experience was lighter than the full-flavored brisket I get when the meat stays on the smoker for the entire cooking stage. It leaned a little more toward pot roast than my usual brisket.
Not unsmoked pot roast. There was absolutely smoke present. It simply did not have the same depth I prefer.
That brought me right back to fuel is flavor. We used less fuel and shortened the exposure, and my taste buds noticed even though the brisket looked fantastic.
My Verdict on the Six-Hour Kamado Brisket
Would I call this a failure? Absolutely not. It produced juicy, tender brisket with impressive bark, a striking smoke ring, and properly rendered fat. For friends and family who prefer a lighter smoke profile, this could be exactly the right balance.
For my bolder smoke preference, it falls a little short of a full smoker cook. That is the trade-off, and it is worth being honest about it.
The method works because it preserves the steps that matter: overnight salting, thoughtful heat protection, enough cooking after the smoke stage, and an extended monitored hot hold. It does not work by magically removing the time brisket needs.
If your goal is six hours of tending a smoker rather than six hours from raw brisket to dinner, this is a shortcut worth considering. Pick the right tools, respond to what the meat is telling you, and do not be afraid to fire it up.


